PBX
Automatic Call Distributor (ACD). También llamado Distribuidor Automático de Llamadas. En el ámbito de Centros de llamadas es un recurso de telefonía que administra las llamadas telefónicas entrantes (Campañas Inbound) y las distribuye a los Agentes, basándose en reglas y algoritmos configurables por el usuario, tales como Balanceo de Carga.
El modulo de ACD se encuentra en el menú de PBX:

ACD le permitirá́:
- Agregar
- Eliminar
- Editar, modificar, las diferentes opciones de configuración.
Definiciones, Acrónimos y Abreviaciones
|

Agregar ACD
Para crear un ACD, sera necesario presionar el botón de Agregar y nos mostrara el siguiente menú:
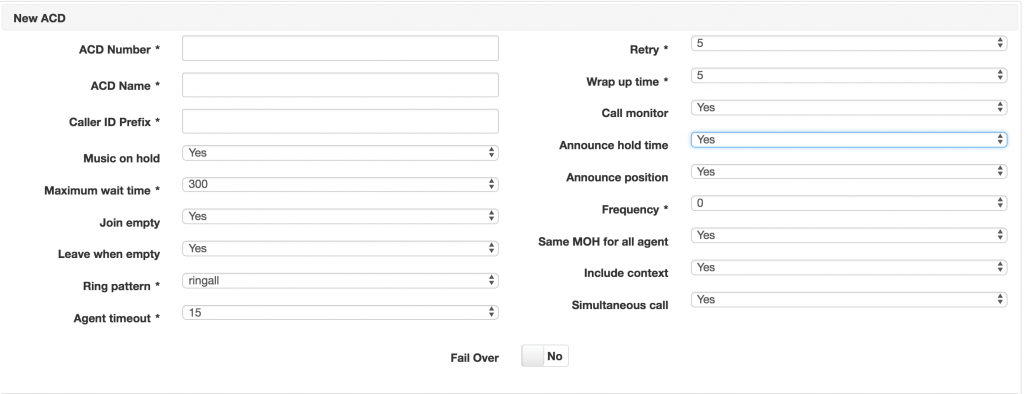
Donde, a continuación, se describen los siguientes campos:
ACD Number: Numero del ACD, permite máximo 9 dígitos.
ACD Name: Nombre del ACD
Caller ID Prefix: Prefijo que se mostrará en la pantalla de los agentes conectados al ACD al momento de recibir una llamada, (Mensaje que se agregará al Caller ID)
Music on hold: Activar/Desactivar música en espera.
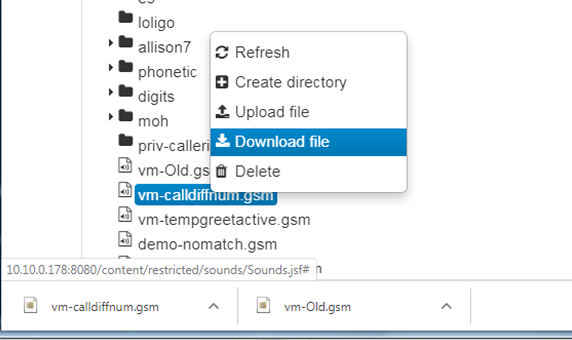
Para poder escuchar la música en espera, es necesario subir el archivo de audio deseado en la carpeta que se genera con el mismo numero del ACD
/var/lib/asterisk/sounds/moh/NUMERO_ACD/
Para subir el audio, ver el manual “sounds”
Máximum wait time: Tiempo máximo de espera de una llamada en el ACD, en caso de que este termine, la llamada procederá con el Fail Over en caso de que se configure.
Join empty: Permitir el acceso de una llamada al ACD si no hay agentes conectados, en caso de no permitir el acceso se procederá con el Fail Over o se terminara la llamada.
Leave when empty: Abandonar el ACD si los agentes se desconectaron en el transcurso de espera, en caso de abandono la llamada procederá con el Fail Over o se terminara.
Ring pattern: Seleccionar la estrategia en que se desbordara la llamada a los agentes.
- Ringall – desbordar la llamada a todos los agentes al mismo tiempo, el primero que la conteste.
- Leastrecent – desbordar llamada al agente con el menor número de llamadas.
- Fewestcalls – Desborda la llamada al agente con el menor numero de llamadas contestadas
- Random – Desborde de llamadas aleatorio.
- RRMemory – Desborda la llamada conforme al orden en que se conectaron.
- RRordered – X
- Linear – X
Agent timeout: Tiempo máximo de timbrado de una llamada al agente.
Retry: Tiempo de espera para timbrar al siguiente agente.
Wrap up time: Tiempo post llamada, tiempo de descanso para el agente después de una llamada.
Call monitor: Si/No, grabación de llamada a través del ACD.
Announce Hold Time: Anuncia el tiempo de espera para ser atendido.
Announce Position: Anuncia la posición en la que se encuentra la llamada en el ACD.
Frecuency: Se indica el tiempo o frecuencia que se indicara el Hold Time
Same MOH for all agent: Usar el mismo Music On Hold para todos los gentes.
Include context: YES-Permitirá salir del ACD cuando una llamada este en espera, se deberá crear un contexto en el dialplan y generar las opciones de salida o marcado hacia alguna extensión, el formato del contexto deberá ser: “context-NUMERO-ACD”, para mayor información de cómo crear context o generar opciones, vea el “Manual Dial Plan”
Sumultaneous call: Permite que los agentes puedan recibir mas de una llamada a través del ACD.
Los campos que están con el símbolo de “ * ”, son obligatorios, por default ARAWeb establece algunos parámetros los cuales deberá modificar de acuerdo a sus criterios
Para la creación del ACD, debemos llenar los datos que se han mencionado conforme a los requerimientos que se tengan.
Para cualquier ACD que se agrega, se recomienda activar el Fail Over, ya que este nos permitirá direccionar la llamada en casos como Maximum wait Time, Join Empty, etc. para poderle dar un tratamiento adecuado a la llamada, ya sea para terminarla o para desbordarla a una extensión, ACD, Ring Group, personalizar algún mensaje de despedida, etc.
El menú del Fail Over se mostrará una vez que seleccionemos la casilla en Yes
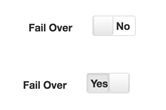
El ACD se puede agregar si lo desean sin activar el Fail Over, si se realiza de esta forma en caso de terminarse el Maximum wait time u otras opciones descritas con anterioridad, la llamada terminara sin aviso.
En el Fail Over podemos seleccionar 6 opciones para poder desbordar la llamada.
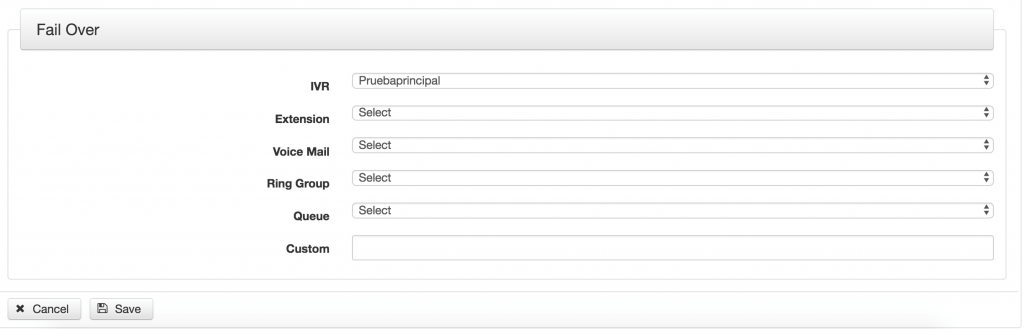
IVR: La llamada se desbordará a un IVR que se tenga generado.
Extensión: La llamada se desbordara a una extensión que seleccionemos, debemos considerar que esta debe estar conectada para que pueda recibir llamada, si no esta puede dirigirse a su buzón de voz en caso de tenerlo activado.
Voice Mail: La llamada se dirigirá directo a un voice mail seleccionado.
Ring Group: La llamada se dirigirá a un Ring Group, cabe mencionar que estos también pueden tener Fail Over
Queue: La llamada se puede redirigir a otra ACD o al mismo, solo que debemos generarlo primero para que lo podamos seleccionar, aun que no es recomendable ya que podemos llegar hacer un ciclo y afectar la operación del PBX
Custom: Este nos permite personalizar el Fail Over, ya que podemos llegar a direccionar la llamada a un celular, o reproducir algún audio que indique que no esta en operación, o alguna otra opción que no se cumpla de las anteriores.
Para agregar el ACD, solo bastara con presionar el botón de “Save”, se genera el ACD y nos lo mostrara de la siguiente forma.

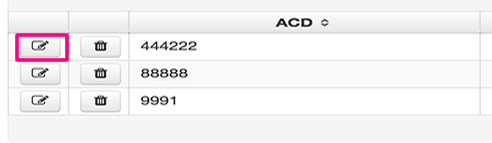
Editar ACD
Para la edición del ACD, basta con presionar el icono de edición y entraremos a las herramientas del ACD, donde podremos cambiar cualquier opción que se requiera, al finalizar presionar el botón de “Save” para guardar cambios.
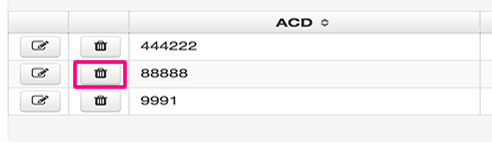
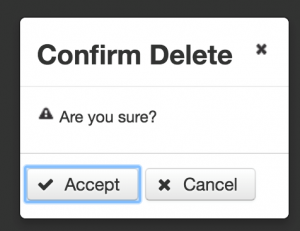
Eliminar ACD
Para eliminar el ACD, basta con presionar el botón de “Borrar” y este nos solicitar confirmar la acción.
Conectarse al ACD
Para conectarse al ACD y poder recibir llamadas, se deberá marcar desde la extensión el numero del ACD mas un asterisk, por ejemplo, si nuestro ACD es el 4444, desde la extensión a conectarse debemos marcar:
4444*, donde se escuchará un mensaje indicando que el usuario esta conectado.
Desconectarse del ACD
Para desconectarse de un ACD y dejar de recibir llamadas de este, se deberá marcar desde la extensión el numero del ACD mas dos asteriscos, por ejemplo, si nuestros ACD es el 4444, debemos marcar desde la extensión:
4444**, donde se escuchará un mensaje de usuario desconectado.
Recomendación: Sírvase de apoyo con ARAQlog para poder obtener estadísticas de las llamadas de los ACD/Queue/colas y respaldado con el Manual ARAQlog para tener una explicación de los reportes.
Este modulo es donde se encuentran algunas de las configuraciones generales para los canales SIP, IAX, Chan_dahdi.conf, voicemail, voicemail.conf, musiconhold.conf, features.conf y queues.conf
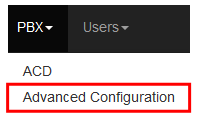
Acceso a Advanced Configuration
Para accesar a esta opción se debe realizar lo siguiente:
- Accesar a la pagina web del usuario
- Ir a PBX
- Advanced Configuration
Se mostrara la siguiente pantalla:

Donde se encuentran las siguientes opciones generales
Configuration File
![]() en este control es donde elegiremos el archivo de configuraciones generales a modificar.
en este control es donde elegiremos el archivo de configuraciones generales a modificar.
Search Context
![]() en este control es donde se buscara algún contexto dentro de los archivos de configuración general.
en este control es donde se buscara algún contexto dentro de los archivos de configuración general.
Add Context
![]() este control es utilizado para añadir un context a algún archivo de configuración
este control es utilizado para añadir un context a algún archivo de configuración
Send to PBX
![]() este control es utilizado para enviar las modificaciones realizadas al Conmutador.
este control es utilizado para enviar las modificaciones realizadas al Conmutador.
Opciones generales de manipulación de datos de archivos
Para la modificación de estos archivos tenemos una barra de búsqueda y opciones como la siguiente:
![]()
Donde se puede filtrar, ordenar y añadir mas variables a cada archivo.
Filtrar por nombre
![]() En este control se escribe el nombre de la variable a buscar y después se presiona el botón
En este control se escribe el nombre de la variable a buscar y después se presiona el botón ![]() , se mostrara la información si es que existe.
, se mostrara la información si es que existe.
Filtrar por Valor de variable
![]() En este control se escribe valor de la variable a buscar y después se presiona el botón
En este control se escribe valor de la variable a buscar y después se presiona el botón ![]() , se mostrara la información si es que existe.
, se mostrara la información si es que existe.
Ordenar
![]() En este control se podrá seleccionar la forma en que se ordenan los parámetros de los archivos.
En este control se podrá seleccionar la forma en que se ordenan los parámetros de los archivos.
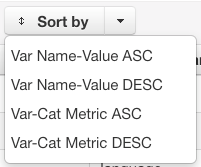
Solo se deberá seleccionar el deseado para que la información se ordene de la manera indicada.
Botón Add Variable
![]() Para agregar una variable se deberá presionar el botón Add Variable el cual creara una nueva linea en el archivo de configuración donde podremos ingresar la información deseada que se mostrara algo similar a la siguiente imagen.
Para agregar una variable se deberá presionar el botón Add Variable el cual creara una nueva linea en el archivo de configuración donde podremos ingresar la información deseada que se mostrara algo similar a la siguiente imagen.
![]()
Estructura de la información en los archivos generales
La forma en que se mostrara la información es similar a la que se utiliza en el dialplan, por lo que se encontrara el context o contexts existentes en cada archivo de configuración. Para desplegar la información del context se deberá presionar el icono ![]() .
.

Columnas en context
Cat Metric
Esta columna no deberá ser modificada ya que el valor que contiene es el identificador del archivo dentro de la estructura del conmutador
Var Metric
Esta columna puede ser modificada, para ordenar los parámetros de la manera que se desee, tomando en cuenta que el primer valor siempre es 1 y en orden ascendente.
Variable Name
Esta columna puede ser modificada para poner los parámetros se deseen, concernientes a cada archivo de configuración.
Variable Value
Esta columna puede ser modificada para poner el valor de la variable que se requiera
Archivos de Configuraciones Generales
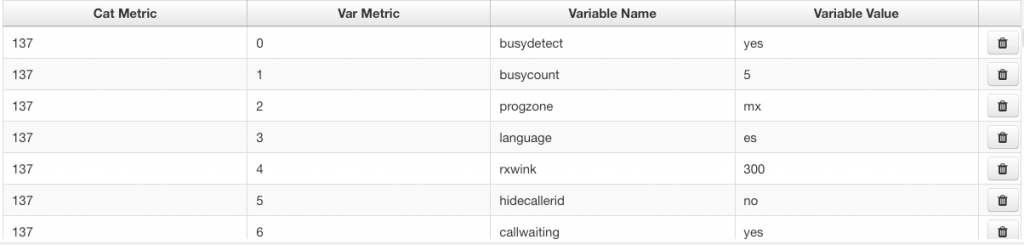
Archivo Chan_dahdi.conf
En este archivo están las configuraciones de los controladores de las tarjetas físicas para las lineas digitales y analógicas.

El context principal es el Channels y es el único que deberá existir en este archivo y tendrá una estructura similar a esta:
Variables y Valores indicados para este archivo
|
Variable Name |
Variable Value |
|
busydetect |
yes |
|
busycount |
5 |
|
progzone |
us |
|
language |
es |
|
rxwink |
300 |
|
hidecallerid |
no |
|
callwaiting |
yes |
|
usecallingpres |
yes |
|
callwaitingcallerid |
yes |
|
callreturn |
yes |
|
echocancelwhenbridged |
yes |
|
echocancel |
yes |
|
echotraining |
yes |
|
echotraining |
400 |
|
relaxdtmf |
yes |
|
rxgain |
1.0 |
|
txgain |
1.0 |
|
usecallerid |
yes |
|
inmediate |
no |
|
callprogress |
no |
|
mfcr2_logdir |
log |
|
mfcr2_logging |
all |
|
musiconhold |
default |
|
signalling |
mfcr2 |
|
mfcr2_variant |
mx |
|
mfcr2_get_ani_first |
no |
|
mfcr2_max_ani |
10 |
|
mfcr2_max_dnis |
4 |
|
mfcr2_category |
national_subscriber |
|
mfcr2_mfback_timeout |
-1 |
|
mfcr2_metering_pulse_timeout |
-1 |
|
context |
in-e1-span01 |
|
group |
1 |
|
callgroup |
1 |
|
pickupgroup |
1 |
|
channel |
1-15 |
|
channel |
17-31 |
Para mas información sobre este archivo véase el anexo A.
Archivo Features.conf
Este archivo es el que controla los códigos de transferencia cuando uno se encuentra en llamada.

Donde el context featuremap es el siguiente:

Donde los parámetros principales son los siguientes:
Blindxfer : Código para la transferencia directa
Disconnect : Código para colgar llamada sin presionar el botón colgar del teléfono
Automon: Código para grabar la llamada en curso
Axtfer: Código para realizar una transferencia asistida
Context General
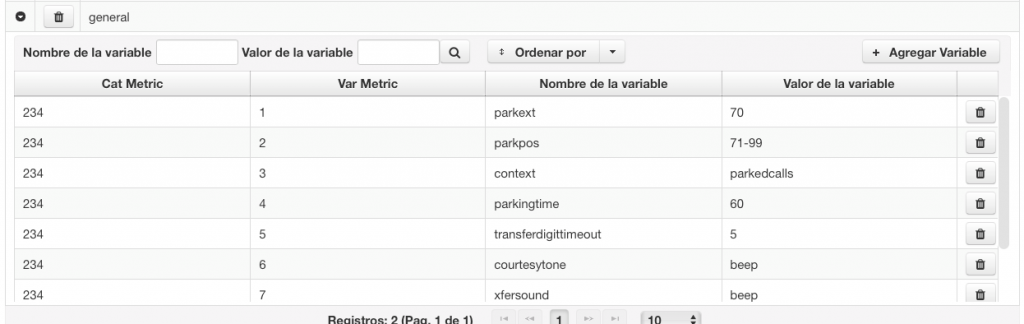
Donde los parámetros principales son los siguientes
Parkext: Extensión para estacionar una llamada
Parkpos: Rango de extensiones para estacionar la llamada
Context: Contexto donde se estacionaran las llamadas
Parkingtime: Tiempo que se estacionara la llamada antes de regresar a la extensión de origen del estacionamiento
Tranferdigittimeout: Tiempo que se espera para que se reciba un dígito después de solicitar una transferencia
Courtesytone: El archivo de audio que deberá ser reproducido en caso de alguna falla al transferir
Xfersound: Sonido que se reproducirá una vez que se solicite una transferencia (asistida o directa).
Para mas información sobre este archivo véase anexo B
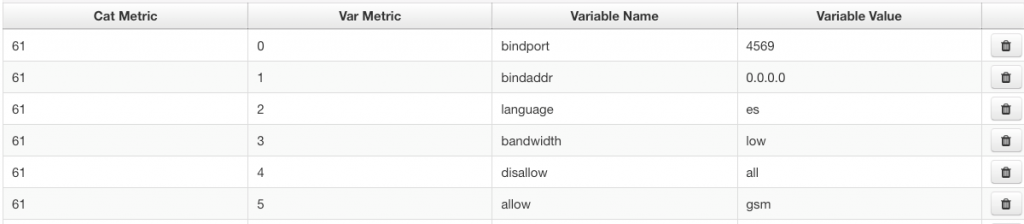
Archivo IAX.conf
En este archivo se realiza la configuración general para el canal IAX2 que es nativo el conmutador.
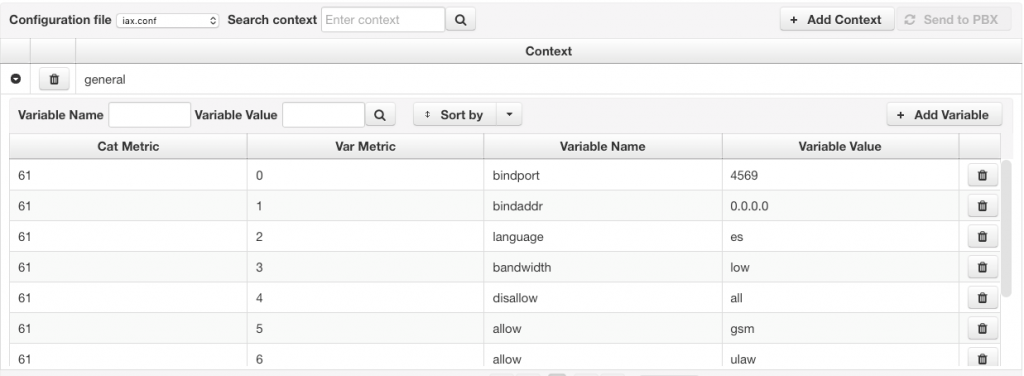
Donde los parámetros principales son:
|
Variable |
Valor de Variable |
|
bindport |
4569 |
|
bindaddr |
0.0.0.0 |
|
language |
es |
|
bandwidth |
low |
|
disallow |
all |
|
allow |
gsm |
|
allow |
ulaw |
|
jitterbuffer |
no |
|
forcejitterbuffer |
no |
|
dropcount |
2 |
|
trunkfreq |
20 |
|
authdebug |
yes |
|
tos |
0x18 |
|
mailboxdetail |
yes |
|
autokill |
yes |
|
codecpriority |
reqonly |
|
qualifysmoothing |
Yes |
|
requirecalltoken |
No |
|
Calltokenoptional |
0.0.0.0/0.0.0.0 |
Para mas información acerca de este archivo véase Anexo C.
Archivo Musiconhold.conf
En este archivo se administran las clases de música de espera en el conmutador
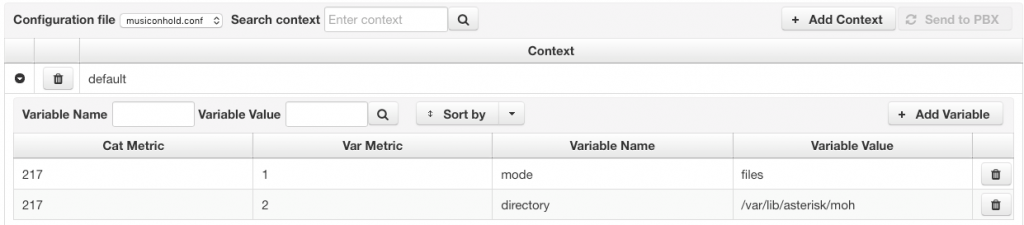
La música de espera que existe de fabrica es la música de espera default.
Para administrar las demás clases de música en espera se realiza por medio del menú PBX – Music on hold.
Para mas información véase Anexo C.
Archivo QUEUES.CONF
Este archivo administra las opciones generales de los ACD (Colas de espera).
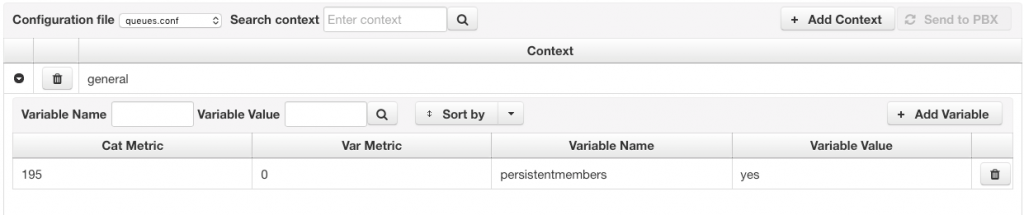
El único parámetro que se usa en este archivo es:
Persistentmembers = yes
La administración de los ACD (colas de espera) se debe llevar a cabo en el menú PBX-ACD.
Archivo SIP.conf
En este archivo de configuración se realizan las modificaciones a los parámetros generales del canal SIP del conmutador.
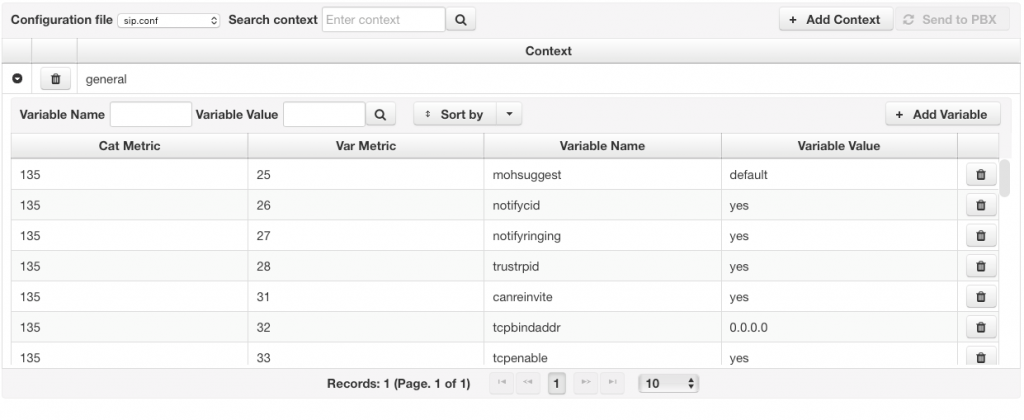
Donde los parámetros generales son:
|
property_name |
property_val |
|
default_context |
default |
|
allowguest |
no |
|
allowoverlap |
no |
|
allowtransfer |
yes |
|
realm |
RM-IP-PBX |
|
transport |
udp,ws,wss |
|
srvlookup |
yes |
|
maxexpiry |
3600 |
|
minexpiry |
60 |
|
defaultexpiry |
120 |
|
qualifyfreq |
60 |
|
qualifygap |
100 |
|
registertimeout |
20 |
|
registerattempts |
0 |
|
rtptimeout |
60 |
|
rtpholdtimeout |
300 |
|
videosupport |
yes |
|
maxcallbitrate |
384 |
|
faxdetect |
yes |
|
t38pt_udptl |
yes |
|
directmedia |
no |
|
notifyringing |
yes |
|
notifyhold |
yes |
|
dtmfmode |
auto |
|
relaxdtmf |
yes |
|
trustrpid |
yes |
|
sendrpid |
no |
|
useragent |
RM-IP-PBX |
|
vmexten |
*97 |
|
language |
en |
|
disallow |
all |
|
allow |
ulaw,alaw,gsm |
|
g726nonstandard |
en |
|
nat |
force_rport,comedia |
|
nat_type |
public |
|
accept_outofcall_message |
yes |
|
auth_message_requests |
yes |
|
bindaddr |
0.0.0.0 |
|
bindport |
5060 |
|
outboundproxy |
127.0.0.1 |
|
outboundproxyport |
5060 |
Para la modificación o eliminación de parámetros y variables sobre este archivo, se deberá consultar a soporte técnico e indicar la situación por la cual estos parámetros deben ser modificados, ya que cualquier modificación afecta al conmutador completamente, pudiendo dejar inservible el mismo temporalmente.
Para mas información acerca de este archivo véase Anexo D.
Archivo VOICEMAIL.CONF
Este archivo configura las opciones generales del comportamiento del buzón de voz de todas las extensiones:

Se deberá solicitar apoyo para modificar este, ya que podrían dejar de funcionar las opciones del buzón de voz correctamente, para mas información sobre este véase Anexo D.
Opción Voicemail
En esta opción se modifica el cuerpo del correo electrónico que sera enviado al correo electrónico que tenga el usuario configurado.
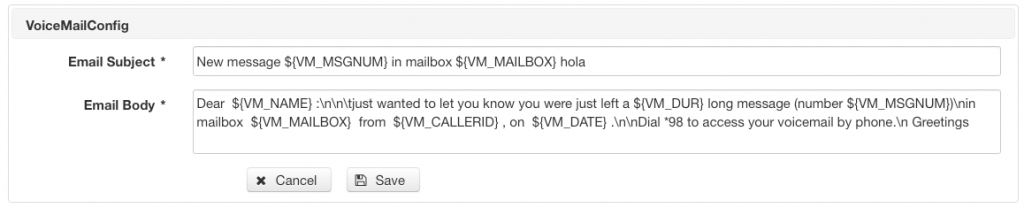
Donde se puede escribir en el idioma que usted requiera tomando en cuenta las siguientes variables:
|
Variable |
Valor/descripcion |
|
${VM_CATEGORY} |
Categoria del mensaje |
|
${VM_NAME} |
Nombre completo del buzon |
|
${VM_MAILBOX} |
Numero de mensaje en el buzon |
|
${VM_DUR} |
Duracion del Mensaje |
|
${VM_MSGNUM} |
Cantidad de mensajes en el buzon |
|
${VM_CALLERID} |
Identificador de llamada (De quien deja el buzon) |
|
${VM_CIDNAME} |
Nombre de este buzon |
|
${VM_CIDNUM} |
Identificador de llamada de este buzon |
|
${VM_DATE} |
Fecha del buzon de voz |
|
${VM_MESSAGEFILE} |
Ruta donde se encuentra archivo de buzon |
Anexo A
CHAN_DAHDI.CONF
DAHDI Telephony Configuration file
You need to restart Asterisk to re-configure the DAHDI channel
CLI> module reload chan_dahdi.so
will reload the configuration file, but not all configuration options
are re-configured during a reload (signalling, as well as PRI and
SS7-related settings cannot be changed on a reload).
This file documents many configuration variables. Normally unless you know
what a variable means or that it should be changed, there’s no reason to
un-comment those lines.
Examples below that are commented out (those lines that begin with a » but
no space afterwards) typically show a value that is not the default value,
but would make sense under certain circumstances. The default values are
usually sane. Thus you should typically not touch them unless you know what
they mean or you know you should change them.
[trunkgroups]
Trunk groups are used for NFAS connections.
Group: Defines a trunk group.
trunkgroup => <trunkgroup>,<dchannel>[,<backup1>…]
trunkgroup is the numerical trunk group to create
dchannel is the DAHDI channel which will have the
d-channel for the trunk.
backup1 is an optional list of backup d-channels.
trunkgroup => 1,24,48
trunkgroup => 1,24
Spanmap: Associates a span with a trunk group
spanmap => <dahdispan>,<trunkgroup>[,<logicalspan>]
dahdispan is the DAHDI span number to associate
trunkgroup is the trunkgroup (specified above) for the mapping
logicalspan is the logical span number within the trunk group to use.
if unspecified, no logical span number is used.
spanmap => 1,1,1
spanmap => 2,1,2
spanmap => 3,1,3
spanmap => 4,1,4
[channels]
Default language
language=en
Context for incoming calls. Defaults to ‘default’
context=public
Switchtype: Only used for PRI.
national: National ISDN 2 (default)
dms100: Nortel DMS100
4ess: AT&T 4ESS
5ess: Lucent 5ESS
euroisdn: EuroISDN (common in Europe)
ni1: Old National ISDN 1
qsig: Q.SIG
switchtype=euroisdn
MSNs for ISDN spans. Asterisk will listen for the listed numbers on
incoming calls and ignore any calls not listed.
Here you can give a comma separated list of numbers or dialplan extension
patterns. An empty list disables MSN matching to allow any incoming call.
Only set on PTMP CPE side of ISDN span if needed.
The default is an empty list.
msn=
Some switches (AT&T especially) require network specific facility IE.
Supported values are currently ‘none’, ‘sdn’, ‘megacom’, ‘tollfreemegacom’, ‘accunet’
nsf cannot be changed on a reload.
nsf=none
service_message_support=yes
Enable service message support for channel. Must be set after switchtype.
Dialing options for ISDN (i.e., Dial(DAHDI/g1/exten/options)):
R Reverse Charge Indication
Indicate to the called party that the call will be reverse charged.
K(n) Keypad digits n
Send out the specified digits as keypad digits.
PRI Dialplan: The ISDN-level Type Of Number (TON) or numbering plan, used for
the dialed number. Leaving this as ‘unknown’ (the default) works for most
cases. In some very unusual circumstances, you may need to set this to
‘dynamic’ or ‘redundant’.
unknown: Unknown
private: Private ISDN
local: Local ISDN
national: National ISDN
international: International ISDN
dynamic: Dynamically selects the appropriate dialplan using the
prefix settings.
redundant: Same as dynamic, except that the underlying number is not
changed (not common)
pridialplan cannot be changed on reload.
pridialplan=unknown
PRI Local Dialplan: Only RARELY used for PRI (sets the calling number’s
numbering plan). In North America, the typical use is sending the 10 digit
callerID number and setting the prilocaldialplan to ‘national’ (the default).
Only VERY rarely will you need to change this.
unknown: Unknown
private: Private ISDN
local: Local ISDN
national: National ISDN
international: International ISDN
from_channel: Use the CALLERID(ton) value from the channel.
dynamic: Dynamically selects the appropriate dialplan using the
prefix settings.
redundant: Same as dynamic, except that the underlying number is not
changed (not common)
prilocaldialplan cannot be changed on reload.
prilocaldialplan=national
PRI Connected Line Dialplan: Sets the connected party number’s numbering plan.
unknown: Unknown
private: Private ISDN
local: Local ISDN
national: National ISDN
international: International ISDN
from_channel: Use the CONNECTEDLINE(ton) value from the channel.
dynamic: Dynamically selects the appropriate dialplan using the
prefix settings.
redundant: Same as dynamic, except that the underlying number is not
changed (not common)
pricpndialplan cannot be changed on reload.
pricpndialplan=from_channel
pridialplan may be also set at dialtime, by prefixing the dialed number with
one of the following letters:
U – Unknown
I – International
N – National
L – Local (Net Specific)
S – Subscriber
V – Abbreviated
R – Reserved (should probably never be used but is included for completeness)
Additionally, you may also set the following NPI bits (also by prefixing the
dialed string with one of the following letters):
u – Unknown
e – E.163/E.164 (ISDN/telephony)
x – X.121 (Data)
f – F.69 (Telex)
n – National
p – Private
r – Reserved (should probably never be used but is included for completeness)
You may also set the prilocaldialplan in the same way, but by prefixing the
Caller*ID Number rather than the dialed number.
Please note that telcos which require this kind of additional manipulation
of the TON/NPI are *rare*. Most telco PRIs will work fine simply by
setting pridialplan to unknown or dynamic.
PRI caller ID prefixes based on the given TON/NPI (dialplan)
This is especially needed for EuroISDN E1-PRIs
None of the prefix settings can be changed on reload.
sample 1 for Germany
internationalprefix = 00
nationalprefix = 0
localprefix = 0711
privateprefix = 07115678
unknownprefix =
sample 2 for Germany
internationalprefix = +
nationalprefix = +49
localprefix = +49711
privateprefix = +497115678
unknownprefix =
PRI resetinterval: sets the time in seconds between restart of unused
B channels defaults to ‘never’.
resetinterval = 3600
Enable per ISDN span to force a RESTART on a channel that returns a cause
code of PRI_CAUSE_REQUESTED_CHAN_UNAVAIL(44). If this option is enabled
and the reason the peer rejected the call with cause 44 was that the
channel is stuck in an unavailable state on the peer, then this might
help release the channel. It is worth noting that the next outgoing call
Asterisk makes will likely try the same channel again.
NOTE: Sending a RESTART in response to a cause 44 is not required
(nor prohibited) by the standards and is likely a primitive chan_dahdi
response to call collisions (glare) and buggy peers. However, there
are telco switches out there that ignore the RESTART and continue to
send calls to the channel in the restarting state.
Default no.
force_restart_unavailable_chans=yes
Assume inband audio may be present when a SETUP ACK message is received.
Q.931 Section 5.1.3 says that in scenarios with overlap dialing, when a
dialtone is sent from the network side, progress indicator 8 «Inband info
now available» MAY be sent to the CPE if no digits were received with
the SETUP. It is thus implied that the ie is mandatory if digits came
with the SETUP and dialtone is needed.
This option should be enabled, when the network sends dialtone and you
want to hear it, but the network doesn’t send the progress indicator when
needed.
NOTE: For Q.SIG setups this option should be enabled when outgoing overlap
dialing is also enabled because Q.SIG does not send the progress indicator
with the SETUP ACK.
Default no.
inband_on_setup_ack=yes
Assume inband audio may be present when a PROCEEDING message is received.
Q.931 Section 5.1.2 says the network cannot assume that the CPE side has
attached to the B channel at this time without explicitly sending the
progress indicator ie informing the CPE side to attach to the B channel
for audio. However, some non-compliant ISDN switches send a PROCEEDING
without the progress indicator ie indicating inband audio is available and
assume that the CPE device has connected the media path for listening to
ringback and other messages.
Default no.
inband_on_proceeding=yes
Overlap dialing mode (sending overlap digits)
Cannot be changed on a reload.
incoming: incoming direction only
outgoing: outgoing direction only
no: neither direction
yes or both: both directions
overlapdial=yes
Send/receive ISDN display IE options. The display options are a comma separated
list of the following options:
block: Do not pass display text data.
Q.SIG: Default for send/receive.
ETSI CPE: Default for send.
name_initial: Use display text in SETUP/CONNECT messages as the party name.
Default for all other modes.
name_update: Use display text in other messages (NOTIFY/FACILITY) for COLP name
update.
name: Combined name_initial and name_update options.
text: Pass any unused display text data as an arbitrary display message
during a call. Sent text goes out in an INFORMATION message.
* Default is an empty string for legacy behavior.
* The name options are not recommended for Q.SIG since Q.SIG already
supports names.
* The send block is the only recommended setting for CPE mode since Q.931 uses
the display IE only in the network to user direction.
display_send and display_receive cannot be changed on reload.
display_send=
display_receive=
Allow sending an ISDN Malicious Caller ID (MCID) request on this span.
Default disabled
mcid_send=yes
Send ISDN date/time IE in CONNECT message option. Only valid on NT spans.
no: Do not send date/time IE in CONNECT message.
date: Send date only.
date_hh Send date and hour.
date_hhmm Send date, hour, and minute.
date_hhmmss Send date, hour, minute, and second.
Default is an empty string which lets libpri pick the default
date/time IE send policy.
datetime_send=
Send ISDN conected line information.
block: Do not send any connected line information.
connect: Send connected line information on initial connect.
update: Same as connect but also send any updates during a call.
Updates happen if the call is transferred. (Default)
colp_send=update
Allow inband audio (progress) when a call is DISCONNECTed by the far end of a PRI
inbanddisconnect=yes
Allow a held call to be transferred to the active call on disconnect.
This is useful on BRI PTMP NT lines where an ISDN phone can simulate the
transfer feature of an analog phone.
The default is no.
hold_disconnect_transfer=yes
BRI PTMP layer 1 presence.
You should normally not need to set this option.
You may need to set this option if your telco brings layer 1 down when
the line is idle.
required: Layer 1 presence required for outgoing calls. (default)
ignore: Ignore alarms from DAHDI about this span.
(Layer 1 and 2 will be brought back up for an outgoing call.)
NOTE: You will not be able to detect physical line problems
until an outgoing call is attempted and fails.
layer1_presence=ignore
BRI PTMP layer 2 persistence.
You should normally not need to set this option.
You may need to set this option if your telco brings layer 1 down when
the line is idle.
<blank>: Use libpri default.
keep_up: Bring layer 2 back up if peer takes it down.
leave_down: Leave layer 2 down if peer takes it down. (Libpri default)
(Layer 2 will be brought back up for an outgoing call.)
layer2_persistence=leave_down
PRI Out of band indications.
Enable this to report Busy and Congestion on a PRI using out-of-band
notification. Inband indication, as used by Asterisk doesn’t seem to work
with all telcos.
outofband: Signal Busy/Congestion out of band with RELEASE/DISCONNECT
inband: Signal Busy/Congestion using in-band tones (default)
priindication cannot be changed on a reload.
priindication = outofband
If you need to override the existing channels selection routine and force all
PRI channels to be marked as exclusively selected, set this to yes.
priexclusive cannot be changed on a reload.
priexclusive = yes
If you need to use the logical channel mapping with your Q.SIG PRI instead
of the physical mapping you must use the qsigchannelmapping option.
logical: Use the logical channel mapping
physical: Use physical channel mapping (default)
qsigchannelmapping=logical
If you wish to ignore remote hold indications (and use MOH that is supplied over
the B channel) enable this option.
discardremoteholdretrieval=yes
ISDN Timers
All of the ISDN timers and counters that are used are configurable. Specify
the timer name, and its value (in ms for timers).
K: Layer 2 max number of outstanding unacknowledged I frames (default 7)
N200: Layer 2 max number of retransmissions of a frame (default 3)
T200: Layer 2 max time before retransmission of a frame (default 1000 ms)
T203: Layer 2 max time without frames being exchanged (default 10000 ms)
T305: Wait for DISCONNECT acknowledge (default 30000 ms)
T308: Wait for RELEASE acknowledge (default 4000 ms)
T309: Maintain active calls on Layer 2 disconnection (default 6000 ms)
EuroISDN: 6000 to 12000 ms, according to (N200 + 1) x T200 + 2s
May vary in other ISDN standards (Q.931 1993 : 90000 ms)
T313: Wait for CONNECT acknowledge, CPE side only (default 3000 ms)
T-RESPONSE: Maximum time to wait for a typical APDU response. (default 4000 ms)
This is an implementation timer when the standard does not specify one.
T-ACTIVATE: Request supervision timeout. (default 10000 ms)
T-RETENTION: Maximum time to wait for user A to activate call-completion. (default 30000 ms)
Used by ETSI PTP, ETSI PTMP, and Q.SIG as the cc_offer_timer.
T-CCBS1: T-STATUS timer equivalent for CC user A status. (default 4000 ms)
T-CCBS2: Maximum time the CCBS service will be active (default 45 min in ms)
T-CCBS3: Maximum time to wait for user A to respond to user B availability. (default 20000 ms)
T-CCBS5: Network B CCBS supervision timeout. (default 60 min in ms)
T-CCBS6: Network A CCBS supervision timeout. (default 60 min in ms)
T-CCNR2: Maximum time the CCNR service will be active (default 180 min in ms)
T-CCNR5: Network B CCNR supervision timeout. (default 195 min in ms)
T-CCNR6: Network A CCNR supervision timeout. (default 195 min in ms)
CC-T1: Q.SIG CC request supervision timeout. (default 30000 ms)
CCBS-T2: Q.SIG CCBS supervision timeout. (default 60 min in ms)
CCNR-T2: Q.SIG CCNR supervision timeout. (default 195 min in ms)
CC-T3: Q.SIG CC Maximum time to wait for user A to respond to user B availability. (default 30000 ms)
pritimer => t200,1000
pritimer => t313,4000
CC PTMP recall mode:
specific – Only the CC original party A can participate in the CC callback
global – Other compatible endpoints on the PTMP line can be party A in the CC callback
cc_ptmp_recall_mode cannot be changed on a reload.
cc_ptmp_recall_mode = specific
CC Q.SIG Party A (requester) retain signaling link option
retain Require that the signaling link be retained.
release Request that the signaling link be released.
do_not_care The responder is free to choose if the signaling link will be retained.
cc_qsig_signaling_link_req = retain
CC Q.SIG Party B (responder) retain signaling link option
retain Prefer that the signaling link be retained.
release Prefer that the signaling link be released.
cc_qsig_signaling_link_rsp = retain
See ccss.conf.sample for more options. The timers described by ccss.conf.sample
are not used by ISDN for the native protocol since they are defined by the
standards and set by pritimer above.
To enable transmission of facility-based ISDN supplementary services (such
as caller name from CPE over facility), enable this option.
Cannot be changed on a reload.
facilityenable = yes
This option enables Advice of Charge pass-through between the ISDN PRI and
Asterisk. This option can be set to any combination of ‘s’, ‘d’, and ‘e’ which
represent the different variants of Advice of Charge, AOC-S, AOC-D, and AOC-E.
Advice of Charge pass-through is currently only supported for ETSI. Since most
AOC messages are sent on facility messages, the ‘facilityenable’ option must
also be enabled to fully support AOC pass-through.
aoc_enable=s,d,e
When this option is enabled, a hangup initiated by the ISDN PRI side of the
asterisk channel will result in the channel delaying its hangup in an
attempt to receive the final AOC-E message from its bridge. The delay
period is configured as one half the T305 timer length. If the channel
is not bridged the hangup will occur immediatly without delay.
aoce_delayhangup=yes
pritimer cannot be changed on a reload.
Signalling method. The default is «auto». Valid values:
auto: Use the current value from DAHDI.
em: E & M
em_e1: E & M E1
em_w: E & M Wink
featd: Feature Group D (The fake, Adtran style, DTMF)
featdmf: Feature Group D (The real thing, MF (domestic, US))
featdmf_ta: Feature Group D (The real thing, MF (domestic, US)) through
a Tandem Access point
featb: Feature Group B (MF (domestic, US))
fgccama: Feature Group C-CAMA (DP DNIS, MF ANI)
fgccamamf: Feature Group C-CAMA MF (MF DNIS, MF ANI)
fxs_ls: FXS (Loop Start)
fxs_gs: FXS (Ground Start)
fxs_ks: FXS (Kewl Start)
fxo_ls: FXO (Loop Start)
fxo_gs: FXO (Ground Start)
fxo_ks: FXO (Kewl Start)
pri_cpe: PRI signalling, CPE side
pri_net: PRI signalling, Network side
bri_cpe: BRI PTP signalling, CPE side
bri_net: BRI PTP signalling, Network side
bri_cpe_ptmp: BRI PTMP signalling, CPE side
bri_net_ptmp: BRI PTMP signalling, Network side
sf: SF (Inband Tone) Signalling
sf_w: SF Wink
sf_featd: SF Feature Group D (The fake, Adtran style, DTMF)
sf_featdmf: SF Feature Group D (The real thing, MF (domestic, US))
sf_featb: SF Feature Group B (MF (domestic, US))
e911: E911 (MF) style signalling
ss7: Signalling System 7
mfcr2: MFC/R2 Signalling. To specify the country variant see ‘mfcr2_variant’
The following are used for Radio interfaces:
fxs_rx: Receive audio/COR on an FXS kewlstart interface (FXO at the
channel bank)
fxs_tx: Transmit audio/PTT on an FXS loopstart interface (FXO at the
channel bank)
fxo_rx: Receive audio/COR on an FXO loopstart interface (FXS at the
channel bank)
fxo_tx: Transmit audio/PTT on an FXO groundstart interface (FXS at
the channel bank)
em_rx: Receive audio/COR on an E&M interface (1-way)
em_tx: Transmit audio/PTT on an E&M interface (1-way)
em_txrx: Receive audio/COR AND Transmit audio/PTT on an E&M interface
(2-way)
em_rxtx: Same as em_txrx (for our dyslexic friends)
sf_rx: Receive audio/COR on an SF interface (1-way)
sf_tx: Transmit audio/PTT on an SF interface (1-way)
sf_txrx: Receive audio/COR AND Transmit audio/PTT on an SF interface
(2-way)
sf_rxtx: Same as sf_txrx (for our dyslexic friends)
ss7: Signalling System 7
signalling of a channel can not be changed on a reload.
signalling=fxo_ls
If you have an outbound signalling format that is different from format
specified above (but compatible), you can specify outbound signalling format,
(see below). The ‘signalling’ format specified will be the inbound signalling
format. If you only specify ‘signalling’, then it will be the format for
both inbound and outbound.
outsignalling can only be one of:
em, em_e1, em_w, sf, sf_w, sf_featd, sf_featdmf, sf_featb, featd,
featdmf, featdmf_ta, e911, fgccama, fgccamamf
outsignalling cannot be changed on a reload.
signalling=featdmf
outsignalling=featb
For Feature Group D Tandem access, to set the default CIC and OZZ use these
parameters (Will not be updated on reload):
defaultozz=0000
defaultcic=303
A variety of timing parameters can be specified as well
The default values for those are «-1», which is to use the
compile-time defaults of the DAHDI kernel modules. The timing
parameters, (with the standard default from DAHDI):
prewink: Pre-wink time (default 50ms)
preflash: Pre-flash time (default 50ms)
wink: Wink time (default 150ms)
flash: Flash time (default 750ms)
start: Start time (default 1500ms)
rxwink: Receiver wink time (default 300ms)
rxflash: Receiver flashtime (default 1250ms)
debounce: Debounce timing (default 600ms)
None of them will update on a reload.
How long generated tones (DTMF and MF) will be played on the channel
(in milliseconds).
This is a global, rather than a per-channel setting. It will not be
updated on a reload.
toneduration=100
Whether or not to do distinctive ring detection on FXO lines:
usedistinctiveringdetection=yes
enable dring detection after caller ID for those countries like Australia
where the ring cadence is changed *after* the caller ID spill:
distinctiveringaftercid=yes
Whether or not to use caller ID:
usecallerid=yes
Type of caller ID signalling in use
bell = bell202 as used in US (default)
v23 = v23 as used in the UK
v23_jp = v23 as used in Japan
dtmf = DTMF as used in Denmark, Sweden and Netherlands
smdi = Use SMDI for caller ID. Requires SMDI to be enabled (usesmdi).
cidsignalling=v23
What signals the start of caller ID
ring = a ring signals the start (default)
polarity = polarity reversal signals the start
polarity_IN = polarity reversal signals the start, for India,
for dtmf dialtone detection using DTMF.
(see https://wiki.asterisk.org/wiki/display/AST/Caller+ID+in+India)
dtmf = causes monitor loop to look for dtmf energy on the
incoming channel to initate cid acquisition
cidstart=polarity
When cidstart=dtmf, the energy level on the line used to trigger dtmf cid
acquisition. This number is compared to the average over a packet of audio
of the absolute values of 16 bit signed linear samples. The default is set
to 256. The choice of 256 is arbitrary. The value you should select should
be high enough to prevent false detections while low enough to insure that
no dtmf spills are missed.
dtmfcidlevel=256
Whether or not to hide outgoing caller ID (Override with *67 or *82)
(If your dialplan doesn’t catch it)
hidecallerid=yes
Enable if you need to hide just the name and not the number for legacy PBX use.
Only applies to PRI channels.
hidecalleridname=yes
On UK analog lines, the caller hanging up determines the end of calls. So
Asterisk hanging up the line may or may not end a call (DAHDI could just as
easily be re-attaching to a prior incoming call that was not yet hung up).
This option changes the hangup to wait for a dialtone on the line, before
marking the line as once again available for use with outgoing calls.
Specified in milliseconds, not set by default.
waitfordialtone=1000
For analog lines, enables Asterisk to use dialtone detection per channel
if an incoming call was hung up before it was answered. If dialtone is
detected, the call is hung up.
no: Disabled. (Default)
yes: Look for dialtone for 10000 ms after answer.
<number>: Look for dialtone for the specified number of ms after answer.
always: Look for dialtone for the entire call. Dialtone may return
if the far end hangs up first.
dialtone_detect=no
The following option enables receiving MWI on FXO lines. The default
value is no.
The mwimonitor can take the following values
no – No mwimonitoring occurs. (default)
yes – The same as specifying fsk
fsk – the FXO line is monitored for MWI FSK spills
fsk,rpas – the FXO line is monitored for MWI FSK spills preceded
by a ring pulse alert signal.
neon – The fxo line is monitored for the presence of NEON pulses
indicating MWI.
When detected, an internal Asterisk MWI event is generated so that any other
part of Asterisk that cares about MWI state changes is notified, just as if
the state change came from app_voicemail.
For FSK MWI Spills, the energy level that must be seen before starting the
MWI detection process can be set with ‘mwilevel’.
mwimonitor=no
mwilevel=512
This option is used in conjunction with mwimonitor. This will get executed
when incoming MWI state changes. The script is passed 2 arguments. The
first is the corresponding configured mailbox, and the second is 1 or 0,
indicating if there are messages waiting or not.
Note: app_voicemail mailboxes are in the form of mailbox@context.
/usr/local/bin/dahdinotify.sh 501@mailboxes 1
mwimonitornotify=/usr/local/bin/dahdinotify.sh
The following keyword ‘mwisendtype’ enables various VMWI methods on FXS lines (if supported).
The default is to send FSK only.
The following options are available
‘rpas’ Ring Pulse Alert Signal, alerts intelligent phones that a FSK message is about to be sent.
‘lrev’ Line reversed to indicate messages waiting.
‘hvdc’ 90Vdc OnHook DC voltage to indicate messages waiting.
‘hvac’ or ‘neon’ 90Vac OnHook AC voltage to light Neon bulb.
‘nofsk’ Disables FSK MWI spills from being sent out.
It is feasible that multiple options can be enabled.
mwisendtype=rpas,lrev
Whether or not to enable call waiting on internal extensions
With this set to ‘yes’, busy extensions will hear the call-waiting
tone, and can use hook-flash to switch between callers. The Dial()
app will not return the «BUSY» result for extensions.
callwaiting=yes
Configure the number of outstanding call waiting calls for internal ISDN
endpoints before bouncing the calls as busy. This option is equivalent to
the callwaiting option for analog ports.
A call waiting call is a SETUP message with no B channel selected.
The default is zero to disable call waiting for ISDN endpoints.
max_call_waiting_calls=0
Allow incoming ISDN call waiting calls.
A call waiting call is a SETUP message with no B channel selected.
allow_call_waiting_calls=no
Configure the ISDN span to indicate MWI for the list of mailboxes.
You can give a comma separated list of up to 8 mailboxes per span.
An empty list disables MWI.
The default is an empty list.
mwi_mailboxes=vm-mailbox{,vm-mailbox}
vm-mailbox = Internal voicemail mailbox identifier.
Note: app_voicemail mailboxes must be in the form of mailbox@context.
mwi_mailboxes=501@mailboxes,502@mailboxes
Configure the ISDN mailbox number sent over the span for MWI mailboxes.
The position of the number in the list corresponds to the position in
mwi_mailboxes. If either position in mwi_mailboxes or mwi_vm_boxes is
empty then that position is disabled.
The default is an empty list.
mwi_vm_boxes=mailbox_number{,mailbox_number}
mwi_vm_boxes=501,502
Configure the ISDN span voicemail controlling numbers for MWI mailboxes.
What number to call for a user to retrieve voicemail messages.
You can give a comma separated list of numbers. The position of the number
corresponds to the position in mwi_mailboxes. If a position is empty then
the last number is reused.
For example:
mwi_vm_numbers=700,,800,,900
is equivalent to:
mwi_vm_numbers=700,700,800,800,900,900,900,900
The default is no number.
mwi_vm_numbers=
Whether or not restrict outgoing caller ID (will be sent as ANI only, not
available for the user)
Mostly use with FXS ports
Does nothing. Use hidecallerid instead.
restrictcid=no
Whether or not to use the caller ID presentation from the Asterisk channel
for outgoing calls.
See dialplan function CALLERID(pres) for more information.
Only applies to PRI and SS7 channels.
usecallingpres=yes
Some countries (UK) have ring tones with different ring tones (ring-ring),
which means the caller ID needs to be set later on, and not just after
the first ring, as per the default (1).
sendcalleridafter = 2
Support caller ID on Call Waiting
callwaitingcallerid=yes
Support three-way calling
threewaycalling=yes
For FXS ports (either direct analog or over T1/E1):
Support flash-hook call transfer (requires three way calling)
Also enables call parking (overrides the ‘canpark’ parameter)
For digital ports using ISDN PRI protocols:
Support switch-side transfer (called 2BCT, RLT or other names)
This setting must be enabled on both ports involved, and the
‘facilityenable’ setting must also be enabled to allow sending
the transfer to the ISDN switch, since it sent in a FACILITY
message.
NOTE: This should be disabled for NT PTMP mode. Phones cannot
have tromboned calls pushed down to them.
transfer=yes
Allow call parking
(‘canpark=no’ is overridden by ‘transfer=yes’)
canpark=yes
Sets the default parking lot for call parking.
This is setable per channel.
Parkinglots are configured in features.conf
parkinglot=plaza
Support call forward variable
cancallforward=yes
Whether or not to support Call Return (*69, if your dialplan doesn’t
catch this first)
callreturn=yes
Stutter dialtone support: If voicemail is received in the mailbox then
taking the phone off hook will cause a stutter dialtone instead of a
normal one.
Note: app_voicemail mailboxes must be in the form of mailbox@context.
mailbox=1234@context
Enable echo cancellation
Use either «yes», «no», or a power of two from 32 to 256 if you wish to
actually set the number of taps of cancellation.
Note that when setting the number of taps, the number 256 does not translate
to 256 ms of echo cancellation. echocancel=256 means 256 / 8 = 32 ms.
Note that if any of your DAHDI cards have hardware echo cancellers,
then this setting only turns them on and off numeric settings will
be treated as «yes». There are no special settings required for
hardware echo cancellers when present and enabled in their kernel
modules, they take precedence over the software echo canceller compiled
into DAHDI automatically.
echocancel=yes
Some DAHDI echo cancellers (software and hardware) support adjustable
parameters these parameters can be supplied as additional options to
the ‘echocancel’ setting. Note that Asterisk does not attempt to
validate the parameters or their values, so if you supply an invalid
parameter you will not know the specific reason it failed without
checking the kernel message log for the error(s) put there by DAHDI.
echocancel=128,param1=32,param2=0,param3=14
Generally, it is not necessary (and in fact undesirable) to echo cancel when
the circuit path is entirely TDM. You may, however, change this behavior
by enabling the echo canceller during pure TDM bridging below.
echocancelwhenbridged=yes
In some cases, the echo canceller doesn’t train quickly enough and there
is echo at the beginning of the call. Enabling echo training will cause
DAHDI to briefly mute the channel, send an impulse, and use the impulse
response to pre-train the echo canceller so it can start out with a much
closer idea of the actual echo. Value may be «yes», «no», or a number of
milliseconds to delay before training (default = 400)
WARNING: In some cases this option can make echo worse! If you are
trying to debug an echo problem, it is worth checking to see if your echo
is better with the option set to yes or no. Use whatever setting gives
the best results.
Note that these parameters do not apply to hardware echo cancellers.
echotraining=yes
echotraining=800
If you are having trouble with DTMF detection, you can relax the DTMF
detection parameters. Relaxing them may make the DTMF detector more likely
to have «talkoff» where DTMF is detected when it shouldn’t be.
relaxdtmf=yes
Hardware gain settings increase/decrease the analog volume level on a channel.
The values are in db (decibels) and can be adjusted in 0.1 dB increments.
A positive number increases the volume level on a channel, and a negavive
value decreases volume level.
Hardware gain settings are only possible on hardware with analog ports
because the gain is done on the analog side of the analog/digital conversion.
When hardware gains are disabled, Asterisk will NOT touch the gain setting
already configured in hardware.
hwrxgain: Hardware receive gain for the channel (into Asterisk).
Default: disabled
hwtxgain: Hardware transmit gain for the channel (out of Asterisk).
Default: disabled
hwrxgain=disabled
hwtxgain=disabled
hwrxgain=2.0
hwtxgain=3.0
Software gain settings digitally increase/decrease the volume level on a channel.
The values are in db (decibels). A positive number increases the volume
level on a channel, and a negavive value decreases volume level.
Software gains work on the digital side of the analog/digital conversion
and thus can also work with T1/E1 cards.
rxgain: Software receive gain for the channel (into Asterisk). Default: 0.0
txgain: Software transmit gain for the channel (out of Asterisk).
Default: 0.0
cid_rxgain: Add this gain to rxgain when Asterisk expects to receive
a Caller ID stream.
Default: 5.0 .
rxgain=2.0
txgain=3.0
Dynamic Range Compression: You can also enable dynamic range compression
on a channel. This will digitally amplify quiet sounds while leaving louder
sounds untouched. This is useful in situations where a linear gain setting
would cause clipping. Acceptable values are in the range of 0.0 to around
6.0 with higher values causing more compression to be done.
rxdrc: dynamic range compression for the rx channel. Default: 0.0
txdrc: dynamic range compression for the tx channel. Default: 0.0
rxdrc=1.0
txdrc=4.0
Logical groups can be assigned to allow outgoing roll-over. Groups range
from 0 to 63, and multiple groups can be specified. By default the
channel is not a member of any group.
Note that an explicit empty value for ‘group’ is invalid, and will not
override a previous non-empty one. The same applies to callgroup and
pickupgroup as well.
group=1
Ring groups (a.k.a. call groups) and pickup groups. If a phone is ringing
and it is a member of a group which is one of your pickup groups, then
you can answer it by picking up and dialing *8#. For simple offices, just
make these both the same. Groups range from 0 to 63.
callgroup=1
pickupgroup=1
Named ring groups (a.k.a. named call groups) and named pickup groups.
If a phone is ringing and it is a member of a group which is one of your
named pickup groups, then you can answer it by picking up and dialing *8#.
For simple offices, just make these both the same.
The number of named groups is not limited.
namedcallgroup=engineering,sales,netgroup,protgroup
namedpickupgroup=sales
Channel variables to be set for all calls from this channel
setvar=CHANNEL=42
setvar=ATTENDED_TRANSFER_COMPLETE_SOUND=beep This channel variable will
cause the given audio file to
be played upon completion of
an attended transfer to the
target of the transfer.
Specify whether the channel should be answered immediately or if the simple
switch should provide dialtone, read digits, etc.
Note: If immediate=yes the dialplan execution will always start at extension
‘s’ priority 1 regardless of the dialed number!
immediate=yes
Specify whether flash-hook transfers to ‘busy’ channels should complete or
return to the caller performing the transfer (default is yes).
transfertobusy=no
Calls will have the party id user tag set to this string value.
cid_tag=
With this set, you can automatically append the MSN of a party
to the cid_tag. An ‘_’ is used to separate the tag from the MSN.
Applies to ISDN spans.
Default is no.
Table of what number is appended:
outgoing incoming
net dialed caller
cpe caller dialed
append_msn_to_cid_tag=no
caller ID can be set to «asreceived» or a specific number if you want to
override it. Note that «asreceived» only applies to trunk interfaces.
fullname sets just the
fullname: sets just the name part.
cid_number: sets just the number part:
callerid = 123456
callerid = My Name <2564286000>
Which can also be written as:
cid_number = 2564286000
fullname = My Name
callerid = asreceived
should we use the caller ID from incoming call on DAHDI transfer?
useincomingcalleridondahditransfer = yes
Add a description for the channel which can be shown through the Asterisk
console when executing the ‘dahdi show channels’ command is run.
description=Phone located in lobby
AMA flags affects the recording of Call Detail Records. If specified
it may be ‘default’, ‘omit’, ‘billing’, or ‘documentation’.
amaflags=default
Channels may be associated with an account code to ease
billing
accountcode=lss0101
ADSI (Analog Display Services Interface) can be enabled on a per-channel
basis if you have (or may have) ADSI compatible CPE equipment
adsi=yes
SMDI (Simplified Message Desk Interface) can be enabled on a per-channel
basis if you would like that channel to behave like an SMDI message desk.
The SMDI port specified should have already been defined in smdi.conf. The
default port is /dev/ttyS0.
usesmdi=yes
smdiport=/dev/ttyS0
On trunk interfaces (FXS) and E&M interfaces (E&M, Wink, Feature Group D
etc, it can be useful to perform busy detection either in an effort to
detect hangup or for detecting busies. This enables listening for
the beep-beep busy pattern.
busydetect=yes
If busydetect is enabled, it is also possible to specify how many busy tones
to wait for before hanging up. The default is 3, but it might be
safer to set to 6 or even 8. Mind that the higher the number, the more
time that will be needed to hangup a channel, but lowers the probability
that you will get random hangups.
busycount=6
If busydetect is enabled, it is also possible to specify the cadence of your
busy signal. In many countries, it is 500msec on, 500msec off. Without
busypattern specified, we’ll accept any regular sound-silence pattern that
repeats <busycount> times as a busy signal. If you specify busypattern,
then we’ll further check the length of the sound (tone) and silence, which
will further reduce the chance of a false positive.
busypattern=500,500
NOTE: In make menuselect, you’ll find further options to tweak the busy
detector. If your country has a busy tone with the same length tone and
silence (as many countries do), consider enabling the
BUSYDETECT_COMPARE_TONE_AND_SILENCE option.
To further detect which hangup tone your telco provider is sending, it is
useful to use the dahdi_monitor utility to record the audio that main/dsp.c
is receiving after the caller hangs up.
For FXS (FXO signalled) ports
switch the line polarity to signal the connected PBX that an outgoing
call was answered by the remote party.
For FXO (FXS signalled) ports
watch for a polarity reversal to mark when a outgoing call is
answered by the remote party.
answeronpolarityswitch=yes
For FXS (FXO signalled) ports
switch the line polarity to signal the connected PBX that the current
call was «hung up» by the remote party
For FXO (FXS signalled) ports
In some countries, a polarity reversal is used to signal the disconnect of a
phone line. If the hanguponpolarityswitch option is selected, the call will
be considered «hung up» on a polarity reversal.
hanguponpolarityswitch=yes
polarityonanswerdelay: minimal time period (ms) between the answer
polarity switch and hangup polarity switch.
(default: 600ms)
On trunk interfaces (FXS) it can be useful to attempt to follow the progress
of a call through RINGING, BUSY, and ANSWERING. If turned on, call
progress attempts to determine answer, busy, and ringing on phone lines.
This feature is HIGHLY EXPERIMENTAL and can easily detect false answers,
so don’t count on it being very accurate.
Few zones are supported at the time of this writing, but may be selected
with «progzone».
progzone also affects the pattern used for buzydetect (unless
busypattern is set explicitly). The possible values are:
us (default)
ca (alias for ‘us’)
cr (Costa Rica)
br (Brazil, alias for ‘cr’)
uk
This feature can also easily detect false hangups. The symptoms of this is
being disconnected in the middle of a call for no reason.
callprogress=yes
progzone=uk
Set the tonezone. Equivalent of the defaultzone settings in
/etc/dahdi/system.conf. This sets the tone zone by number.
Note that you’d still need to load tonezones (loadzone in
/etc/dahdi/system.conf).
The default is -1: not to set anything.
tonezone = 0 0 is US
FXO (FXS signalled) devices must have a timeout to determine if there was a
hangup before the line was answered. This value can be tweaked to shorten
how long it takes before DAHDI considers a non-ringing line to have hungup.
ringtimeout will not update on a reload.
ringtimeout=8000
For FXO (FXS signalled) devices, whether to use pulse dial instead of DTMF
Pulse digits from phones (FXS devices, FXO signalling) are always
detected.
pulsedial=yes
For fax detection, uncomment one of the following lines. The default is *OFF*
faxdetect=both
faxdetect=incoming
faxdetect=outgoing
faxdetect=no
When ‘faxdetect’ is enabled, one could use ‘faxdetect_timeout’ to disable fax
detection after the specified number of seconds into a call. Be aware that
outgoing analog channels may consider the channel is answered immediately
when dialing completes. Analog does not have a reliable method of detecting
when the far end answers. Zero disables the timeout.
Default is 0 to disable the timeout.
faxdetect_timeout=30
When ‘faxdetect’ is used, one could use ‘faxbuffers’ to configure the DAHDI
transmit buffer policy. The default is *OFF*. When this configuration
option is used, the faxbuffer policy will be used for the life of the call
after a fax tone is detected. The faxbuffer policy is reverted after the
call is torn down. The sample below will result in 6 buffers and a full
buffer policy.
faxbuffers=>6,full
When FXO signalling (FXS device, e.g. analog phone) is used, overlap dialing
is typically used. Asterisk has several configurable (per-channel) timeouts
to know how long to wait for the next digit. All the values are in
milliseconds.
* firstdigit_timeout: a longer timeout before any digit is dialed.
By default: 16 seconds.
* interdigit_timeout: timeout for next digits, if the current number dialed
does not match a number in the current context. Default: 8 seconds.
* matchdigit_timeout: timeout for next digits, if the current number dialed
matches a number in the current context. Default: 3 seconds.
firstdigit_timeout=16000
interdigit_timeout=8000
matchdigit_timeout=3000
Configure the default number of DAHDI buffers and the transmit policy to use.
This can be used to eliminate data drops when scheduling jitter prevents
Asterisk from writing to a DAHDI channel regularly. Most users will probably
want «faxbuffers» instead of «buffers».
The policies are:
immediate – DAHDI will immediately start sending the data to the hardware after
Asterisk writes to the channel. This is the default mode. It
introduces the least amount of latency but has an increased chance for
hardware under runs if Asterisk is not able to keep the DAHDI write
queue from going empty.
half – DAHDI will wait until half of the configured buffers are full before
starting to transmit. This adds latency to the audio but reduces
the chance of under runs. Essentially, this is like an in-kernel jitter
buffer.
full – DAHDI will not start transmitting until all buffers are full.
Introduces the most amount of latency and is susceptible to over
runs from the Asterisk process.
The receive policy is never changed. DAHDI will always pass up audio as soon
as possible.
The default number of buffers is 4 (from jitterbuffers) and the default policy
is immediate.
buffers=4,immediate
This option specifies what to do when the channel’s bridged peer puts the
ISDN channel on hold. Settable per logical ISDN span.
moh: Generate music-on-hold to the remote party.
notify: Send hold notification signaling to the remote party.
For ETSI PTP and ETSI PTMP NT links.
(The notify setting deprecates the mohinterpret=passthrough setting.)
hold: Use HOLD/RETRIEVE signaling to release the B channel while on hold.
For ETSI PTMP TE links.
moh_signaling=moh
This option specifies a preference for which music on hold class this channel
should listen to when put on hold if the music class has not been set on the
channel with Set(CHANNEL(musicclass)=whatever) in the dialplan, and the peer
channel putting this one on hold did not suggest a music class.
This option may be set globally or on a per-channel basis.
mohinterpret=default
This option specifies which music on hold class to suggest to the peer channel
when this channel places the peer on hold. This option may be set globally,
or on a per-channel basis.
mohsuggest=default
PRI channels can have an idle extension and a minunused number. So long as
at least «minunused» channels are idle, chan_dahdi will try to call «idledial»
on them, and then dump them into the PBX in the «idleext» extension (which
is of the form exten@context). When channels are needed the «idle» calls
are disconnected (so long as there are at least «minidle» calls still
running, of course) to make more channels available. The primary use of
this is to create a dynamic service, where idle channels are bundled through
multilink PPP, thus more efficiently utilizing combined voice/data services
than conventional fixed mappings/muxings.
Those settings cannot be changed on reload.
idledial=6999
idleext=6999@dialout
minunused=2
minidle=1
ignore_failed_channels: Continue even if some channels failed to configure.
True by default. Disable this if you can guarantee that DAHDI starts before
Asterisk and want to be sure chan_dahdi will not start with broken
configuration.
ignore_failed_channels = false
Configure jitter buffers in DAHDI (each one is 20ms, default is 4)
This is set globally, rather than per-channel.
jitterbuffers=4
—————————– JITTER BUFFER CONFIGURATION ————————–
jbenable = yes Enables the use of a jitterbuffer on the receiving side of a
DAHDI channel. Defaults to «no». An enabled jitterbuffer will
be used only if the sending side can create and the receiving
side can not accept jitter. The DAHDI channel can’t accept jitter,
thus an enabled jitterbuffer on the receive DAHDI side will always
be used if the sending side can create jitter.
jbmaxsize = 200 Max length of the jitterbuffer in milliseconds.
jbresyncthreshold = 1000 Jump in the frame timestamps over which the jitterbuffer is
resynchronized. Useful to improve the quality of the voice, with
big jumps in/broken timestamps, usually sent from exotic devices
and programs. Defaults to 1000.
jbimpl = fixed Jitterbuffer implementation, used on the receiving side of a DAHDI
channel. Two implementations are currently available – «fixed»
(with size always equals to jbmax-size) and «adaptive» (with
variable size, actually the new jb of IAX2). Defaults to fixed.
jbtargetextra = 40 This option only affects the jb when ‘jbimpl = adaptive’ is set.
The option represents the number of milliseconds by which the new
jitter buffer will pad its size. the default is 40, so without
modification, the new jitter buffer will set its size to the jitter
value plus 40 milliseconds. increasing this value may help if your
network normally has low jitter, but occasionally has spikes.
jblog = no Enables jitterbuffer frame logging. Defaults to «no».
———————————————————————————-
You can define your own custom ring cadences here. You can define up to 8
pairs. If the silence is negative, it indicates where the caller ID spill is
to be placed. Also, if you define any custom cadences, the default cadences
will be turned off.
This setting is global, rather than per-channel. It will not update on
a reload.
Syntax is: cadence=ring,silence[,ring,silence[…]]
These are the default cadences:
cadence=125,125,2000,-4000
cadence=250,250,500,1000,250,250,500,-4000
cadence=125,125,125,125,125,-4000
cadence=1000,500,2500,-5000
Each channel consists of the channel number or range. It inherits the
parameters that were specified above its declaration.
callerid=»Green Phone»<(256) 428-6121>
description=Reception Phone add a description for ‘dahdi show channels’
channel => 1
callerid=»Black Phone»<(256) 428-6122>
description=Courtesy Phone
channel => 2
callerid=»CallerID Phone» <(630) 372-1564>
description= reset the description for following channels
channel => 3
callerid=»Pac Tel Phone» <(256) 428-6124>
channel => 4
callerid=»Uniden Dead» <(256) 428-6125>
channel => 5
callerid=»Cortelco 2500″ <(256) 428-6126>
channel => 6
callerid=»Main TA 750″ <(256) 428-6127>
channel => 44
For example, maybe we have some other channels which start out in a
different context and use E & M signalling instead.
context=remote
signaling=em
channel => 15
channel => 16
signalling=em_w
All those in group 0 I’ll use for outgoing calls
Strip most significant digit (9) before sending
stripmsd=1
callerid=asreceived
group=0
signalling=fxs_ls
channel => 45
signalling=fxo_ls
group=1
callerid=»Joe Schmoe» <(256) 428-6131>
channel => 25
callerid=»Megan May» <(256) 428-6132>
channel => 26
callerid=»Suzy Queue» <(256) 428-6233>
channel => 27
callerid=»Larry Moe» <(256) 428-6234>
channel => 28
Sample PRI (CPE) config: Specify the switchtype, the signalling as either
pri_cpe or pri_net for CPE or Network termination, and generally you will
want to create a single «group» for all channels of the PRI.
switchtype cannot be changed on a reload.
switchtype = national
signalling = pri_cpe
group = 2
channel => 1-23
Used for distinctive ring support for x100p.
You can see the dringX patterns is to set any one of the dringXcontext fields
and they will be printed on the console when an inbound call comes in.
dringXrange is used to change the acceptable ranges for «tone offsets». Defaults to 10.
Note: a range of 0 is NOT what you might expect – it instead forces it to the default.
A range of -1 will force it to always match.
Anything lower than -1 would presumably cause it to never match.
dring1=95,0,0
dring1context=internal1
dring1range=10
dring2=325,95,0
dring2context=internal2
dring2range=10
If no pattern is matched here is where we go.
context=default
channel => 1
AMI alarm event reporting
reportalarms=channels
Possible values are:
channels – report each channel alarms (current behavior, default for backward compatibility)
spans – report an «SpanAlarm» event when the span of any configured channel is alarmed
all – report channel and span alarms (aggregated behavior)
none – do not report any alarms.
—————- Options for use with signalling=ss7 —————–
None of them can be changed by a reload.
Variant of SS7 signalling:
Options are itu and ansi
ss7type = itu
SS7 Called Nature of Address Indicator
unknown: Unknown
subscriber: Subscriber
national: National
international: International
dynamic: Dynamically selects the appropriate dialplan
ss7_called_nai=dynamic
SS7 Calling Nature of Address Indicator
unknown: Unknown
subscriber: Subscriber
national: National
international: International
dynamic: Dynamically selects the appropriate dialplan
ss7_calling_nai=dynamic
sample 1 for Germany
ss7_internationalprefix = 00
ss7_nationalprefix = 0
ss7_subscriberprefix =
ss7_unknownprefix =
This option is used to disable automatic sending of ACM when the call is started
in the dialplan. If you do use this option, you will need to use the Proceeding()
application in the dialplan to send ACM or enable ss7_autoacm below.
ss7_explicitacm=yes
Use this option to automatically send ACM when the call rings or is answered and
has not seen proceeding yet. If you use this option, you should disable ss7_explicitacm.
You may still use Proceeding() to explicitly send an ACM from the dialplan.
ss7_autoacm=yes
Create the linkset with all CICs in hardware remotely blocked state.
ss7_initialhwblo=yes
This option is whether or not to trust the remote echo control indication. This means
that in cases where echo control is reported by the remote end, we will trust them and
not enable echo cancellation on the call.
ss7_use_echocontrol=yes
This option is to set what our echo control indication is to the other end. Set to
yes to indicate that we are using echo cancellation or no if we are not.
ss7_default_echocontrol=yes
All settings apply to linkset 1
linkset = 1
Set the Signaling Link Code (SLC) for each sigchan.
If you manually set any you need to manually set all.
Should be defined before sigchan.
The default SLC starts with zero and increases for each defined sigchan.
slc=
Point code of the linkset. For ITU, this is the decimal number
format of the point code. For ANSI, this can either be in decimal
number format or in the xxx-xxx-xxx format
pointcode = 1
Point code of node adjacent to this signalling link (Possibly the STP between you and
your destination). Point code format follows the same rules as above.
adjpointcode = 2
Default point code that you would like to assign to outgoing messages (in case of
routing through STPs, or using A links). Point code format follows the same rules
as above.
defaultdpc = 3
Begin CIC (Circuit indication codes) count with this number
cicbeginswith = 1
What the MTP3 network indicator bits should be set to. Choices are
national, national_spare, international, international_spare
networkindicator=international
First signalling channel
sigchan = 48
Additional signalling channel for this linkset (So you can have a linkset
with two signalling links in it). It seems like a silly way to do it, but
for linksets with multiple signalling links, you add an additional sigchan
line for every additional signalling link on the linkset.
sigchan = 96
Channels to associate with CICs on this linkset
channel = 25-47
Set this option if you wish to send an Information Request Message (INR) request
if no calling party number is specified. This will attempt to tell the other end
to send it anyways. Should be defined after sigchan.
inr_if_no_calling=yes
Set this to set whether or not the originating access is (non) ISDN in the forward and
backward call indicators. Should be defined after sigchan
non_isdn_access=yes
This sets the number of binary places to shift the CIC when doing load balancing between
sigchans on a linkset. Should be defined after sigchan. Default 0
sls_shift = 0
Send custom cause_location value
Should be defined after sigchan. Default 1 (private local)
cause_location=1
SS7 timers (ISUP and MTP3) should be explicitly defined for each linkset to be used.
For a full list of supported timers and their default values (applicable for both ITU
and ANSI) see ss7.timers
Should be defined after sigchan
#include ss7.timers
For more information on setting up SS7, see the README file in libss7 or
https://wiki.asterisk.org/wiki/display/AST/Signaling+System+Number+7
—————– SS7 Options —————————————-
—————- Options for use with signalling=mfcr2 ————–
MFC-R2 signaling has lots of variants from country to country and even sometimes
minor variants inside the same country. The only mandatory parameters here are:
mfcr2_variant, mfcr2_max_ani and mfcr2_max_dnis.
IT IS RECOMMENDED that you leave the default values (leaving it commented) for the
other parameters unless you have problems or you have been instructed to change some
parameter. OpenR2 library uses the mfcr2_variant parameter to try to determine the
best defaults for your country, also refer to the OpenR2 package directory
doc/asterisk/ where you can find sample configurations for some countries. If you
want to contribute your configs for a particular country send them to the e-mail
of the primary OpenR2 developer that you can find in the AUTHORS file of the OpenR2 package
MFC/R2 variant. This depends on the OpenR2 supported variants
A list of values can be found by executing the openr2 command r2test -l
some valid values are:
ar (Argentina)
br (Brazil)
mx (Mexico)
ph (Philippines)
itu (per ITU spec)
mfcr2_variant=mx
Max amount of ANI to ask for
mfcr2_max_ani=10
Max amount of DNIS to ask for
mfcr2_max_dnis=4
whether or not to get the ANI before getting DNIS.
some telcos require ANI first some others do not care
if this go wrong, change this value
mfcr2_get_ani_first=no
Caller Category to send
national_subscriber
national_priority_subscriber
international_subscriber
international_priority_subscriber
collect_call
usually national_subscriber works just fine
you can change this setting from the dialplan
by setting the variable MFCR2_CATEGORY
(remember to set _MFCR2_CATEGORY from originating channels)
MFCR2_CATEGORY will also be a variable available in your context
on incoming calls set to the value received from the far end
mfcr2_category=national_subscriber
Call logging is stored at the Asterisk
logging directory specified in asterisk.conf
plus mfcr2/<whatever you put here>
if you specify ‘span1’ here and asterisk.conf has
as logging directory /var/log/asterisk then the full
path to your MFC/R2 call logs will be /var/log/asterisk/mfcr2/span1
(the directory will be automatically created if not present already)
remember to set mfcr2_call_files=yes
mfcr2_logdir=span1
whether or not to drop call files into mfcr2_logdir
mfcr2_call_files=yes|no
MFC/R2 valid logging values are: all,error,warning,debug,notice,cas,mf,stack,nothing
error,warning,debug and notice are self-descriptive
‘cas’ is for logging ABCD CAS tx and rx
‘mf’ is for logging of the Multi Frequency tones
‘stack’ is for very verbose output of the channel and context call stack, only useful
if you are debugging a crash or want to learn how the library works. The stack logging
will be only enabled if the openr2 library was compiled with -DOR2_TRACE_STACKS
You can mix up values, like: loglevel=error,debug,mf to log just error, debug and
multi frequency messages
‘all’ is a special value to log all the activity
‘nothing’ is a clean-up value, in case you want to not log any activity for
a channel or group of channels
BE AWARE that the level of output logged will ALSO depend on
the value you have in logger.conf, if you disable output in logger.conf
then it does not matter you specify ‘all’ here, nothing will be logged
so logger.conf has the last word on what is going to be logged
mfcr2_logging=all
MFC/R2 value in milliseconds for the MF timeout. Any negative value
means ‘default’, smaller values than 500ms are not recommended
and can cause malfunctioning. If you experience protocol error
due to MF timeout try incrementing this value in 500ms steps
mfcr2_mfback_timeout=-1
MFC/R2 value in milliseconds for the metering pulse timeout.
Metering pulses are sent by some telcos for some R2 variants
during a call presumably for billing purposes to indicate costs,
however this pulses use the same signal that is used to indicate
call hangup, therefore a timeout is sometimes required to distinguish
between a *real* hangup and a billing pulse that should not
last more than 500ms, If you experience call drops after some
minutes of being stablished try setting a value of some ms here,
values greater than 500ms are not recommended.
BE AWARE that choosing the proper protocol mfcr2_variant parameter
implicitly sets a good recommended value for this timer, use this
parameter only when you *really* want to override the default, otherwise
just comment out this value or put a -1
Any negative value means ‘default’.
mfcr2_metering_pulse_timeout=-1
Brazil uses a special calling party category for collect calls (llamadas por cobrar)
instead of using the operator (as in Mexico). The R2 spec in Brazil says a special GB tone
should be used to reject collect calls. If you want to ALLOW collect calls specify ‘yes’,
if you want to BLOCK collect calls then say ‘no’. Default is to block collect calls.
(see also ‘mfcr2_double_answer’)
mfcr2_allow_collect_calls=no
This feature is related but independent of mfcr2_allow_collect_calls
Some PBX’s require a double-answer process to block collect calls, if
you ever have problems blocking collect calls using Group B signals (mfcr2_allow_collect_calls=no)
then you may want to try with mfcr2_double_answer=yes, this will cause that every answer signal
is changed by answer->clear back->answer (sort of a flash)
(see also ‘mfcr2_allow_collect_calls’)
mfcr2_double_answer=no
This feature allows to skip the use of Group B/II signals and go directly
to the accepted state for incoming calls
mfcr2_immediate_accept=no
You most likely dont need this feature. Default is yes.
When this is set to yes, all calls that are offered (incoming calls) which
DNIS is valid (exists in extensions.conf) and pass collect call validation
will be accepted with a Group B tone (either call with charge or not, depending on mfcr2_charge_calls)
with this set to ‘no’ then the call will NOT be accepted on offered, and the call will start its
execution in extensions.conf without being accepted until the channel is answered (either with Answer() or
any other application resulting in the channel being answered).
This can be set to ‘no’ if your telco or PBX needs the hangup cause to be set accurately
when this option is set to no you must explicitly accept the call with DAHDIAcceptR2Call
or implicitly through the Answer() application.
mfcr2_accept_on_offer=yes
Skip request of calling party category and ANI
you need openr2 >= 1.2.0 to use this feature
mfcr2_skip_category=no
WARNING: advanced users only! I really mean it
this parameter is commented by default because
YOU DON’T NEED IT UNLESS YOU REALLY GROK MFC/R2
READ COMMENTS on doc/r2proto.conf in openr2 package
for more info
mfcr2_advanced_protocol_file=/path/to/r2proto.conf
Brazil use a special signal to force the release of the line (hangup) from the
backward perspective. When mfcr2_forced_release=no, the normal clear back signal
will be sent on hangup, which is OK for all mfcr2 variants I know of, except for
Brazilian variant, where the central will leave the line up for several seconds (30, 60)
which sometimes is not what people really want. When mfcr2_forced_release=yes, a different
signal will be sent to hangup the call indicating that the line should be released immediately
mfcr2_forced_release=no
Whether or not report to the other end ‘accept call with charge’
This setting has no effect with most telecos, usually is safe
leave the default (yes), but once in a while when interconnecting with
old PBXs this may be useful.
Concretely this affects the Group B signal used to accept calls
The application DAHDIAcceptR2Call can also be used to decide this
in the dial plan in a per-call basis instead of doing it here for all calls
mfcr2_charge_calls=yes
—————- END of options to be used with signalling=mfcr2
Configuration Sections
~~~~~~~~~~~~~~~~~~~~~~
You can also configure channels in a separate chan_dahdi.conf section. In
this case the keyword ‘channel’ is not used. Instead the keyword
‘dahdichan’ is used (as in users.conf) – configuration is only processed
in a section where the keyword dahdichan is used. It will only be
processed in the end of the section. Thus the following section:
[phones]
echocancel = 64
dahdichan = 1-8
group = 1
Is somewhat equivalent to the following snippet in the section
[channels]:
echocancel = 64
group = 1
channel => 1-8
ANEXO B
FEATURES.CONF
Sample Call Features (transfer, monitor/mixmonitor, etc) configuration
Note: From Asterisk 12 – All parking lot configuration is now done in res_parking.conf
[general]
transferdigittimeout => 3 Number of seconds to wait between digits when transferring a call
(default is 3 seconds)
xfersound = beep to indicate an attended transfer is complete
xferfailsound = beeperr to indicate a failed transfer
pickupexten = *8 Configure the pickup extension. (default is *8)
pickupsound = beep to indicate a successful pickup (default: no sound)
pickupfailsound = beeperr to indicate that the pickup failed (default: no sound)
featuredigittimeout = 1000 Max time (ms) between digits for
feature activation (default is 1000 ms)
recordingfailsound = beeperr indicates that a one-touch monitor or one-touch mixmonitor feature failed
to be applied to the call. (default: no sound)
atxfernoanswertimeout = 15 Timeout for answer on attended transfer default is 15 seconds.
atxferdropcall = no If someone does an attended transfer, then hangs up before the transfer
target answers, then by default, the system will try to call back the
person that did the transfer. If this is set to «yes», the ringing
transfer target is immediately transferred to the transferee.
atxferloopdelay = 10 Number of seconds to sleep between retries (if atxferdropcall = no)
atxfercallbackretries = 2 Number of times to attempt to send the call back to the transferer.
By default, this is 2.
transferdialattempts = 3 Number of times that a transferer may attempt to dial an extension before
being kicked back to the original call.
transferretrysound = «beep» Sound to play when a transferer fails to dial a valid extension.
transferinvalidsound = «beeperr» Sound to play when a transferer fails to dial a valid extension and is out of retries.
atxferabort = *1 cancel the attended transfer
atxfercomplete = *2 complete the attended transfer, dropping out of the call
atxferthreeway = *3 complete the attended transfer, but stay in the call. This will turn the call into a multi-party bridge
atxferswap = *4 swap to the other party. Once an attended transfer has begun, this options may be used multiple times
Note that the DTMF features listed below only work when two channels have answered and are bridged together.
They can not be used while the remote party is ringing or in progress. If you require this feature you can use
chan_local in combination with Answer to accomplish it.
[featuremap]
blindxfer => #1 Blind transfer (default is #) — Make sure to set the T and/or t option in the Dial() or Queue() app call!
disconnect => *0 Disconnect (default is *) — Make sure to set the H and/or h option in the Dial() or Queue() app call!
automon => *1 One Touch Record a.k.a. Touch Monitor — Make sure to set the W and/or w option in the Dial() or Queue() app call!
atxfer => *2 Attended transfer — Make sure to set the T and/or t option in the Dial() or Queue() app call!
parkcall => #72 Park call (one step parking) — Make sure to set the K and/or k option in the Dial() app call!
automixmon => *3 One Touch Record a.k.a. Touch MixMonitor — Make sure to set the X and/or x option in the Dial() or Queue() app call!
[applicationmap]
Note that the DYNAMIC_FEATURES channel variable must be set to use the features
defined here. The value of DYNAMIC_FEATURES should be the names of the features
to allow the channel to use separated by ‘#’. For example:
Set(__DYNAMIC_FEATURES=myfeature1#myfeature2#myfeature3)
(Note: The two leading underscores allow these feature settings to be set
on the outbound channels, as well. Otherwise, only the original channel
will have access to these features.)
The syntax for declaring a dynamic feature is any of the following:
<FeatureName> => <DTMF_sequence>,<ActivateOn>[/<ActivatedBy>],<Application>[,<AppArguments>[,MOH_Class]]
<FeatureName> => <DTMF_sequence>,<ActivateOn>[/<ActivatedBy>],<Application>[,»<AppArguments>»[,MOH_Class]]
<FeatureName> => <DTMF_sequence>,<ActivateOn>[/<ActivatedBy>],<Application>([<AppArguments>])[,MOH_Class]
FeatureName -> This is the name of the feature used when setting the
DYNAMIC_FEATURES variable to enable usage of this feature.
DTMF_sequence -> This is the key sequence used to activate this feature.
ActivateOn -> This is the channel of the call that the application will be executed
- Valid values are «self» and «peer». «self» means run the
application on the same channel that activated the feature. «peer»
means run the application on the opposite channel from the one that
has activated the feature.
ActivatedBy -> ActivatedBy is no longer honored. The feature is activated by which
channel DYNAMIC_FEATURES includes the feature is on. Use a pre-dial
handler to set different values for DYNAMIC_FEATURES on the channels.
Historic values are: «caller», «callee», and «both».
Application -> This is the application to execute.
AppArguments -> These are the arguments to be passed into the application. If you need
commas in your arguments, you should use either the second or third
syntax, above.
MOH_Class -> This is the music on hold class to play while the idle
channel waits for the feature to complete. If left blank,
no music will be played.
IMPORTANT NOTE: The applicationmap is not intended to be used for all Asterisk
applications. When applications are used in extensions.conf, they are executed
by the PBX core. In this case, these applications are executed outside of the
PBX core, so it does *not* make sense to use any application which has any
concept of dialplan flow. Examples of this would be things like Goto,
Background, WaitExten, and many more. The exceptions to this are Gosub and
Macro routines which must complete for the call to continue.
Enabling these features means that the PBX needs to stay in the media flow and
media will not be re-directed if DTMF is sent in the media stream.
Example Usage:
testfeature => #9,peer,Playback,tt-monkeys Allow both the caller and callee to play
tt-monkeys to the opposite channel
Set arbitrary channel variables, based upon CALLERID number (Note that the application
argument contains commas)
retrieveinfo => #8,peer,Set(ARRAY(CDR(mark),CDR(name))=${ODBC_FOO(${CALLERID(num)})})
pauseMonitor => #1,self/callee,Pausemonitor Allow the callee to pause monitoring
on their channel
unpauseMonitor => #3,self/callee,UnPauseMonitor Allow the callee to unpause monitoring
on their channel
Dynamic Feature Groups:
Dynamic feature groups are groupings of features defined in [applicationmap]
that can have their own custom key mappings. To give a channel access to a dynamic
feature group, add the group name to the value of the DYNAMIC_FEATURES variable.
example:
[myGroupName] defines the group named myGroupName
testfeature => #9 associates testfeature with the group and the keycode ‘#9’.
pauseMonitor => associates pauseMonitor with the group and uses the keycode specified
in the [applicationmap].
ANEXO C
IAX.CONF GENERAL SECTION
Inter-Asterisk eXchange v2 (IAX2) Channel Driver configuration
This configuration is read when the chan_iax2.so module is loaded, and is
re-read when the module is reloaded, such as when invoking the CLI command:
*CLI> iax2 reload
General settings, like port number to bind to, and an option address (the
default is to bind to all local addresses).
[general]
Listener Addresses
Use the ‘bindaddr’ and ‘bindport’ options to specify on which address and port
the IAX2 channel driver will listen for incoming requests.
bindport=4569 The default port to listen on
NOTE: bindport must be specified BEFORE bindaddr or
may be specified on a specific bindaddr if followed by
colon and port (e.g. bindaddr=192.168.0.1:4569) or for
IPv6 the address needs to be in brackets then colon
and port (e.g. bindaddr=[2001:db8::1]:4569).
bindaddr=192.168.0.1 You can specify ‘bindaddr’ more than once to bind to
multiple addresses, but the first will be the
default. IPv6 addresses are accepted.
Set ‘iaxcompat’ to yes if you plan to use layered switches or some other
scenario which may cause some delay when doing a lookup in the dialplan. It
incurs a small performance hit to enable it. This option causes Asterisk to
spawn a separate thread when it receives an IAX2 DPREQ (Dialplan Request)
instead of blocking while it waits for a response.
Accepted values: yes, no
Default value: no
iaxcompat=yes
Disable UDP checksums (if nochecksums is set, then no checkums will
be calculated/checked on systems supporting this feature)
Accepted values: yes, no
Default value: no
nochecksums=yes
For increased security against brute force password attacks enable
‘delayreject’ which will delay the sending of authentication reject for REGREQ
or AUTHREP if there is a password.
Accepted values: yes, no
Default value: no
delayreject=yes
You may specify a global default AMA flag for iaxtel calls. These flags are
used in the generation of call detail records.
Accepted values: default, omit, billing, documentation
Default value: default
amaflags=billing
ADSI (Analog Display Services Interface) can be enabled if you have (or may
have) ADSI compatible CPE equipment.
Accepted values: yes, no
Default value: no
adsi=yes
Whether or not to perform an SRV lookup on outbound calls.
Accepted values: yes, no
Default value: no
srvlookup=yes
You may specify a default account for Call Detail Records (CDRs) in addition to
specifying on a per-user basis.
Accepted values: Any string value up to 19 characters in length
Default value: <empty>
accountcode=lss0101
You may specify a global default language for users. This can be specified
also on a per-user basis. If omitted, will fallback to English (en).
Accepted values: A language tag such as ‘en’ or ‘es’
Default value: en
language=en
This option specifies a preference for which music-on-hold class this channel
should listen to when put on hold if the music class has not been set on the
channel with Set(CHANNEL(musicclass)=whatever) in the dialplan, and the peer
channel putting this one on hold did not suggest a music class.
If this option is set to «passthrough», then the hold message will always be
passed through as signalling instead of generating hold music locally.
This option may be specified globally, or on a per-user or per-peer basis.
Accepted values: passthrough, or any music-on-hold class name
Default value: <empty>
mohinterpret=default
The ‘mohsuggest’ option specifies which music on hold class to suggest to the
peer channel when this channel places the peer on hold. It may be specified
globally or on a per-user or per-peer basis.
mohsuggest=default
Specify bandwidth of low, medium, or high to control which codecs are used
in general.
bandwidth=low
You can also fine tune codecs here using «allow» and «disallow» clauses with
specific codecs. Use «all» to represent all formats.
allow=all
disallow=g723.1
disallow=lpc10
allow=gsm
Jitter Buffer
You can adjust several parameters relating to the jitter buffer. The jitter
buffer’s function is to compensate for varying network delay.
All of the jitter buffer settings are in milliseconds. The jitter buffer
works for INCOMING audio only – the outbound audio will be dejittered by the
jitter buffer at the other end.
jitterbuffer=yes|no: global default as to whether you want
the jitter buffer at all.
maxjitterbuffer: a maximum size for the jitter buffer.
Setting a reasonable maximum here will prevent the call delay
from rising to silly values in extreme situations you’ll hear
SOMETHING, even though it will be jittery.
resyncthreshold: when the jitterbuffer notices a significant change in delay
that continues over a few frames, it will resync, assuming that the change in
delay was caused by a timestamping mix-up. The threshold for noticing a
change in delay is measured as twice the measured jitter plus this resync
threshold.
Resyncing can be disabled by setting this parameter to -1.
maxjitterinterps: the maximum number of interpolation frames the jitterbuffer
should return in a row. Since some clients do not send CNG/DTX frames to
indicate silence, the jitterbuffer will assume silence has begun after
returning this many interpolations. This prevents interpolating throughout
a long silence.
jittertargetextra: number of milliseconds by which the new jitter buffer
will pad its size. the default is 40, so without modification, the new
jitter buffer will set its size to the jitter value plus 40 milliseconds.
increasing this value may help if your network normally has low jitter,
but occasionally has spikes.
jitterbuffer=no
maxjitterbuffer=1000
maxjitterinterps=10
resyncthreshold=1000
jittertargetextra=40
IAX2 Encryption
Enable IAX2 encryption. The default is no.
encryption=yes
Force encryption insures no connection is established unless both sides
support encryption. By turning this option on, encryption is automatically
turned on as well. The default is no.
forceencryption=yes
This option defines the maximum payload in bytes an IAX2 trunk can support at
a given time. The best way to explain this is to provide an example. If the
maximum number of calls to be supported is 800, and each call transmits 20ms
frames of audio using ulaw:
(8000hz / 1000ms) * 20ms * 1 byte per sample = 160 bytes per frame
The maximum load in bytes is:
(160 bytes per frame) * (800 calls) = 128000 bytes
Once this limit is reached, calls may be dropped or begin to lose audio.
Depending on the codec in use and number of channels to be supported this value
may need to be raised, but in most cases the default value is large enough.
trunkmaxsize = 128000 defaults to 128000 bytes, which supports up to 800
calls of ulaw at 20ms a frame.
With a large amount of traffic on IAX2 trunks, there is a risk of bad voice
quality when allowing the Linux system to handle fragmentation of UDP packets.
Depending on the size of each payload, allowing the OS to handle fragmentation
may not be very efficient. This setting sets the maximum transmission unit for
IAX2 UDP trunking. The default is 1240 bytes which means if a trunk’s payload
is over 1240 bytes for every 20ms it will be broken into multiple 1240 byte
messages. Zero disables this functionality and let’s the OS handle
fragmentation.
trunkmtu = 1240 trunk data will be sent in 1240 byte messages.
trunkfreq sets how frequently trunk messages are sent in milliseconds. This
value is 20ms by default, which means the trunk will send all the data queued
to it in the past 20ms. By increasing the time between sending trunk messages,
the trunk’s payload size will increase as well. Note, depending on the size
set by trunkmtu, messages may be sent more often than specified. For example
if a trunk’s message size grows to the trunkmtu size before 20ms is reached
that message will be sent immediately. Acceptable values are between 10ms and
1000ms.
trunkfreq=20 How frequently to send trunk msgs (in ms). This is 20ms by
default.
Should we send timestamps for the individual sub-frames within trunk frames?
There is a small bandwidth use for these (less than 1kbps/call), but they
ensure that frame timestamps get sent end-to-end properly. If both ends of
all your trunks go directly to TDM, _and_ your trunkfreq equals the frame
length for your codecs, you can probably suppress these. The receiver must
also support this feature, although they do not also need to have it enabled.
trunktimestamps=yes
Minimum and maximum amounts of time that IAX2 peers can request as a
registration expiration interval (in seconds).
minregexpire = 60
maxregexpire = 60
IAX2 helper threads
Establishes the number of iax helper threads to handle I/O.
iaxthreadcount = 10
Establishes the number of extra dynamic threads that may be spawned to handle I/O
iaxmaxthreadcount = 100
We can register with another IAX2 server to let him know where we are
in case we have a dynamic IP address for example
Register with tormenta using username marko and password secretpass
register => marko:secretpass@tormenta.linux-support.net
Register joe at remote host with no password
register => joe@remotehost:5656
Register marko at tormenta.linux-support.net using RSA key «torkey»
register => marko:[torkey]@tormenta.linux-support.net
Sample Registration for iaxtel
Visit http://www.iaxtel.com to register with iaxtel. Replace «user»
and «pass» with your username and password for iaxtel. Incoming
calls arrive at the «s» extension of «default» context.
register => user:pass@iaxtel.com
Sample Registration for IAX2 + FWD
To register using IAX2 with FWD, it must be enabled by visiting the URL
http://www.fwdnet.net/index.php?section_id=112
Note that you need an extension in you default context which matches
your free world dialup number. Please replace «FWDNumber» with your
FWD number and «passwd» with your password.
register => FWDNumber:passwd@iax.fwdnet.net
Through the use of the res_stun_monitor module, Asterisk has the ability to detect when the
perceived external network address has changed. When the stun_monitor is installed and
configured, chan_iax will renew all outbound registrations when the monitor detects any sort
of network change has occurred. By default this option is enabled, but only takes effect once
res_stun_monitor is configured. If res_stun_monitor is enabled and you wish to not
generate all outbound registrations on a network change, use the option below to disable
this feature.
subscribe_network_change_event = yes on by default
You can enable authentication debugging to increase the amount of
debugging traffic.
authdebug = yes
See https://wiki.asterisk.org/wiki/display/AST/IP+Quality+of+Service for a description of these parameters.
tos=ef
cos=5
If regcontext is specified, Asterisk will dynamically create and destroy
a NoOp priority 1 extension for a given peer who registers or unregisters
with us. The actual extension is the ‘regexten’ parameter of the registering
peer or its name if ‘regexten’ is not provided. More than one regexten
may be supplied if they are separated by ‘&’. Patterns may be used in
regexten.
regcontext=iaxregistrations
If we don’t get ACK to our NEW within 2000ms, and autokill is set to yes,
then we cancel the whole thing (that’s enough time for one retransmission
only). This is used to keep things from stalling for a long time for a host
that is not available, but would be ill advised for bad connections. In
addition to ‘yes’ or ‘no’ you can also specify a number of milliseconds.
See ‘qualify’ for individual peers to turn on for just a specific peer.
autokill=yes
codecpriority controls the codec negotiation of an inbound IAX2 call.
This option is inherited to all user entities. It can also be defined
in each user entity separately which will override the setting in general.
The valid values are:
caller – Consider the callers preferred order ahead of the host’s.
host – Consider the host’s preferred order ahead of the caller’s.
disabled – Disable the consideration of codec preference altogether.
(this is the original behaviour before preferences were added)
reqonly – Same as disabled, only do not consider capabilities if
the requested format is not available the call will only
be accepted if the requested format is available.
The default value is ‘host’
codecpriority=host
allowfwdownload controls whether this host will serve out firmware to
IAX2 clients which request it. This has only been used for the IAXy,
and it has been recently proven that this firmware distribution method
can be used as a source of traffic amplification attacks. Also, the
IAXy firmware has not been updated for at least 18 months, so unless
you are provisioning IAXys in a secure network, we recommend that you
leave this option to the default, off.
allowfwdownload=yes
rtcachefriends=yes Cache realtime friends by adding them to the internal list
just like friends added from the config file only on a
as-needed basis? (yes|no)
rtsavesysname=yes Save systemname in realtime database at registration
Default = no
rtupdate=yes Send registry updates to database using realtime? (yes|no)
If set to yes, when a IAX2 peer registers successfully,
the IP address, the origination port, the registration period,
and the username of the peer will be set to database via realtime.
If not present, defaults to ‘yes’.
rtautoclear=yes Auto-Expire friends created on the fly on the same schedule
as if it had just registered? (yes|no|<seconds>)
If set to yes, when the registration expires, the friend will
vanish from the configuration until requested again.
If set to an integer, friends expire within this number of
seconds instead of the registration interval.
rtignoreregexpire=yes When reading a peer from Realtime, if the peer’s registration
has expired based on its registration interval, used the stored
address information regardless. (yes|no)
parkinglot=edvina Default parkinglot for IAX2 peers and users
This can also be configured per device
Parkinglots are defined in features.conf
The following two options are used to disable call token validation for the
purposes of interoperability with IAX2 endpoints that do not yet support it.
Call token validation can be set as optional for a single IP address or IP
address range by using the ‘calltokenoptional’ option. ‘calltokenoptional’ is
only a global option.
calltokenoptional=209.16.236.73/255.255.255.0
By setting ‘requirecalltoken=no’, call token validation becomes optional for
that peer/user. By setting ‘requirecalltoken=auto’, call token validation
is optional until a call token supporting peer registers successfully using
call token validation. This is used as an indication that from now on, we
can require it from this peer. So, requirecalltoken is internally set to yes.
requirecalltoken may only be used in peer/user/friend definitions,
not in the global scope.
By default, ‘requirecalltoken=yes’.
requirecalltoken=no
Maximum time allowed for call token authentication handshaking. Default is 10 seconds.
Use higher values in lagged or high packet loss networks.
calltokenexpiration=10
These options are used to limit the amount of call numbers allocated to a
single IP address. Before changing any of these values, it is highly encouraged
to read the user guide associated with these options first. In most cases, the
default values for these options are sufficient.
The ‘maxcallnumbers’ option limits the amount of call numbers allowed for each
individual remote IP address. Once an IP address reaches it’s call number
limit, no more new connections are allowed until the previous ones close. This
option can be used in a peer definition as well, but only takes effect for
the IP of a dynamic peer after it completes registration.
maxcallnumbers=512
The ‘maxcallnumbers_nonvalidated’ is used to set the combined number of call
numbers that can be allocated for connections where call token validation
has been disabled. Unlike the ‘maxcallnumbers’ option, this limit is not
separate for each individual IP address. Any connection resulting in a
non-call token validated call number being allocated contributes to this
limit. For use cases, see the call token user guide. This option’s
default value of 8192 should be sufficient in most cases.
maxcallnumbers_nonvalidated=1024
The [callnumberlimits] section allows custom call number limits to be set
for specific IP addresses and IP address ranges. These limits take precedence
over the global ‘maxcallnumbers’ option, but may still be overridden by a
peer defined ‘maxcallnumbers’ entry. Note that these limits take effect
for every individual address within the range, not the range as a whole.
ANEXO D
SIP Configuration – general
The [general] section of sip.conf includes the following variables:
allowsubscribe = yes|no : Allow or Ignore Subscribe requests
allow = <codec> : Allow codecs in order of preference (Use DISALLOW=ALL first, before allowing other codecs)
disallow = all : Disallow all codecs (global configuration)
allowexternaldomains = yes|no : Enable/Disable INVITE and REFER to non-local domains. Default yes. (New in v1.2.x).
allowguest = yes|no : Allow or reject guest calls. Default is yes. (this can also be set to ‘osp’ if asterisk was compiled with OSP support). (New in v1.2.x).
allowoverlap = yes|no : Enable/disable overlap dialing support. Default yes (Overlap dial provides for a longer time-out period between digits, also called the inter-digit timer. With overlap dial set to off, the gateway expects to receive the digits one right after the other coming in to this line with very little delay between digits. With overlap dial set to on, then the device waits up to about 2 seconds between digits).
autocreatepeer = yes|no : If set, anyone will be able to log in as a peer (with no check of credentials; useful for operation with SER). Default no.
autodomain = yes|no : Enable/disable Asterisk’s ability to add local hostnames and local IP address to the domain list. externip or externhost are also taken into the domain list. Default no. (New in v1.2.x).
bindaddr = IP_Address : IP Address to bind to (listen on). Default 0.0.0.0 (all network interfaces).
bindport = Number : UDP Port to bind to (listen on). Used to be port in Asterisk v1.0.x. Default 5060.
callerid = <string> : Caller ID information used when nothing else is available. Defaults to asterisk. (The ability to override the default appears to available in Asterisk 1.0.9. Unsure about other versions.)
canreinvite = update|yes|no|nonat (global setting): For some reason this defaults to yes, so beware…
checkmwi = Number : Global interval (in seconds) between mailbox checks. Default 10 seconds. (New in v1.2.x)
compactheaders = yes|no : Indicates Asterisk should send compact (i.e. abbreviated) headers in the SIP messages. Default no. (New in v1.2.x)
context = <contextname> : This is the default context and is used when a endpoint has no context property. The context in section of an endpoint is used to route calls from that endpoint to the wanted destination. The context body is located in extensions.conf.
defaultexpiry= Number : Default duration (in seconds) of incoming/outgoing registration. Default 120 seconds.
domain = domains : Comma separated list of domains which Asterisk is responsible for. (New in Asterisk 1.2.x)
dtmfmode = inband|info|rfc2833 (global setting). Default rfc2833. Warning: inband very high CPU load.
dumphistory = yes|no : Enable support for dumping of SIP conversation’s transaction history to LOG_DEBUG. Default no. (New in v1.2.x)
externip = IP_Address or a hostname : Address that we’re going to put in SIP messages if we’re behind a NAT. If a hostname is used as the value, then the IP address associated with the hostname is looked up only once during the reading of the sip.conf. If you want support for a hostname associated with a dynamic IP address, use externhost.
externhost = hostname.tld : (New in Asterisk 1.2.x)
externrefresh = Number : Specify how often (in seconds) a hostname DNS lookup should be performed for the value entered in ‘externhost’. Default 10 seconds. (New in Asterisk 1.2.x).
fromdomain = <domain> : Sets default From: domain in SIP messages when acting as a SIP UAC (client)
ignoreregexpire = yes|no : Indicates whether to use Contact information about a peer even if the information is stale because it has reached its expiration time. Default no. (New in v1.2.x)
jbenable = yes|no : Enables the use of a jitterbuffer on the receiving side of a SIP channel. (Added in Version 1.4)
jbforce = yes|no : Forces the use of a jitterbuffer on the receive side of a SIP channel. Defaults to “no”. (Added in Version 1.4)
jbmaxsize = Number : Max length of the jitterbuffer in milliseconds. (Added in Version 1.4)
jbresyncthreshold = Number : Jump in the frame timestamps over which the jitterbuffer is resynchronized. Useful to improve the quality of the voice, with big jumps in/broken timestamps, usually sent from exotic devices and programs. Defaults to 1000. (Added in Version 1.4)
jbimpl = fixed|adaptive: Jitterbuffer implementation, used on the receiving side of a SIP channel. Two implementations are currently available – “fixed” (with size always equals to jbmaxsize) and “adaptive” (with variable size, actually the new jb of IAX2). Defaults to fixed. (Added in Version 1.4)
jblog = no|yes: Enables jitterbuffer frame logging. Defaults to “no”. (Added in Version 1.4)
language = <string> : Default language used by any Playback()/Background().
limitonpeers = yes|no: If set to yes use only the peer call counter for both incoming and outgoing calls (ref. hints, subscriptions, BLF; added in 1.4)
localnet = NetAddress/Netmask : local network and mask.
insecure = very|yes|no|invite|port : Specifies how to handle connections with peers. Default no (authenticate all connections). invite and port added in v1.2.x, yes and very removed in v1.6.x, possible to use multiple options separated by commas from v1.4.x
maxexpiry = Number : Max duration (in seconds) of incoming registration we allow. Default 3600 seconds.
musicclass = one of the classes specified in musiconhold.conf
musdiconhold = same as musicclass
nat = yes|no : Please note that as of Asterisk 1.0.x nat can now have the values: yes|no|never|route. Default no which really means to use rfc3581 techniques.
notifymimetype = mediatype/subtype : Allow overriding of mime type in MWI NOTIFY used in Asterisk cmd VoiceMail2 online messages. Valid MIME types can be found here. Default application/simple-message-summary. (New in v1.2.x).
notifyringing = yes|no : Notify subscription on RINGING state. Default yes. (New in v1.2.x).
outboundproxy = IP_address or DNS SRV name (excluding the _sip._udp prefix) : SRV name, hostname, or IP address of the outbound SIP Proxy. (New in v1.2.x).
outboundproxyport = Number : UDP port number for the Outbound SIP Proxy. (New in v1.2.x).
pedantic = yes|no : Enable slow, pedantic checking of Call-ID:s, multiline SIP headers and URI-encoded headers. Default no (in Asterisk 1.8 default yes).
port = <portno> : Default SIP port of peer. (this is not the port for Asterisk to listen. See bindport).
progressinband = never|no|yes : If we should generate in-band ringing always. Default never.
promiscredir= yes|no : Allows support for 302 Redirects; (Note: will redirect them all to the local extension returned in Contact rather than to that extension at the destination). Default no.
qualify = yes|no|milliseconds : Check if client is reachable. If yes, the checks occur every 60 seconds. Default no.
realm = my realm (Change authentication realm from asterisk (default) to your own. Requires Asterisk v1.x)
recordhistory = yes|no. Enable logging of SIP conversation’s transaction history. Default no. (New in v1.2.x).
regcontext = context : Default context to use for SIP REGISTER replies from the SIP Registrar.
register => <username>:<password>:[authid]@<sip client/peer id in sip.conf>/<contact> :Register with a SIP provider
registerattempts = Number : Number of SIP REGISTER messages to send to a SIP Registrar before giving up. Default 0 (no limit). (New in v1.2.x).
registertimeout = Number : Number of seconds to wait for a response from a SIP Registrar before classifying the SIP REGISTER has timed out. Default 20 seconds. (New in v1.2.x).
relaxdtmf = yes|no: Default no.
rtautoclear = yes|no|number : Auto-Expire friends created on the fly. If yes the autoexpire will be in 120 seconds. Default yes. (New in v1.2.x). Buggy up to 1.4.19, see bug 12707
rtcachefriends = yes|no : Cache realtime friends by adding them to the internal list just like friends added from the config file. Default no. (New in v1.2.x). Buggy up to 1.4.19, see bug 12707
rtsavesysname = yes|no : If set will write the value of asterisk.conf (options) systemname to the sip peer table in the field “regserver”. Useful for multi-server systems. (New in v1.?)
rtpholdtimeout = Number : Max number of seconds of inactivity before terminating a call on hold. Default 0 (no limit). (New in v1.2.x).
rtpkeepalive = Number : Number of seconds, when a RTP Keepalive packet will be sent if no other RTP traffic on that connection. Default 0 (no RTP Keepalive). (New in v1.2.x).
rtptimeout = Number : Number of seconds, to wait for RTP traffic before classify the connection as discontinued. Default 0 (no RTP timeout). (New in v1.2.x).
rtupdate = yes|no : Send registry updates to the database when using Realtime support. Default yes. (New in v1.2.x).
sendrpid = yes|no : If a Remote-Party-ID SIP header should be sent. Default no.
sipdebug = yes|no. Default setting for whether SIP debug is enabled upon loading of the sip.conf. Default no. (New in v1.2.x).
srvlookup = yes|no : Enable DNS SRV lookups on calls. Default yes. (Default is no prior to v1.4.14)
tos = <value> : Set IP QoS parameters for outgoing media streams (numeric values are also accepted, like tos=184 )
trustrpid = yes|no : If Remote-Party-ID SIP header should be trusted. Default no.
useclientcode = yes|no : If yes, then the Call Originator as stated in the CDR will be changed to whatever is specified in a X-ClientCode SIP Header. Default no. (New in v1.2.x)
usereqphone = yes|no : Indicates whether to add a “;user=phone” to the URI. Default no. (New in v1.2.x)
useragent = <string> : Allow the SIP header “User-Agent” to be customized. Default asterisk.
videosupport = yes|no : Turn on support for SIP video (peer specific setting added in SVN Dec 21 2005, bug 5427. Default no.
vmexten = <string> : Dialplan extension to reach mailbox. Default asterisk. (New in v1.2.x)
callevents = yes|no: Set to yes to receive events on AMI when a call is put on/off hold.
disallowed_methods= (1.8.x) When a dialog is started with another SIP endpoint, the other endpoint should include an Allow header telling us what SIP methods the endpoint implements. However, some endpoints either do not include an Allow header or lie about what methods they implement. In the former case, Asterisk makes the assumption that the endpoint supports all known SIP methods. If you know that your SIP endpoint does not provide support for a specific method, then you may provide a comma-separated list of methods that your endpoint does not implement in the disallowed_methods option. Note that if your endpoint is truthful with its Allow header, then there is no need to set this option. This option may be set in the general section or may be set per endpoint. If this option is set both in the general section and in a peer section, then the peer setting completely overrides the general setting (i.e. the result is *not* the union of the two options). Note also that while Asterisk currently will parse an Allow header to learn what methods an endpoint supports, the only actual use for this currently is for determining if Asterisk may send connected line UPDATE requests. Its use may be expanded in the future.
preferred_codec_only= (1.8.x) Respond to a SIP invite with the single most preferred codec rather than advertising all joint codec capabilities. This limits the other side’s codec choice to exactly what we prefer.
engine= (1.8.x) RTP engine to use when communicating with the device
ANEXO E
Archivo VOICEMAIL.CONF
Voicemail Configuration
********* NOTICE ************************************************************
NOTE: Asterisk has to edit this file to change a user’s password. This does
not currently work with the «#include <file>» directive for Asterisk
configuration files, nor when using realtime static configuration.
Do not use them with this configuration file.
NOTE: Mailboxes defined by app_voicemail MUST be referenced by the rest
of the system as mailbox@context. The rest of the system cannot add
@default to mailbox identifiers for app_voicemail that do not specify a
context any longer. It is a mailbox identifier format that should only
be interpreted by app_voicemail.
********* NOTICE ************************************************************
[general]
Formats for writing Voicemail. Note that when using IMAP storage for
voicemail, only the first format specified will be used.
format=g723sf|wav49|wav
format=wav49|gsm|wav
WARNING:
If you change the list of formats that you record voicemail in
when you have mailboxes that contain messages, you _MUST_ absolutely
manually go through those mailboxes and convert/delete/add the
the message files so that they appear to have been stored using
your new format list. If you don’t do this, very unpleasant
things may happen to your users while they are retrieving and
manipulating their voicemail.
In other words: don’t change the format list on a production system
unless you are _VERY_ sure that you know what you are doing and are
prepared for the consequences.
Who the e-mail notification should appear to come from
serveremail=asterisk
serveremail=asterisk@linux-support.net
Should the email contain the voicemail as an attachment
attach=yes
Maximum number of messages per folder. If not specified, a default value
(100) is used. Maximum value for this option is 9999. If set to 0, a
mailbox will be greetings-only.
maxmsg=100
Maximum length of a voicemail message in seconds
maxsecs=180
Minimum length of a voicemail message in seconds for the message to be kept
The default is no minimum.
minsecs=3
Maximum length of greetings in seconds
maxgreet=60
How many milliseconds to skip forward/back when rew/ff in message playback
skipms=3000
How many seconds of silence before we end the recording
maxsilence=10
Silence threshold (what we consider silence: the lower, the more sensitive)
silencethreshold=128
Max number of failed login attempts
maxlogins=3
Move heard messages to the ‘Old’ folder automagically. Defaults to on.
moveheard=yes
Forward an urgent message as an urgent message. Defaults to no so
sender can set the urgency on the envelope of the forwarded message.
forward_urgent_auto=no
User context is where entries from users.conf are registered. The
default value is ‘default’
userscontext=default
If you need to have an external program, i.e. /usr/bin/myapp
called when a voicemail is left, delivered, or your voicemailbox
is checked, uncomment this.
externnotify=/usr/bin/myapp
If you would also like to enable SMDI notification then set smdienable to yes.
You will also need to make sure smdiport is set to a valid port as specified in
smdi.conf.
smdienable=yes
smdiport=/dev/ttyS0
If you need to have an external program, i.e. /usr/bin/myapp
called when a voicemail password is changed, uncomment this. The
arguments passed to the application are: <context> <mailbox> <newpassword>
Note: If this is set, the password will NOT be changed in voicemail.conf
If you would like to also change the password in voicemail.conf, use
the externpassnotify option below instead.
externpass=/usr/bin/myapp
externpassnotify=/usr/bin/myapp
If you would like to have an external program called when a user changes the
voicemail password for the purpose of doing validation on the new password,
then use this option. The script can decide whether or not the new password
meets minimum password strength requirements before the Voicemail application
accepts the password. If the script decides that the password is not acceptable,
the user will be informed that the new password does not meet minimum password
requirements, and they will be asked to enter another password.
The arguments passed to this script are <mailbox> <context> <old pw> <new pw>.
The script should print «VALID» to stdout to indicate that the new password
is acceptable. If the password is considered too weak, the script should print
«INVALID» to stdout.
There is an example script in the contrib/scripts/ directory, voicemailpwcheck.py,
which implements some basic password checking, and can be used as a starting point
for use with this option.
externpasscheck=/usr/local/bin/voicemailpwcheck.py
For the directory, you can override the intro file if you want
directoryintro=dir-intro
The character set for voicemail messages can be specified here
default: ISO-8859-1
charset=UTF-8
The ADSI feature descriptor number to download to
adsifdn=0000000F
The ADSI security lock code
adsisec=9BDBF7AC
The ADSI voicemail application version number.
adsiver=1
Skip the «[PBX]:» string from the message title
pbxskip=yes
Change the From: string
fromstring=The Asterisk PBX
Permit finding entries for forward/compose from the directory
usedirectory=yes
Voicemail can be stored in a database using the ODBC driver.
The value of odbcstorage is the database connection configured
in res_odbc.conf.
odbcstorage=asterisk
The default table for ODBC voicemail storage is voicemessages.
odbctable=voicemessages
Change the from, body and/or subject, variables:
VM_NAME, VM_DUR, VM_MSGNUM, VM_MAILBOX, VM_CALLERID, VM_CIDNUM,
VM_CIDNAME, VM_DATE
Additionally, on forwarded messages, you have the variables:
ORIG_VM_CALLERID, ORIG_VM_CIDNUM, ORIG_VM_CIDNAME, ORIG_VM_DATE
You can select between two variables by using dialplan functions, e.g.
${IF(${ISNULL(${ORIG_VM_DATE})}?${VM_DATE}:${ORIG_VM_DATE})}
Note: The emailbody config row can only be up to 8190 characters due to a
limitation in the Asterisk configuration subsystem. If compiled with
LOW_MEMORY the limit is 510 characters.
emailsubject=[PBX]: New message ${VM_MSGNUM} in mailbox ${VM_MAILBOX}
The following definition is very close to the default, but the default shows
just the CIDNAME, if it is not null, otherwise just the CIDNUM, or «an unknown
caller», if they are both null.
emailbody=Dear ${VM_NAME}:\n\n\tjust wanted to let you know you were just left a ${VM_DUR} long message (number ${VM_MSGNUM})\nin mailbox ${VM_MAILBOX} from ${VM_CALLERID}, on ${VM_DATE}, so you might\nwant to check it when you get a chance. Thanks!\n\n\t\t\t\t–Asterisk\n
Note: ${IF()} strips spacing at the beginning and end of its true and false
values, so a newline cannot be placed at either location. The word ‘so’ is
therefore duplicated, in order for the newline to be interpreted correctly.
emailbody=Dear ${VM_NAME}:\n\n\tjust wanted to let you know you were just ${IF($[«${VM_CIDNUM}» = «${ORIG_VM_CIDNUM}»]?left:forwarded)} a ${VM_DUR} long message (number ${VM_MSGNUM})\nin mailbox ${VM_MAILBOX} from ${VM_CALLERID}, on ${VM_DATE},\n${IF($[«${VM_CIDNUM}» = «${ORIG_VM_CIDNUM}»]?so:(originally sent by ${ORIG_VM_CALLERID} on ${ORIG_VM_DATE})\nso)} you might want to check it when you get a chance. Thanks!\n\n\t\t\t\t–Asterisk\n
You can also change the Pager From: string, the pager body and/or subject.
The above defined variables also can be used here
pagerfromstring=The Asterisk PBX
pagersubject=New VM
pagerbody=New ${VM_DUR} long msg in box ${VM_MAILBOX}\nfrom ${VM_CALLERID}, on ${VM_DATE}
Set the date format on outgoing mails. Valid arguments can be found on the
strftime(3) man page
Default
emaildateformat=%A, %B %d, %Y at %r
24h date format
emaildateformat=%A, %d %B %Y at %H:%M:%S
Default for pager use
pagerdateformat=%A, %B %d, %Y at %r
Short 24h date format for pager use
pagerdateformat=%T %D
Using the mailcmd option, you can specify what command is called for
outbound E-mail. The default is shown below.
mailcmd=/usr/sbin/sendmail -t
pollmailboxes=no If mailboxes are changed anywhere outside of app_voicemail,
then this option must be enabled for MWI to work. This
enables polling mailboxes for changes. Normally, it will
expect that changes are only made when someone called in
to one of the voicemail applications.
Examples of situations that would require this option are
web interfaces to voicemail or an email client in the case
of using IMAP storage.
Default: no
pollfreq=30 If the «pollmailboxes» option is enabled, this option
sets the polling frequency. The default is once every
30 seconds.
—————————————————————————–
IMAP configuration settings only
These settings are only applicable when Asterisk is compiled with IMAP support.
imapgreetings=no If using IMAP storage, specify whether voicemail greetings
should be stored via IMAP. If no, then greetings are stored
as if IMAP storage were not enabled.
greetingsfolder=INBOX If imapgreetings=yes, then specify which folder to store
your greetings in. If you do not specify a folder, then INBOX
will be used
imapparentfolder=INBOX Some IMAP server implementations store folders under INBOX
instead of using a top level folder (ex. INBOX/Friends). In
this case, user imapparentfolder to set the parent folder. For
example, Cyrus IMAP does NOT use INBOX as the parent. Default
is to have no parent folder set.
imapserver=localhost The address of the IMAP server
imapport=143 The port of the IMAP server
imapflags=ssl Optional flags to pass to the IMAP server in the IMAP mailbox
name. For example, setting this to ‘ssl’ will enable OpenSSL
encryption, assuming the IMAP libraries were compiled with
OpenSSL support.
imapfolder=INBOX The folder in which to store voicemail messages on the IMAP
server. By default, they are stored in INBOX.
authuser=user The master user to use for connecting to the IMAP server, if
the server is configured with a single user that has access to
all mailboxes
authpassword=password The password for the authuser, if used
imapopentimeout=60 The TCP open timeout (in seconds)
imapclosetimeout=60 The TCP close timeout (in seconds)
imapreadtimeout=60 The TCP read timeout (in seconds)
imapwritetimeout=60 The TCP write timeout (in seconds)
imap_poll_logout=no If pollmailboxes=yes, then specify whether need to
disconnect from the IMAP server after polling.
Default: no
—————————————————————————–
Each mailbox is listed in the form <mailbox>=<password>,<name>,<email>,<pager_email>,<options>
If email is specified, a message will be sent when a voicemail is received, to
the given mailbox, for each address listed (separated by |, ex. alice@foo.com|bob@foo.com).
If pager is specified, a message will be sent there as well. If the password
is prefixed by ‘-‘, then it is considered to be unchangeable.
Advanced options example is extension 4069
NOTE: All options can be expressed globally in the general section, and
overridden in the per-mailbox settings, unless listed otherwise.
tz=central Timezone from zonemessages below. Irrelevant if envelope=no.
locale=de_DE.UTF-8 set the locale for generation of the date/time strings (make
sure the locales are installed in your operating system e.g
on Debian Linux you can use «dpkg-reconfigure locales»).
If you use UTF-8 locales, make sure to set the «charset» option
to UTF-8 too. If you mix different locales for different users
you should avoid words in the emaildateformat specification, e.g.:
emaildateformat=%A, %d %B %Y, %H:%M:%S
attach=yes Attach the voicemail to the notification email *NOT* the pager email
attachfmt=wav49 Which format to attach to the email. Normally this is the
first format specified in the format parameter above, but this
option lets you customize the format sent to particular mailboxes.
Useful if Windows users want wav49, but Linux users want gsm.
[per-mailbox only]
saycid=yes Say the caller id information before the message. If not described,
or set to no, it will be in the envelope. When enabled, if a recorded file
with the same name as the caller id exists in
<astspooldir>/recordings/callerids, then that file will be played as a name
rather than saying each digit as a phone number.
cidinternalcontexts=intern Internal Context for Name Playback instead of
extension digits when saying caller id.
sayduration=no Turn on/off the duration information before the message. [ON by default]
saydurationm=2 Specify the minimum duration to say. Default is 2 minutes
dialout=fromvm Context to dial out from [option 4 from mailbox’s advanced menu].
If not specified, option 4 will not be listed and dialing out
from within VoiceMailMain() will not be permitted.
sendvoicemail=yes Allow the user to compose and send a voicemail while inside
VoiceMailMain() [option 5 from mailbox’s advanced menu].
If set to ‘no’, option 5 will not be listed.
searchcontexts=yes Current default behavior is to search only the default context
if one is not specified. The older behavior was to search all contexts.
This option restores the old behavior [DEFAULT=no]
Note: If you have this option enabled, then you will be required to have
unique mailbox names across all contexts. Otherwise, an ambiguity is created
since it is impossible to know which mailbox to retrieve when one is requested.
callback=fromvm Context to call back from
if not listed, calling the sender back will not be permitted
exitcontext=fromvm Context to go to on user exit such as * or 0
The default is the current context.
review=yes Allow sender to review/rerecord their message before saving it [OFF by default
operator=yes Allow sender to hit 0 before/after/during leaving a voicemail to
reach an operator. This option REQUIRES an ‘o’ extension in the
same context (or in exitcontext, if set), as that is where the
0 key will send you. [OFF by default]
envelope=no Turn on/off envelope playback before message playback. [ON by default]
This does NOT affect option 3,3 from the advanced options menu
delete=yes After notification, the voicemail is deleted from the server. [per-mailbox only]
This is intended for use with users who wish to receive their
voicemail ONLY by email. Note: «deletevoicemail» is provided as an
equivalent option for Realtime configuration.
alias=Bongo Use this additional string for comparison while looking
for a match in the Directory application. This option
may be specified multiple times to specify additional
strings [per-mailbox only]
volgain=0.0 Emails bearing the voicemail may arrive in a volume too
quiet to be heard. This parameter allows you to specify how
much gain to add to the message when sending a voicemail.
NOTE: sox must be installed for this option to work.
nextaftercmd=yes Skips to the next message after hitting 7 or 9 to delete/save current message.
forcename=yes Forces a new user to record their name. A new user is
determined by the password being the same as
the mailbox number. The default is «no».
forcegreetings=no This is the same as forcename, except for recording
greetings. The default is «no».
hidefromdir=yes Hide this mailbox from the directory produced by app_directory
The default is «no».
tempgreetwarn=yes Remind the user that their temporary greeting is set
passwordlocation=spooldir
Usually the voicemail password (vmsecret) is stored in
this configuration file. By setting this option you can
specify where Asterisk should read/write the vmsecret.
Supported options:
voicemail.conf:
This is the default option. The secret is read from
and written to voicemail.conf (or users.conf).
spooldir:
The secret is stored in a separate file in the user’s
voicemail spool directory in a file named secret.conf.
Please ensure that normal Linux users are not
permitted to access Asterisk’s spool directory as the
secret is stored in plain text. If a secret is not
found in this directory, the password in
voicemail.conf (or users.conf) will be used.
Note that this option does not affect password storage for
realtime users, which are still stored in the realtime
backend.
messagewrap=no Enable next/last message to wrap around to
first (from last) and last (from first) message
The default is «no».
minpassword=0 Enforce minimum password length
vm-login=custom_sound
Customize which sound file is used instead of the default
prompt that says: «Comedian Mail. Mailbox?»
vm-newuser=custom_sound
Customize which sound file is used instead of the default
prompt that says: «Welcome to Comedian Mail. First, I will
guide you through a short setup process.»
vm-password=custom_sound
Customize which sound file is used instead of the default
prompt that says: «password»
vm-newpassword=custom_sound
Customize which sound file is used instead of the default
prompt that says: «Please enter your new password followed by
the pound key.»
vm-passchanged=custom_sound
Customize which sound file is used instead of the default
prompt that says: «Your password has been changed.»
vm-reenterpassword=custom_sound
Customize which sound file is used instead of the default
prompt that says: «Please re-enter your password followed by
the pound key»
vm-mismatch=custom_sound
Customize which sound file is used instead of the default
prompt that says: «The passwords you entered and re-entered
did not match.»
vm-invalid-password=custom_sound
Customize which sound file is used instead of the default
prompt that says: …
vm-pls-try-again=custom_sound
Customize which sound file is used instead of the
default prompt that says «Please try again.»
vm-prepend-timeout=custom_sound
Customize which sound file is used when the user
times out while recording a prepend message instead
of the default prompt that says «then press pound»
note that this will currently follow vm-pls-try-again.
this behavior is subject to change in the near future.
listen-control-forward-key=# Customize the key that fast-forwards message playback
listen-control-reverse-key=* Customize the key that rewinds message playback
listen-control-pause-key=0 Customize the key that pauses/unpauses message playback
listen-control-restart-key=2 Customize the key that restarts message playback
listen-control-stop-key=13456789 Customize the keys that interrupt message playback, probably all keys not set above
Maximum number of messages allowed in the ‘Deleted’ folder. If set to 0
or no then no deleted messages will be moved. If non-zero (max 9999) then up
to this number of messages will be automagically saved when they are
‘deleted’ on a FIFO basis.
defaults to being off
backupdeleted=100
[zonemessages]
Users may be located in different timezones, or may have different
message announcements for their introductory message when they enter
the voicemail system. Set the message and the timezone each user
hears here. Set the user into one of these zones with the tz= attribute
in the options field of the mailbox. Of course, language substitution
still applies here so you may have several directory trees that have
alternate language choices.
Look in /usr/share/zoneinfo/ for names of timezones.
Look at the manual page for strftime for a quick tutorial on how the
variable substitution is done on the values below.
Supported values:
‘filename’ filename of a soundfile (single ticks around the filename
required)
${VAR} variable substitution
A or a Day of week (Saturday, Sunday, …)
B or b or h Month name (January, February, …)
d or e numeric day of month (first, second, …, thirty-first)
Y Year
I or l Hour, 12 hour clock
H Hour, 24 hour clock (single digit hours preceded by «oh»)
k Hour, 24 hour clock (single digit hours NOT preceded by «oh»)
M Minute, with 00 pronounced as «o’clock»
N Minute, with 00 pronounced as «hundred» (US military time)
P or p AM or PM
Q «today», «yesterday» or ABdY
(*note: not standard strftime value)
q «» (for today), «yesterday», weekday, or ABdY
(*note: not standard strftime value)
R 24 hour time, including minute
eastern=America/New_York|’vm-received’ Q ‘digits/at’ IMp
central=America/Chicago|’vm-received’ Q ‘digits/at’ IMp
central24=America/Chicago|’vm-received’ q ‘digits/at’ H N ‘hours’
military=Zulu|’vm-received’ q ‘digits/at’ H N ‘hours’ ‘phonetic/z_p’
european=Europe/Copenhagen|’vm-received’ a d b ‘digits/at’ HM
[default]
Note: The rest of the system must reference mailboxes defined here as mailbox@default.
1234 => 4242,Example Mailbox,root@localhost
4200 => 9855,Mark Spencer,markster@linux-support.net,mypager@digium.com,attach=no|serveremail=myaddy@digium.com|fromstring=MySystem|tz=central|maxmsg=10
4300 => 3456,Ben Rigas,ben@american-computer.net
4310 => -5432,Sales,sales@marko.net
4069 => 6522,Matt Brooks,matt@marko.net,,|tz=central|attach=yes|saycid=yes|dialout=fromvm|callback=fromvm|review=yes|operator=yes|envelope=yes|moveheard=yes|sayduration=yes|saydurationm=1
4073 => 1099,Bianca Paige,bianca@biancapaige.com,,delete=1|emailsubject=You have a new voicemail.|emailbody=Click on the attachment to listen.|rip=2010-06-04
4110 => 3443,Rob Flynn,rflynn@blueridge.net
4235 => 1234,Jim Holmes,jim@astricon.ips,,Tz=european
Mailboxes may be organized into multiple contexts for
voicemail virtualhosting
[other]
The intro can be customized on a per-context basis
directoryintro=dir-company2
1234 => 5678,Company2 User,root@localhost
example for our acme compartmentalized company
Pete telecommutes from Chicago, so we’ll customize timestamps for him.
[acme]
111 => 7383,Pete,pete@acme-widgets.com,,tz=central
112 => 6262,Nancy,nancy@acme-widgets.com
—————————————————————————
IMAP user settings and overrides. These are only applicable when Asterisk is
compiled with IMAP support.
imapuser=username The IMAP username of the mailbox to access
imappassword=password The IMAP password of the user
imapvmshareid=xxxx A shared mailbox ID to use for the IMAP mailbox
login, as opposed to the mailbox dialed
imapfolder Overrides the global imapfolder setting
imapserver Overrides the global imapserver setting
imapport Overrides the global imapport setting
imapflags Overrides the global imapflags setting
[imapvm]
4324 => 7764,Ellis Redding,red@buxton.us,,imapuser=eredding|imappassword=g3tbusy|imapfolder=notinbox
4325 => 2392,Andrew Dufresne,andy@dufresne.info,,imapuser=adufresne|imappassword=rockh@mmer
Este módulo nos permite crear troncales mediante el protocolo IAX2 propietario de asterisk para poder intercomunicar dos conmutadores que trabajen sobre esta tecnología, mediante una cuenta de usuario y un peer. Para eso, se requiere que el peer en el punto local coincida con el usuario del punto remoto. Para explicarlo mejor he aquí esta gráfica.
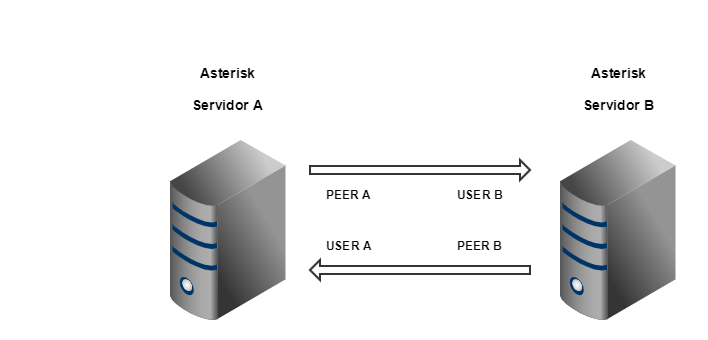
Peer: Origen de la llamada
User: Destino de la llamada
Las llamadas salientes del Servidor A usarán el Peer A que se comunicará con el User B que permitirá hacer llamadas hacia las extensiones del Servidor B. En el caso contrario, el Peer B será usado por las extensiones del Servidor B, para comunicarse con el User A que permitirá hacer llamadas hacia las extensiones del Servidor A.
Entre las ventajas con las que cuenta dicho protocolo son las siguientes:
- Señalización y media a través de un mismo puerto (4569 UDP)
- Se salta los problemas que provoca la mala implementación del NAT de algunos routers.
- Soporte de cifrado nativo RSA con SHA-1. (comunicación de señalización y media totalmente cifrada)
- Soporte TRUNK (incluye varias conversaciones en el mismo paquete, permitiendo ahorrar ancho de banda cuando hay varias conversaciones simultaneas)
- Unificación del modo DTMF (al permitir únicamente DTMF)
Creación de un peer IAX
Para crear un peer con protocolo IAX damos clic en el botón Nuevo IAX señalada con el icono ![]() .
.
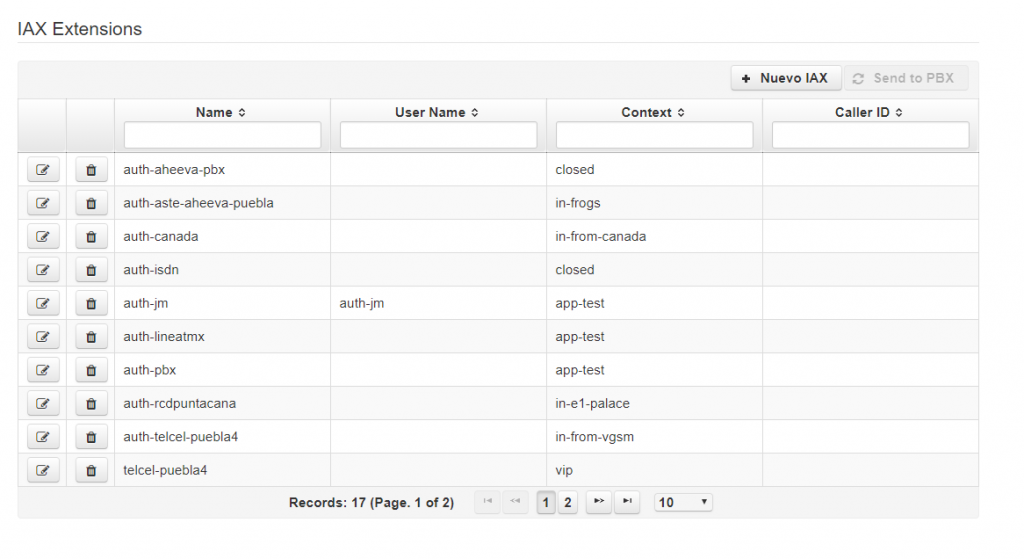
Llenamos los siguientes campos:

- Name: to-sitio (se recomienda que al ser un peer se utilice la nomenclatura “to-nombresitio)
Valor: to-servidorb
- Allow: Codecs que utilizarán los sitios para poder comunicarse
Valor: gsm
Nota: los dos sitios deben especificar los mismos códecs para poderse comunicar.
- Auth: Tipo de autenticación realizada, en la configuración realizada la contraseña se guarda en texto plano, existen la opción MD5 con la que el nivel seguridad incrementa progresivamente
Valor: md5
- Codecpriority: Este parámetro controla la negociación de codec de la llamada IAX entrante.
Valor: reqonly
- Context: contexto por el cual saldrán las llamadas del peer
Valor: vip
- Disallow: permite deshabilitar un codecs
Valor: all
- notransfer: parámetro para no permitir transferencias en la troncal
Valor: yes
- Qualify: parámetro para determinar cuando el dispositivo puede ser alcanzado
Valor: yes
- Regseconds: Número de segundos entre el registro IAX
Valor: 0
- Requirecalltoken: Parámetro no (se debe poner en no para no afectar la comunicación)
Valor: no
- Secret: contraseña con la que autenticaremos los dos sitios
Ejemplo: contraseña
- Trunk: Paramétro para indicar que se trata de una troncal IAX
Valor: yes
- Trunkfreq: Frecuencia de sincronía en la troncal
Valor: 20
- Type: corresponde al tipo de usuario, en este caso peer lo que le permite hacer llamadas
Valor: peer
Para guardar el User damos clic en el botón Guardar (Save).
Creación de un User IAX
Para crear un user bajo protocolo IAX2 nos dirigimos a la pestaña PBX -> IAX Extensions.
Una vez dentro damos clic en el botón Nuevo IAX.

Llenamos los siguientes campos:

- Name: auth-sitio (se recomienda que al ser un peer se utilice la nomenclatura “auth-nombresitio)
Valor: auth-servidora
- Allow: Codecs que utilizarán los sitios para poder comunicarse
Valor: gsm
Nota: los dos sitios deben especificar los mismos códecs para poderse comunicar.
- Auth: Tipo de autenticación realizada, en la configuración realizada la contraseña se guarda en texto plano, existen la opción MD5 con la que el nivel seguridad incrementa progresivamente
Valor: md5
- Codecpriority: Este parámetro controla la negociación de codec de la llamada IAX entrante
Valor: reqonly
- Context: contexto al que llegarán las llamadas recibidas del peer
Valor: in-from-serverb
- Disallow: permite deshabilitar un codec
Valor: all
- Host: Parámetro para especificar cada ip asociada con esta cuenta
Valor: dynamic
- notransfer: parámetro para no permitir transferencias en la troncal
Valor: yes
- Qualify: Para determinar cuando el dispositivo puede ser alcanzado
Valor: yes
- Regseconds: Número de segundos entre el registro IAX
Valor: 0
- Requirecalltoken: Parámetro no (se debe poner en no para no afectar la comunicación)
Valor: no
- Secret: contraseña con la que autenticaremos los dos sitios
Ejemplo: contraseña
- Trunk: Parámetro para especificar que se trata de una troncal
Valor: yes
- Trunkfreq: Frecuencia de sincronía en la troncal
Valor: 20
- Type: corresponde al tipo de usuario, en este caso user lo que le permite recibir llamadas
Valor: User
Para guardar el User damos clic en el botón Guardar (Save).
Editar un Peer/User IAX
Para poder editar un peer/user nos ubicamos en el deseado y damos clic en el icono de editar ubicado en la parte derecha del peer/user.
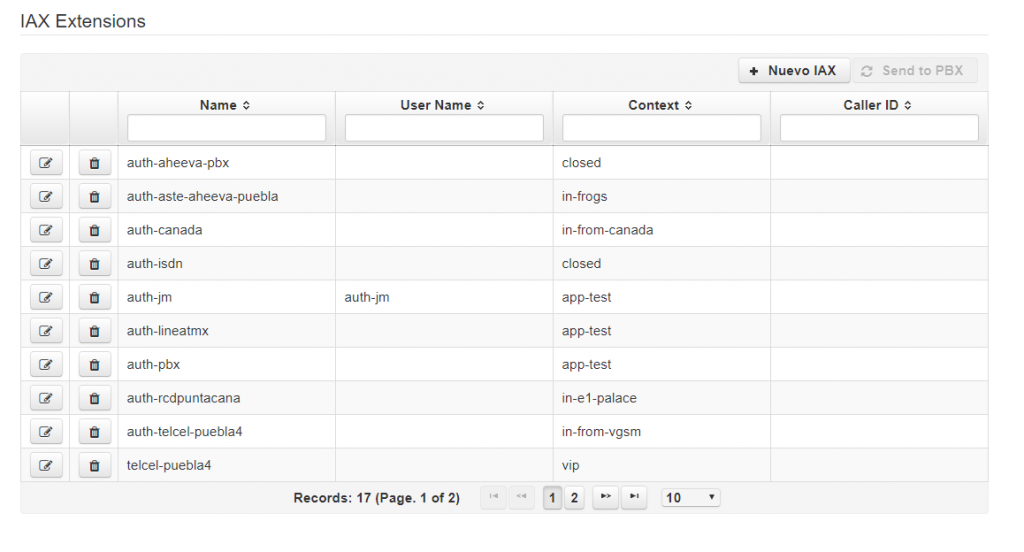
Una vez dentro ubicamos los datos a editar:
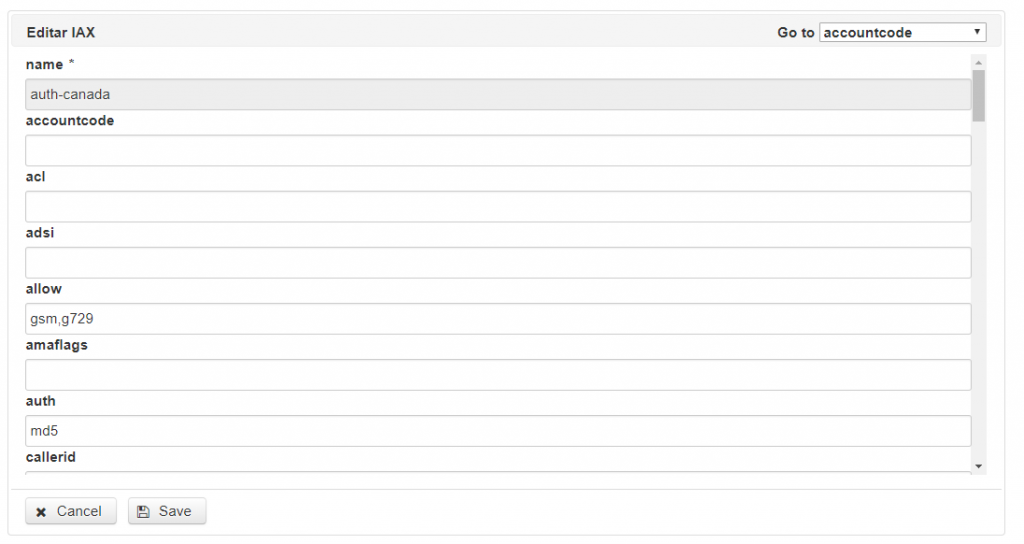
Para guardar el User damos clic en el botón Guardar (Save).
Eliminar un Peer/User IAX
Para poder eliminar un peer/user nos ubicamos en el deseado y damos clic en el icono de borrar ubicado en la parte derecha del peer/user.

Damos clic y en seguida saldrá una pantalla emergente la cual nos solicita la confirmación.
Por último, confirmamos la eliminación dando clic en Accept.
Glosario
|
Dato |
Valor |
Descripción |
|
accountcode |
Algún código |
Para utilizar el código de cuenta predeterminado |
|
allow |
Nombre del códec |
Nombre del códec o códecs que se utilizarán separados por coma |
|
amaflags |
default|omit|billing|documentation |
Este campo es usado para la generación de grabación detallada de llamadas. |
|
auth |
plaintext|md5|rsa |
Tipo de autenticación realizada, puede ser texto plano o con los algoritmos md5 y rsa. |
|
callerid |
texto |
Especificar el string del caller ID se será usado para un usuario |
|
callgroup |
Número |
Especificar el grupo de llamadas para poder se tomadas por alguien perteneciente al mismo grupo |
|
codecpriority |
caller|host|disabled|reqonly |
Este parámetro controla la negociación de códec de la llamada IAX entrante |
|
context |
texto |
Especificar el contexto entrante para este usuario |
|
dbsecret |
Clave alfanumerica |
La contraseña de autenticación que también puede ser almacenada en la base de datos de asterisk |
|
defaultip |
Dirección IP |
La dirección IP para ser usada antes del registro |
|
deny |
Dirección IP/ Dirección de red |
Denegar Dirección IP/ Dirección de Red para llamadas entrantes |
|
disallow |
codec especifico|all |
Permite deshabilitar un códec o deshabilitar todos los códecs |
|
encryption |
yes|no |
Habilita la encriptación en el Protocolo IAX2 |
|
forcejitterbuffer |
Yes| no |
Esta opción es usada cuando tenemos puntos finales con jitter buffers malos |
|
host |
Dirección IP|dynamic |
Parámetro para especificar cada IP asociada con esta cuenta |
|
inkeys |
Clave alfanumérica |
Las claves públicas utilizadas para descifrar la autenticación para las solicitudes de clientes entrantes |
|
jitterbuffer |
Yes|no |
si usted desea usar la opción de jitter buffer |
|
language |
primeras dos letras del idioma ej. (es: español,en: inglés) |
Campo para especificar el idioma por defecto para todos los usuarios, por defecto es: en |
|
mailbox |
email con formato correcto: mailbox@correo |
Buzón de voz para esta cuenta |
|
mask |
mascara de la red, formato 24 ej. (255.255.255.0) |
Máscara de red utilizada en la configuración del host |
|
maxauthreq |
número |
Especifica el número máximo de tiempo para replicar paquetes de autenticación |
|
maxcallnumbers |
Número |
Limita la cantidad de números de llamada permitidos para cada dirección IP remota. |
|
mohinterpret |
passthrough|any music-on-hold |
Esta opción especifica una preferencia para la clase de música en espera de este canal, el valor por defecto es vacío |
|
mohsuggest |
default|nombre de la clase de música en espera |
Especifica qué clase de música en espera se sugiere al canal del interlocutor cuando este canal pone al interlocutor en espera |
|
musiconhold |
texto |
Especifica la música en espera al canal del interlocutor cuando este canal pone al interlocutor en espera |
|
name |
texto |
Nombre que tendrá el peer|user |
|
notransfer |
yes|no |
parámetro para no permitir transferencias en la troncal |
|
organization_domain |
texto |
nombre de dominio que se utiliza en la organización |
|
outkey |
Clave alfanumerica |
La clave privada utilizada para cifrar las solicitudes salientes para el user |
|
permit |
Dirección IP| Dirección de red |
Permitir Dirección IP/ Dirección de Red para llamadas entrantes |
|
pickupgroup |
Número |
Especificar el grupo de llamadas para poder tomar llamadas |
|
port |
Número |
Número de puerto, por defecto es 4569 |
|
qualify |
yes|no |
Parámetro para revisar que el peer siga arriba |
|
qualifyfreqnotok |
Número |
La frecuencia en milisegundos con las que el peer hará el ping para revisar si se encuentra en lag o no disponible el user |
|
qualifyfreqok |
Número |
La frecuencia en milisegundos con las que el peer hará el ping disponible el user |
|
qualifysmoothing |
yes|no |
Parámetro para utilizar un promedio de los dos últimos resultados de ping para reducir los hosts con lag detectados falsamente, por defecto es: no |
|
regcontext |
texto |
Asterisk creará y destruirá dinámicamente la extensión NoOp de prioridad 1 para un par dado que se registre o anule el registro con nosotros |
|
regexten |
texto |
Asterisk creará y destruirá dinámicamente la extensión NoOp de prioridad 1 para un par dado que se registre o anule el registro con nosotros |
|
regseconds |
Número |
Número de segundos entre el registro IAX |
|
requirecalltoken |
yes|no|auto |
Validación de token entre peer y user (se recomienda dejar en no para o afectar la operación) |
|
secret |
Clave alfanumerica |
Esta es la contraseña de autenticación para ese User |
|
sendani |
yes|no |
Habilitar el envío de numero de identificador automático |
|
setvar |
texto |
Esta variable de canal hará que el archivo de audio dado se reproduzca al completar una transferencia asistida al objetivo de la transferencia |
|
timezone |
Continente/Ciudad |
Indicar la zona horaria con el formato correcto de la región ej. America/New_York |
|
transfer |
yes|no |
habilitar la transferencia |
|
trunk |
yes|no |
Parámetro para indicar que se trata de una troncal |
|
trunkfreq |
Número |
Dato para indicar el tiempo en mili segundos para enviar mensajes troncales, por defecto es 20ms |
|
trunktimestamps |
Número |
Cantidades mínimas y máximas de tiempo que las cuentas de IAX2 pueden solicitar como intervalo de caducidad de registro (en segundos). |
|
type |
peer|user|friend |
Tipo de cuenta a crear |
|
username |
texto |
Nombre para identificar la cuenta |
Interactive Voice Response (IVR), la respuesta de voz interactiva es un sistema telefónico que es capaz de recibir una llamada e interactuar con el humano a través de grabaciones de voz y el reconocimiento de respuestas que el usuario ingrese a través de su teléfono, además de ser un sistema automatizado de respuesta interactivo que está orientado a entregar o capturar información a través del teléfono.
Crear un IVR
Para crear un IVR se debe dar clic sobre el símbolo de agregar ubicado en la parte superior derecha.
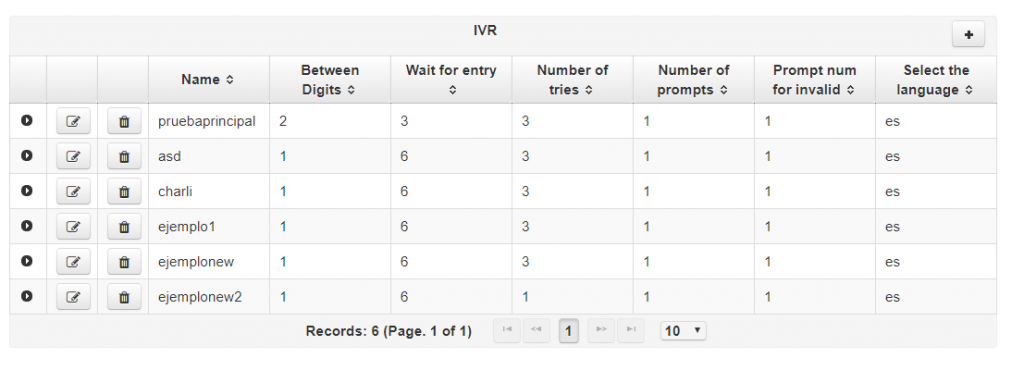
Una vez dentro se nos mostrará el siguiente formulario


- Nombre del menú IVR: Se asigna nombre al nuevo IVR.
- Nombre del prompt IVR: Se asigna nombre al prompt (audio de fondo en el IVR)
- Segundos entre dígitos: Se agrega el número de segundos que esperara el IVR entre cada marcación.
- Segundos de espera para la entrada: Se agrega el número de segundos que el IVR espera en respuesta del usuario.
- Number of tries: Se agrega el número máximo de intentos de marcación erróneos.
- # de prompts IVR:
- Prompt # invalid: Número de intentos válidos antes de enviar a la acción de falla
- Seleccione idioma:Se selecciona el idioma en el cual se graba el IVR.
- Include Closed: Seleccionar si es que se desea incluir el contexto closed
- Include app-direcotry: Seleccionar si es que se desea incluir el contexto closed
- Prompt To Play: Audio que se reproducirá al llegar al máximo número de intentos en el IVR.
- Opciones en el IVR: En esta sección se añaden las opciones que tendrá nuestro IVR y como es que serán desbordadas estas opciones al ser seleccionadas por el usuario.
Ejemplo:
Opción 1: Ventas
Opción 2: Soporte
Opción 3: Administración
Opción 4: Segundo-IVR
Para añadir las opciones damos clic en la parte superior derecha de este apartado

Una vez creada la opción llenamos los siguientes campos
Opción IVR: opción que digitará el usuario al ingresar en el IVR
Tipo: Que tipo de desborde tendrá la opción seleccionada
- IVR
- Extension
- Voicemail
- Ring Group
- Queue ACD
- Custom
En la opción de CUSTOM, se usará un comando del Dialplan para continuar con la ejecución, por ejemplo:
goto(calls-local,55555555,1)
Sintaxis de este comando:
Aplicación(parametro1,parametro2,parametro3,…,parámetro N.)
- Selección: Opción que utilizará de acuerdo al tipo seleccionado
- ¿Tiene acción de falla?
De ser seleccionada esta opción proseguir con el paso 14, en caso contrario guardar el IVR
- Acción de Falla
De ser seleccionada esta opción en caso de que se llegue al máximo de intentos fallidos la llamada será desbordada a cualquiera de las siguientes opciones:
Desviar llamada a:
- IVR
- Extension
- Voicemail
- Ring Group
- Queue
- Custom
En la opción de CUSTOM, se usará un comando del Dialplan para continuar con la ejecución, por ejemplo:
goto(calls-local,55555555,1)
Sintaxis de este comando:
Aplicación(parametro1,parametro2,parametro3,…,parámetro N.)
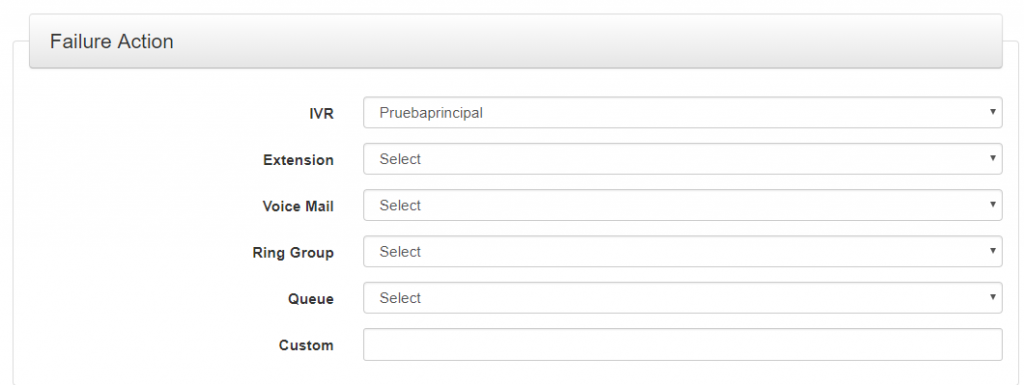
Para guardar el IVR damos clic en el botón Guardar (Save).
Ejemplo de información de un IVR
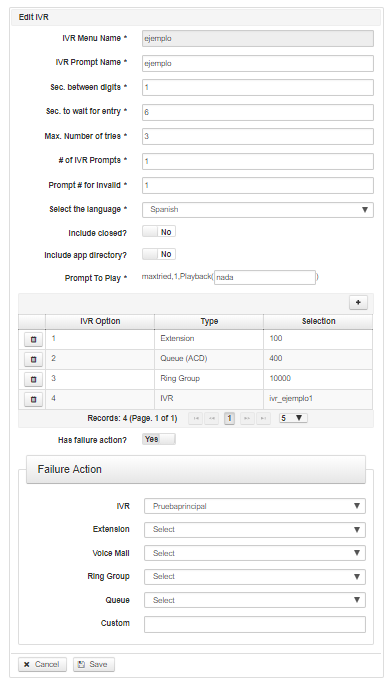
Editar un IVR
Para editar un IVR previamente creado nos dirigimos a la opción “editar” ubicada en la parte izquierda del ACD señalada con el icono ![]() .
.
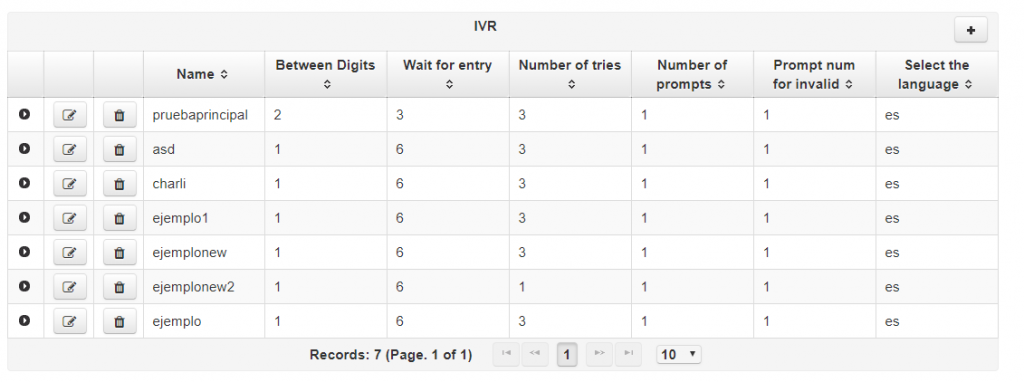
Damos clic y en seguida se mostrará la configuración del IVR.
Ejemplo: Se desea editar el apartado de “Máximo número de intentos” y el apartado de “Failure Action”

Realizamos el cambio deseado y guardamos los cambios con el botón Guardar (Save).
Eliminar un IVR
Para eliminar un IVR previamente creado nos dirigimos a la opción “borrar” ubicada en la parte izquierda del IVR señalada con el ícono![]() .
.
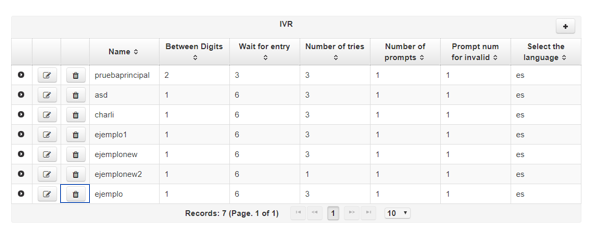
Damos clic y en seguida saldrá una pantalla emergente la cual nos solicita la confirmación.
Por último, confirmamos la eliminación dando clic en Aceptar.
Este módulo está diseñado para crear clases de música de espera. Esto nos permitirá subir un archivo de audio que el usuario podrá escuchar cuando se encuentre en espera dentro de una llamada y/o de la misma forma podrá colocar archivos de audio dependiendo de las festividades, con esto logrará personalizar el servicio.
Acciones:
- Crear y borrar clases de música de espera.
- Subir y bajar archivos de audio.
- Definir orden en el que se escuchan los archivos de audio.
Crear clases Music On Hold
Dar clic en el módulo de PBX y posteriormente en el sub menú de Music On Hold, en la próxima venta aparecerá las diferentes clases de música de espera creadas por default. En la parte superior derecha presionaremos el botón de “+ Add Music On Hold” y nos aparecerá el siguiente formulario.
- Name: Nombre para identificar la música de espera, no puede estar repetido
- Descripcion: En este campo podremos colocar alguna descripción que solo informará el fin de la clase
- Mode: Este campo se refiere al formato de archivo específico que se podrá leer, por default estará la opción de “Files”
- Application
- Digit
- Sort: Aquí se podrá sortear a modo de reproducción, si es lineal o de forma aleatoria
- Format
- Announcement
En un frame diferente en la parte de abajo, nos mostrará la sección donde podremos seleccionar, ver y eliminar el audio. Para que se pueda subir un archivo este deberá tener una ubicación en la computadora y/o en su defecto en una unidad de red, sin embargo, se deben considerar ciertas características y formatos indicados, por ejemplo: mp3,. gsm y .wav
Esta sección tiene como título “Files in the Music on Hold directory”, en la parte de abajo presione el botón de “Select”, cuando presione este botón aparecerá una ventana emergente donde podremos ubicar el archivo de audio requerido, una vez seleccionados de clic en el botón de “Open”, una vez seleccionado el archivo de clic en el botón de “Upload”.
Paso 1: Modulo Music On Hold.
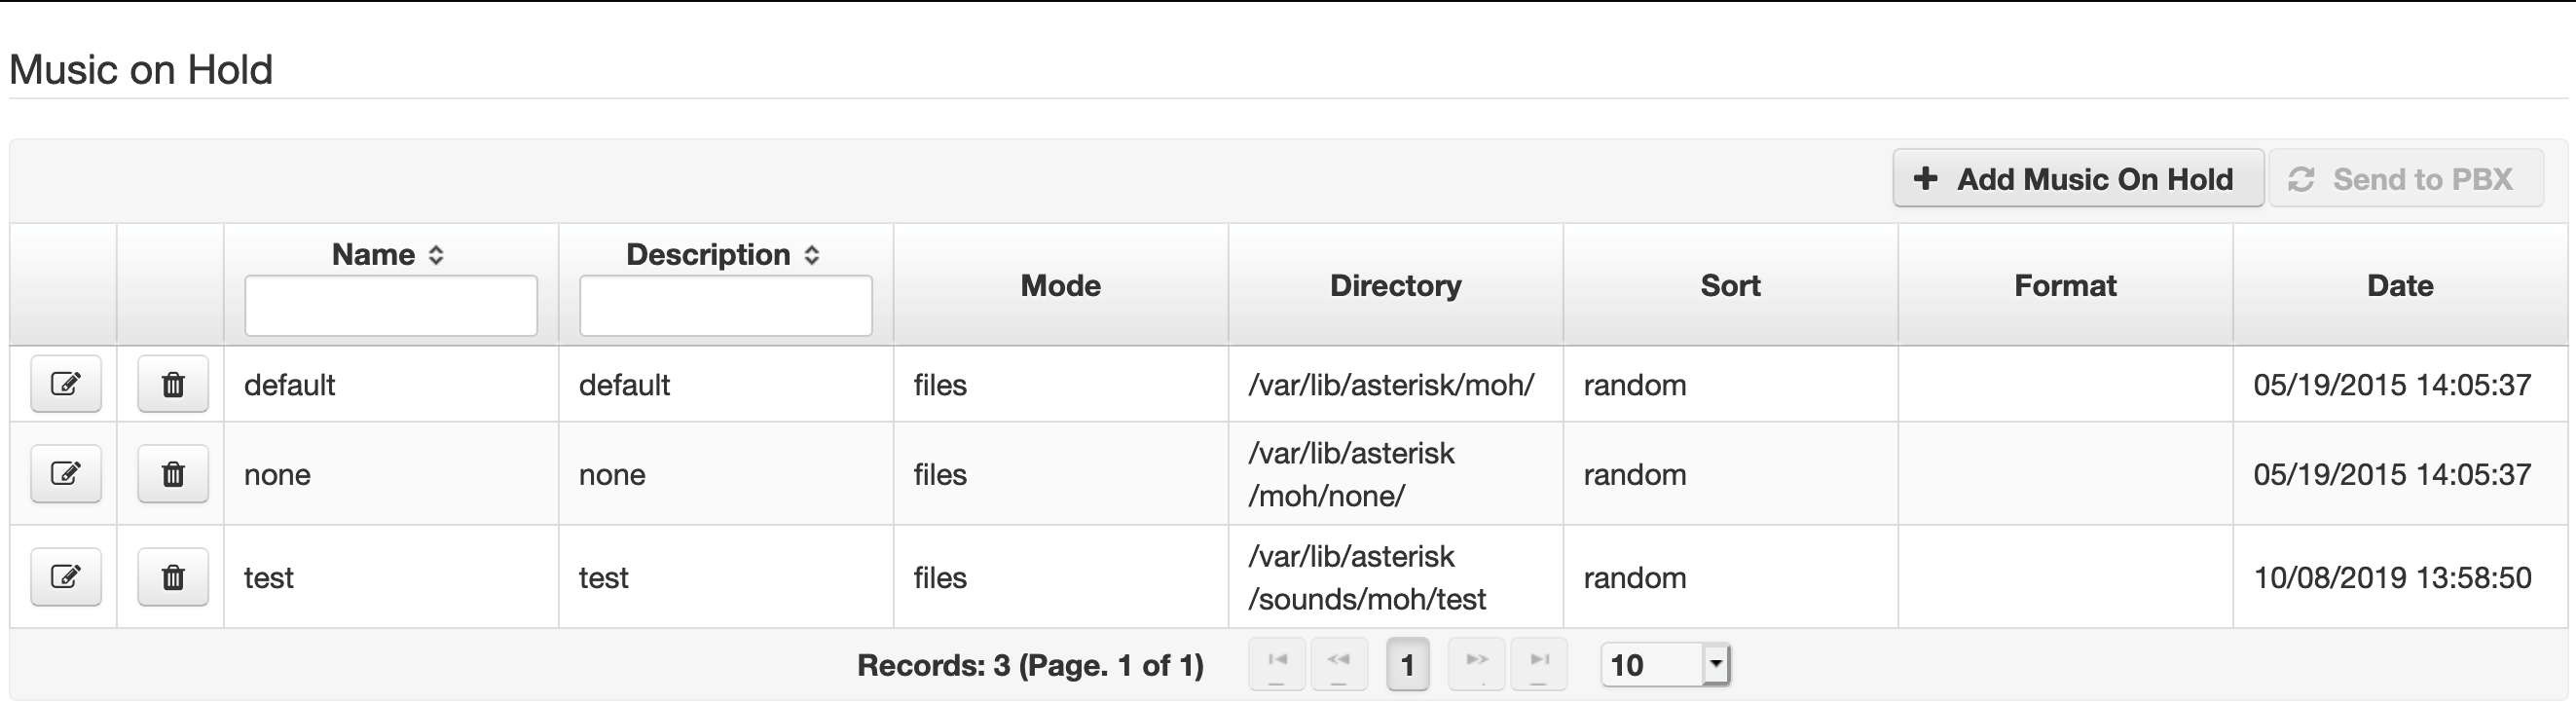
Paso 2: + Add Music On Hold.
![]()
Paso 3: Llenar el formulario dependiendo de las opciones antes descritas.
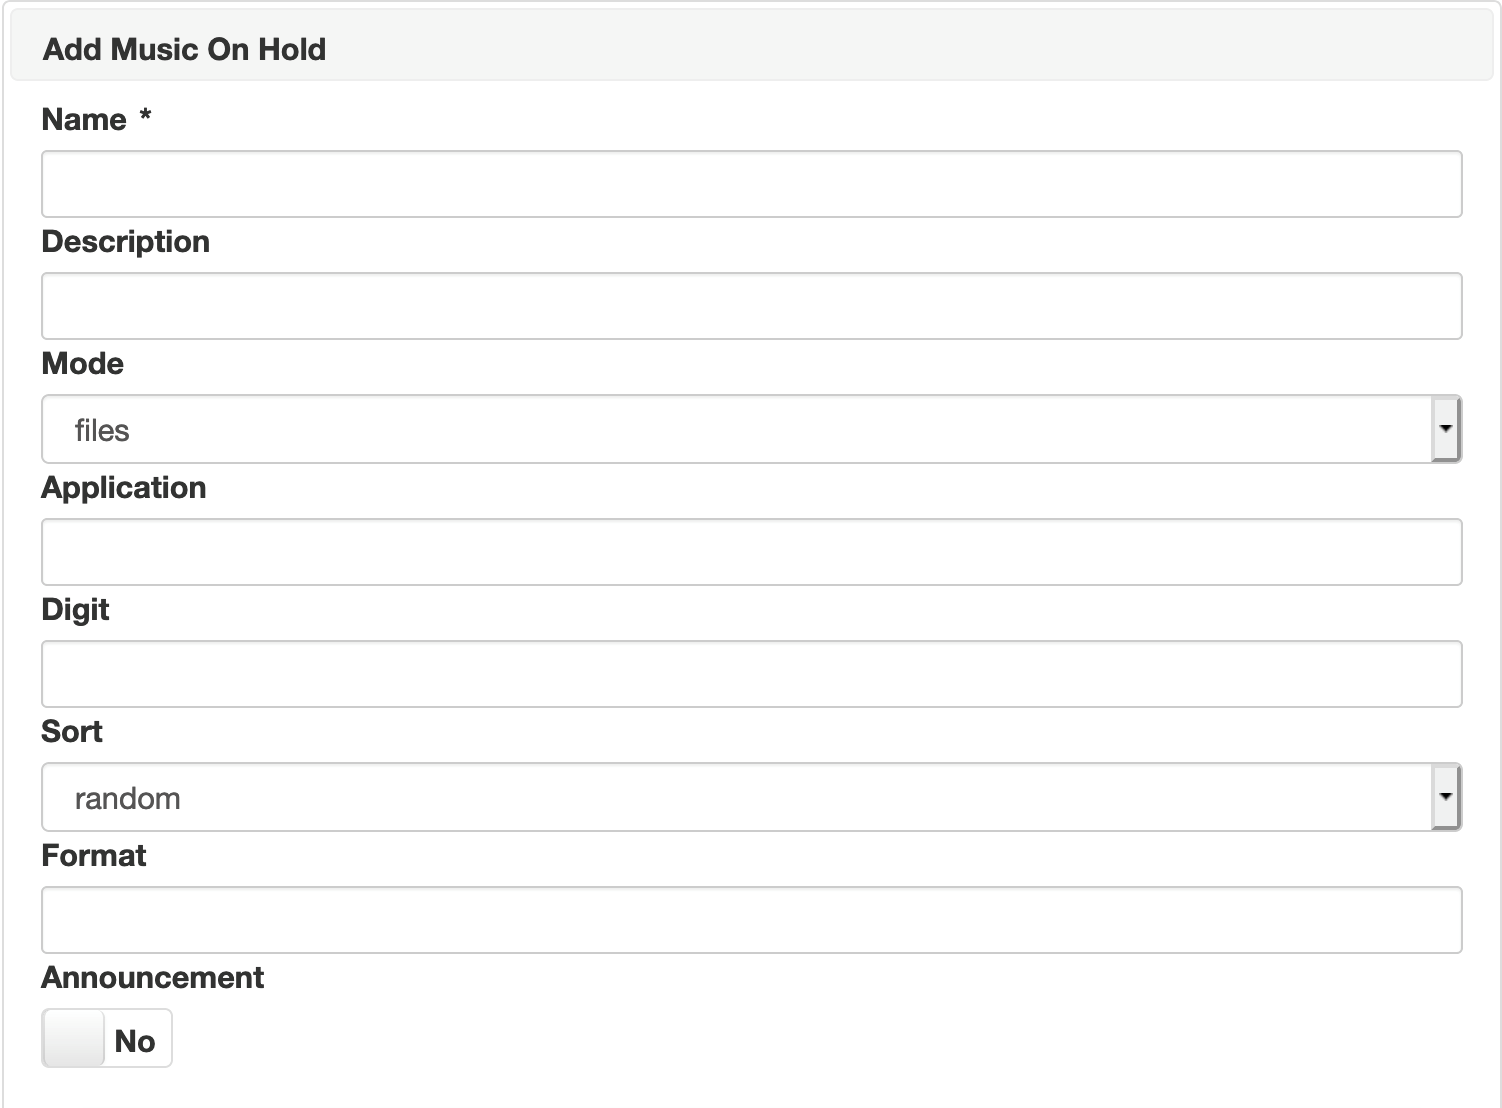
Paso 4: Seleccionar el archivo de audio y adjuntarlo al PBX, con el botón de Select.

Paso 5: Una vez seleccionado el archivo proceda a dar clic en el botón de Open
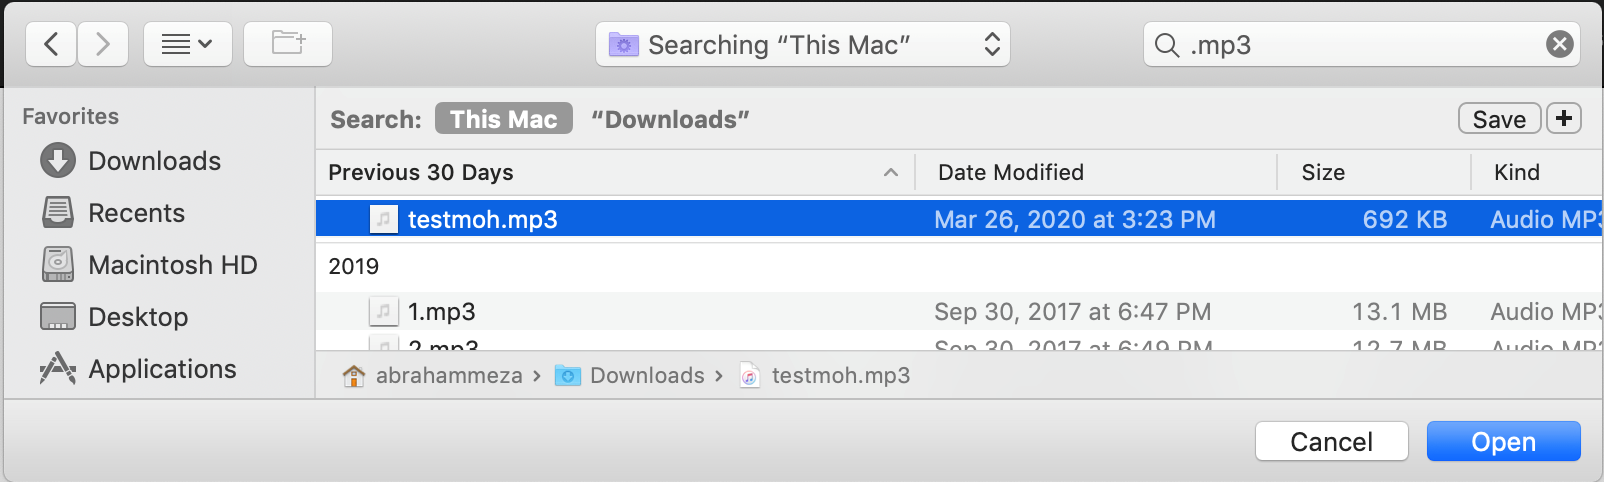
Paso 6: Presione el botón de Upload se observará una barra de estado indicando que el archivo se está adjuntando.
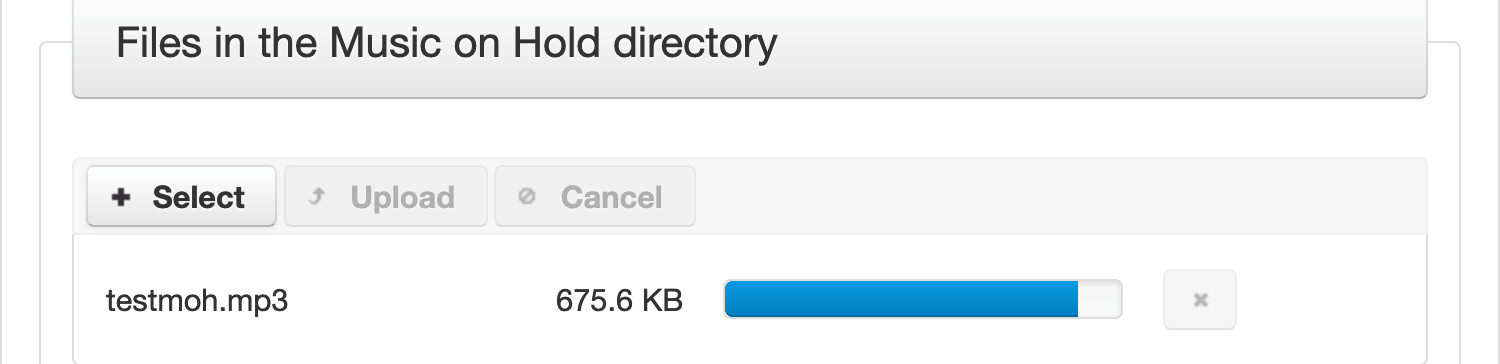
Paso 7: Una vez finalizado aparecerá en la sección de New File. Al confirmarse este punto presione el botón de Save.
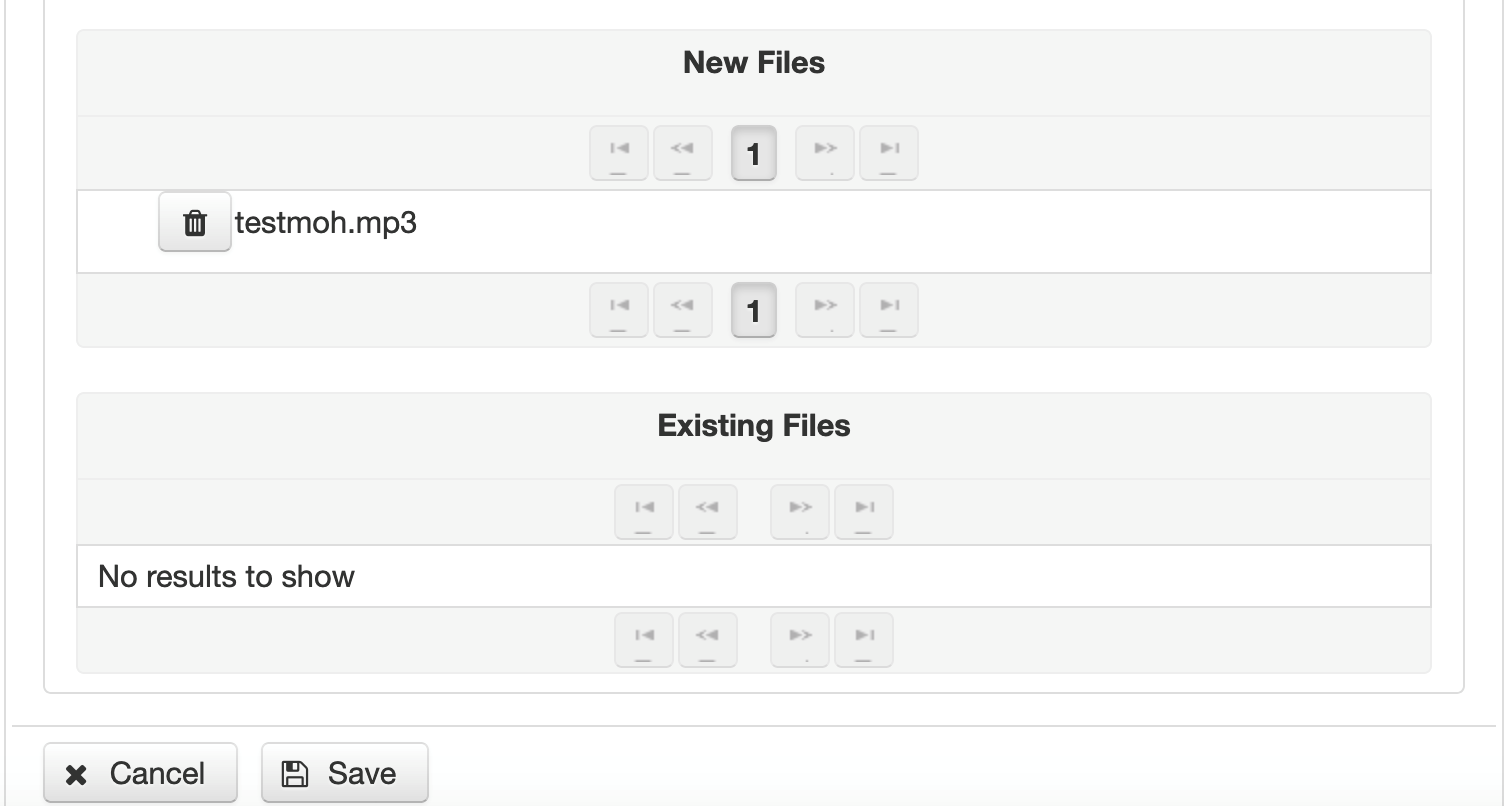
Eliminar clase de Music On Hold
Para eliminar la clase de música de espera solo diríjase al módulo, de clic en PBX, posteriormente de clic en Music On Hold. Y en la siguiente página presione el icono de eliminar.
Editar Clase de Music On Hold
La opción de editar la música de espera la puede ocupar solo para cambiar archivos de audio, y/o eliminar los mismos, es la misma ruta de PBX y Music On Hold, presione el botón de editar y en la próxima página suba y/o elimine el archivo.
Un Ring Group realiza la funcionalidad de timbrar en una o más extensiones de manera simultánea por un tiempo definido y en caso de que la llamada no sea contestada se realice un failover hacia una de las siguientes opciones: IVR, Extensión, Buzón de voz, ACD, o custom.
Creación de Ring Group
Para poder crear un Ring Group se deberá dar clic en el botón + en cual está ubicado en la parte superior derecha de la ventana.
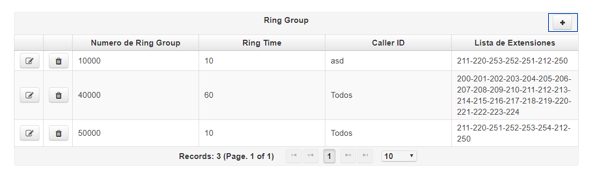
Donde los parámetros de configuración son de la siguiente manera:
- New Ring Group: Numero de Ring Group que deberá ser marcado desde cualquier extensión, este no debe ser igual a ninguna otra extensión u opción existente en el conmutador.
- Extensions List: Aquí se definen las extensiones que timbraran de manera simultánea separadas por un guion cada una de ellas, por ejemplo: 100-101-105-110
- CallerID to append: Algún texto descriptivo para que se agregue al número de teléfono que está marcando, por ejemplo: Soporte
- Ring Time: Tiempo para timbrar en las extensiones de manera simultánea, este no deberá ser mayor a 60 segundos
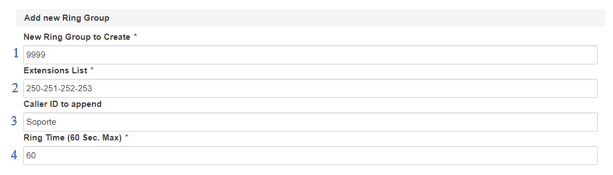
Failure Action
En caso de que ninguna extensión perteneciente al Ring Group conteste la llamada que se realiza entonces se ejecutara una y solo una de las siguientes opciones:
Desviar llamada a:
- IVR
- Extension
- Voicemail
- Ring Group
- Queue
- Custom
En la opción de CUSTOM, se usará un comando del Dialplan para continuar con la ejecución, por ejemplo:
goto(calls-local,55555555,1)
Sintaxis de este comando:
Aplicación(parametro1,parametro2,parametro3,…,parámetro N.)
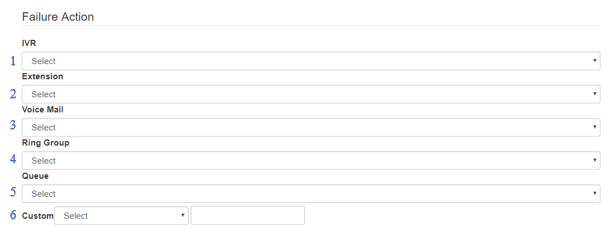
Para guardar el Ring Group damos clic en el botón Guardar (Save).
Editar un Ring Group
Para editar un Ring Group previamente creado nos dirigimos a la opción “editar” ubicada en la parte izquierda del ACD señalada con el icono ![]() .
.
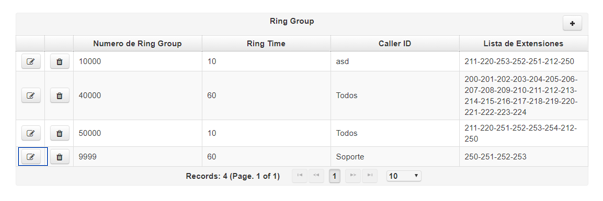
Damos clic y en seguida se mostrará la configuración del ring group.
Ejemplo: Se desea editar el apartado de “Ring Time” y el apartado de “Failure Action”
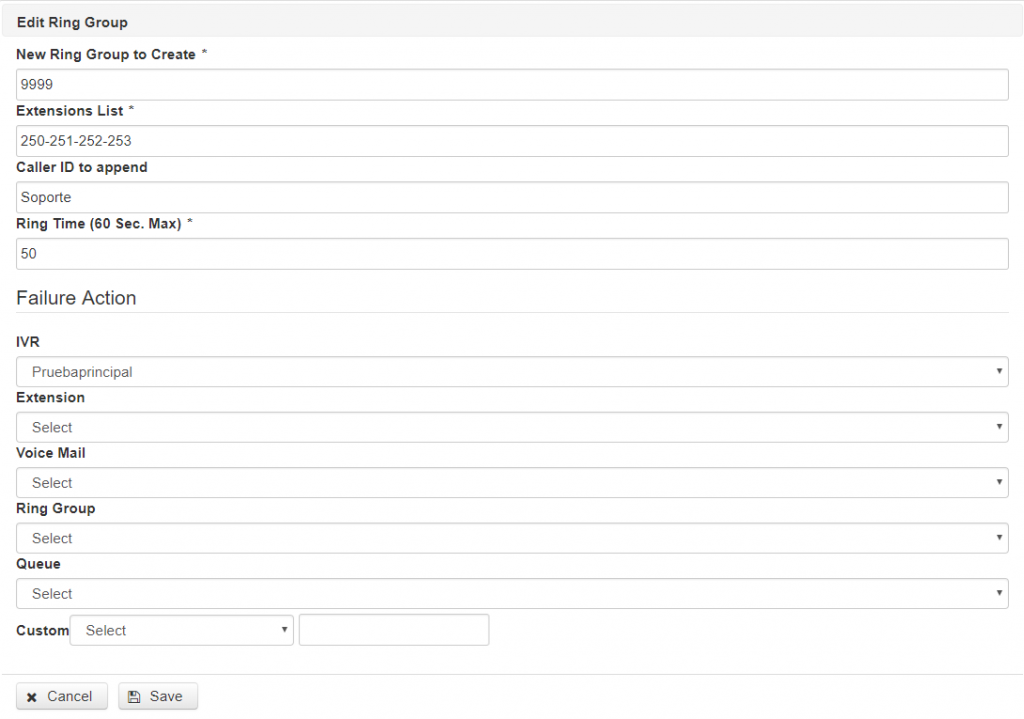
Realizamos el cambio deseado y guardamos los cambios con el botón Guardar (Save).
Eliminar un Ring Group
Para eliminar un Ring Group previamente creado nos dirigimos a la opción “borrar” ubicada en la parte izquierda del ACD señalada con el icono ![]() .
.
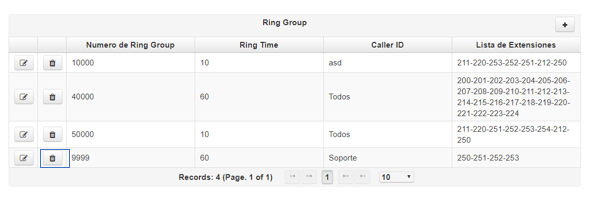
Damos clic y en seguida saldrá una pantalla emergente la cual nos solicita la confirmación
Por último, confirmamos la eliminación dando clic en Aceptar.
Este modulo es donde se encuentran todas las opciones de una extensión o troncal tipo SIP.
CONCEPTOS BÁSICOS
El protocolo SIP (Session Initiation Protocol) es el principal protocolo para tener extensiones o troncales dentro del Conmutador.
Acceso a SIP Extensions
Para accesar a esta opción se debe realizar lo siguiente:
- Accesar a la pagina web del usuario
- Ir a PBX
- SIP Extensions
Donde se mostrará la siguiente pantalla:
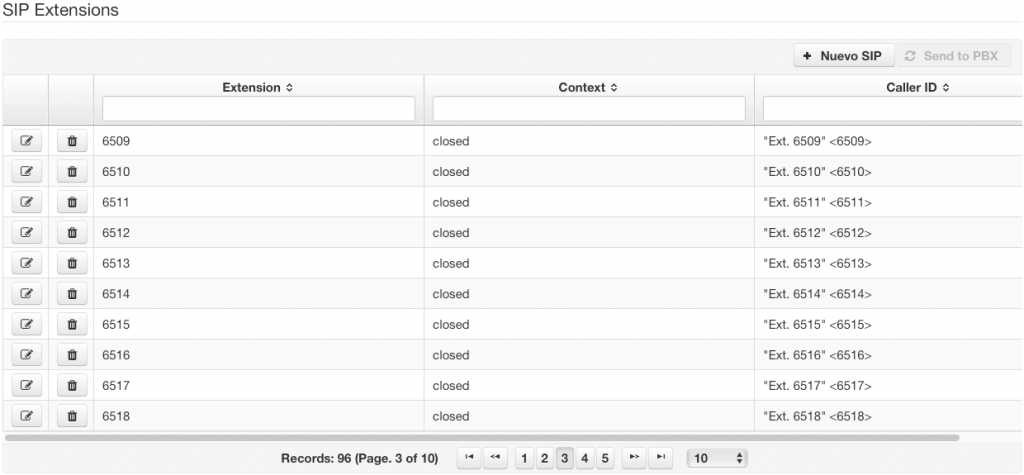
Donde se encuentran las siguientes opciones generales
Nuevo SIP
Se usa para crear un nuevo usuario/peer.
Filtros de búsqueda
![]()
Donde en
![]() Se puede filtrar por numero o nombre de usuario/peer
Se puede filtrar por numero o nombre de usuario/peer
En
![]() Se puede filtrar por context asignado al usuario/peer
Se puede filtrar por context asignado al usuario/peer
En
![]() Se puede filtrar por Caller ID asignado al usuario/peer.
Se puede filtrar por Caller ID asignado al usuario/peer.
Barra de Navegación
![]()
Edición de Extensión
Para Editar cualquier extensión se presionara el icono ![]() de usuario/peer a editar con lo cual se desplegara una ventana como la siguiente:
de usuario/peer a editar con lo cual se desplegara una ventana como la siguiente:
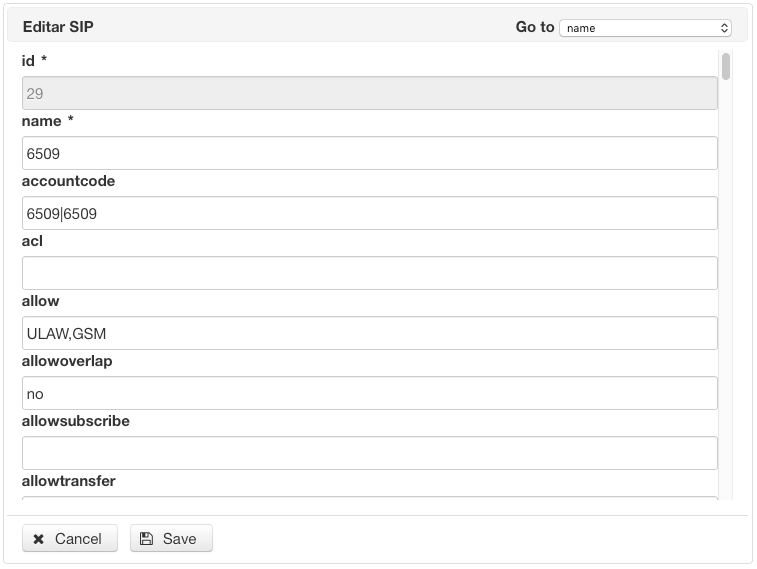
Aquí se pueden editar cada uno de los parámetros existentes para la modificación del usuario/peer.
Para navegar entre todos los parámetros existentes se pueden usar las siguientes opciones:
Control para ir a Parámetro
![]()
Aquí en la lista desplegable se selecciona el parámetro deseado y la aplicación nos llevara hasta este parámetro para poder realizar la edición.
Barra de desplazamiento

Con la cual podemos buscar el parámetro indicado a través de todos los parámetros existentes.
Botón Cancel
Para cancelar cualquier modificación hecha se deberá presionar el icono ![]()
Boton Guardar
Para guardar cualquier modificación hecha se deberá presionar el icono ![]()
NUEVO SIP
Para crear un Nuevo SIP (usuario/peer), se deberá presionar el icono ![]()
Con lo que aparecerá el siguiente cuadro de dialogo:
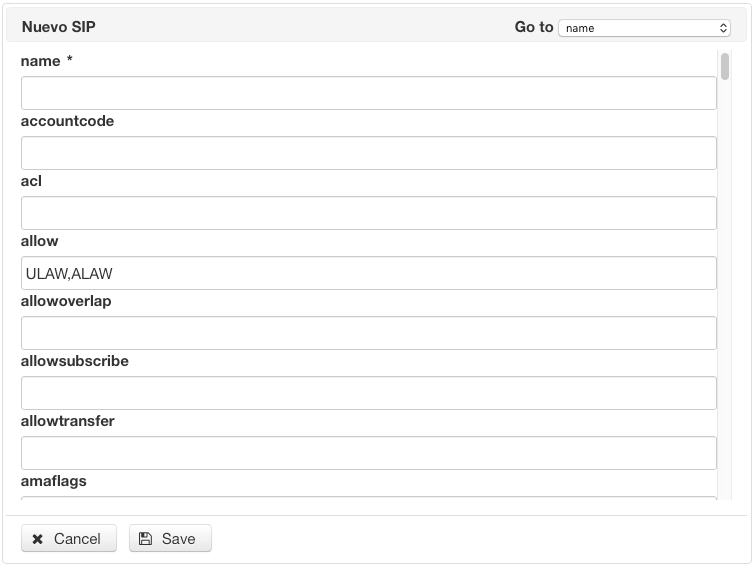
Donde los campos principales para agregar la información son los siguientes:
Name: nombre del usuario/peer
Allow: codecs de audio permitidos para usuario/peer, de fabrica tiene ULAW,ALAW
Context: Contexto asignado a este usuario/peer
Disallow: Permite deshabilitar cualquier codec de audio antes de poner los permitidos en el campo allow, de fabrica viene con ALL
Host: Direccion IP o dns valido para el usuario/peer
Kamailioname: Debe ser el mismo que en el parámetro name
Port: En caso de ser diferente al 5060 se deberá escribir aquí
Qualify: yes o no, para monitorear la latencia de este usuario/peer
Secret: Password que deberá tener en caso de que se permita recibir o llamar a través de el para garantizar la seguridad del usuario/peer
Sippassword: Deberá ser igual que el secret
Type: user/peer/friend, cualquier de estos tres parámetros deberá ser escrito, dependiendo de la funcionalidad del usuario/peer
Username: deberá ser el nombre de usuario a autenticar, dicha información deberá ser con la que se autenticara cualquier dispositivo
Una vez que todos los campos tengan información se deberá presionar el botón ![]()
Para enviar los cambios realizados hacia el Conmutador se deberá presionar el botón ![]() con lo cual los cambios serán activados en el conmutador.
con lo cual los cambios serán activados en el conmutador.
Eliminación de un usuario/peer
Para eliminar un usuario/peer de la consola se deberá presionar el icono ![]() de la pantalla principal del usuario/peer deseado
de la pantalla principal del usuario/peer deseado

Solicitara una confirmación
Después se debe presionar el botón ![]() , para activar los cambios en el conmutador.
, para activar los cambios en el conmutador.
Después de realizada la eliminación del usuario/peer este no debe mostrarse en la pantalla

Para mayor información sobre todos los parámetros que se usan en el protocolo SIP véase el anexo A.
ANEXO A
Configuraciones de SIP– Usuarios y Peers
Estas variables pueden ser configuradas para cada SIP peer/usuario
(Si no se especifica la configuración de la variable puede ser para los dos usuario y peer)
- accountcode = <string> : Users may be associated with an accountcode. See Asterisk billing
- allow = <codec> : Allow codecs in order of preference (Use DISALLOW=ALL first, before allowing other codecs)
- disallow = all : Disallow all codecs for this peer or user definition.
- allowguest = yes|no : Allow or reject guest calls (default is yes, this can also be set to ‘osp’ if asterisk was compiled with OSP support). (New in v1.2.x).
- amaflags : Categorization for CDR records. Choices are default, omit, billing, documentation. See Asterisk billing
- astdb : Appears to insert a value in the Asterisk database. See example below.
- auth = <authname> : Value assigned to the Digest username= SIP header.
- callerid = <string> : Caller ID information used when nothing else is available. Defaults to asterisk.
- busylevel = number : Number of simultaneous calls until user/peer is busy
- call-limit = number : Number of simultaneous calls through this user/peer.
- callgroup = num1,num2-num3 : Defines call groups for calls to this device.
- callingpres = number|descriptive_text : Set Caller-ID presentation on a call. Valid descriptive values are: allowed_not_screened, allowed_passed_screen, allowed_failed_screen, allowed, prohib_not_screened, prohib_passed_screen, prohib_failed_screen, prohib, and unavailable. See SetCallerPres for more information. Default allowed_not_screened.
- canreinvite = update|yes|no|nonat : If the client is able to support SIP re-invites. Default yes.
- cid_number = <string> : On incoming (through this peer) calls sets the outbound $CALLERID(num) to <string>. (New in v.1.4.x)
- context = <context_name> : If type=user, the Context for the inbound call from this SIP user definition. If type=peer, the Context in the dialplan for outbound calls from this SIP peer definition. If type=friend the context used for both inbound and outbound calls through the SIP entities definition. If no type=user entry matches an inbound call, then a type=peer or type=friend will match if the hostname or IP address defined in host= matches.
- defaultip = Dotted.Quad.IP.Addr : Default IP address of client if host=dynamic is specified. Used if client has not registered at any other IP address. Valid only for type=peer.
- defaultuser = The new name for the ‘username’ variable.
- directrtpsetup = yes|no: Similar to canreinvite, but right away passes media to the other party like a SIP proxy
- dtmfmode = inband|info|rfc2833 : How the client handles DTMF signalling. Default rfc2833. Warning: inband very high CPU load.
- fromuser = <from_ID> : Specify user to put in “from” instead of $CALLERID(number) (overrides the callerid) when placing calls _to_ peer (another SIP proxy). Valid only for type=peer.
- fromdomain = <domain> : Sets default From: domain in SIP messages when placing calls _to_ peer. Valid only when in [general] section or type=peer.
- fullcontact = <sip:uri_contact> : SIP URI contact for realtime peer. Valid only for realtime peers.
- fullname = “Full Name” : Sets outbound $CALLERID(name). (New in v1.4.x)
- host = dynamic|hostname|IPAddr : How to find the client – IP # or host name. If you want the phone to register itself, use the keyword dynamic instead of Host IP.
- incominglimit and outgoinglimit = Number : Limits for number of simultaneous active calls for a SIP client. Valid only for type=peer.
- insecure : very|yes|no|invite|port : Specifies how to handle connections with peers. Default no (authenticate all connections). invite and port added in v1.2.x, yes and very removed in v1.6.x, possible to use multiple options separated by commas from v1.4.x
- ipaddr : Dotted Quad IP address of the peer. Valid only for realtime peers.
- language : A language code defined in indications.conf – defines language for prompts
- mailbox = mailbox : Voicemail extension (for message waiting indications). Valid only for type=peer. Edit: also valid for type=friend (verified with 1.4.22.1).
- md5secret : MD5-Hash of “<user>:==SIP_realm==:<secret>” (can be used instead of secret). Default for authenticating to an Asterisk server when SIP realm is not explicitly declared is “<user>:asterisk:<secret>”.
- musicclass = one of the classes specified in musiconhold.conf
- musiconhold = Set class of musiconhold on calls from SIP phone. Calls to the phone require SetMusicOnHold cmd of higher priority (lower numerical value of priority) than Dial cmd in dialplan in order to set this class for the call. Calls have the MusicOnHold class set on a per call basis, not on a per phone basis, and making a call through any extension specifying SetMusicOnHold will override this value for the call.
- subscribemwi: Instructs Asterisk to not send NOTIFY messages for message waiting indication (added in v1.4)
- name = <name> : Name of the realtime peer. If the peer is an actual phone then this will generally be the extension number of that phone. On some softphones this field corresponds to the “username” field/option in the softphone’s settings. Valid only for realtime peers.
- nat = yes|no : This variable changes the behaviour of Asterisk for clients behind a firewall. This does not solve the problem if Asterisk is behind the firewall and the client on the outside. Please note that Asterisk 1.0.x nat can now have the values: yes|no|never|route; Asterisk 1.8 can have the values: yes|no|force_rport|comedia. Default no which really means to use rfc3581 techniques.
- outboundproxy = IP_address or DNS SRV name (excluding the _sip._udp prefix) : SRV name, hostname, or IP address of the outbound SIP Proxy. Valid only in [general] section and type=peer. (New in v1.2.x).
- permit, deny,mask : IP address and network restriction
- pickupgroup : Group that can pickup fellow workers’ calls using *8 and the Pickup() application on the *8 extension
- port : SIP port of the client
- progressinband = never|no|yes : If we should generate in-band ringing always. Default never.
- promiscredir = yes|no : Allows support for 302 Redirects; (Note: will redirect them all to the local extension returned in Contact rather than to that extension at the destination). Default no.
- qualify = yes|no|milliseconds : Check if client is reachable. If yes, the checks occur every 60 seconds. Valid only in [general] section and type=peer.
- regexten =
- regseconds = seconds : Number of seconds between SIP REGISTER. Valid only for realtime peer entries.
- restrictcid : (yes/no) To have the callerid restricted -> sent as ANI; use this to hide the caller ID. This does not seem to work. This variable has been deprecated as of v1.2.x.
- rtpkeepalive = seconds : Number of seconds, when a RTP Keepalive packet will be sent if no other RTP traffic on that connection. Default 0 (no RTP Keepalive). Valid only in [general] section and type=peer.
- rtptimeout = seconds : Terminate call if x seconds of no RTP activity when we’re not on hold. Valid only in [general] section and type=peer.
- rtpholdtimeout = seconds : Terminate call if x seconds of no RTP activity when we’re on hold (must be larger than rtptimeout). Valid only in [general] section and type=peer.
- secret : If Asterisk is acting as a SIP Server, then this SIP client must login with this Password (A shared secret). If Asterisk is acting as a SIP client to a remote SIP server that requires SIP INVITE authentication, then this field is used to authenticate SIP INVITEs that Asterisk sends to the remote SIP server. Asterisk 1.6.2.x: Changed the secret parameter to remotesecret.
- sendrpid = yes|no : If a Remote-Party-ID SIP header should be sent. Default no.
- setvar = variable=value : Channel variable to be set for all calls from this peer/user.
- Asterisk SIP Subscribecontext = <context_name> : Set a specific context for SIP SUBSCRIBE requests
- trunkname: Indicates this peer definition is for a SIP trunk. As a result, the $CALLERID(name) will start off blank and requires the dialplan to set the $CALLERID(name). (New in v1.6.x)
- trustrpid = yes|no : If Remote-Party-ID SIP header should be trusted. Default no.
- type = user|peer|friend : Relationship to client – outbound provider or full client?
- useclientcode = yes|no : If yes, then the Call Originator as stated in the CDR will be changed to whatever is specified in a X-ClientCode SIP Header. Default no. (New in v1.2.x)
- usereqphone = yes|no : Indicates whether to add a “;user=phone” to the URI. Default no. Valid only in [general] and type=peer.
- username = <username[@realm]> : If Asterisk is accepting SIP INVITE requests from a remote SIP client, this field specifies the user name for authentication. (Contrast with fromuser.) Also, for peers that register with Asterisk, this username is used in INVITEs until we have a registration.
- vmexten = <string> : Dialplan extension to reach mailbox. Default asterisk. Valid only in [general] or type=peer.
Esta página se crea con la finalidad de poder navegar en los directorios correspondientes a sounds, los cuales son los audios que el PBX reproduce en los IVR, Voicemail, etc.
Sounds Module le permitirá́:
- Navegar en diferentes carpetas.
- Crear carpetas.
- Subir archivos de audio.
- Eliminar archivos de audio
Formato de audio
El formato adecuado para subir y que reproduzca el PBX los audios con la mayor calidad deberá ser:
Bit Rate: 64 or 128 Kbps
Audio sample size: 16 bit
Channels: 1 (mono)
Audio sample rate: 8KHz
Audio format PCM, mp3, wav
Formato GSM
Definiciones, acrónimos y abreviaciones
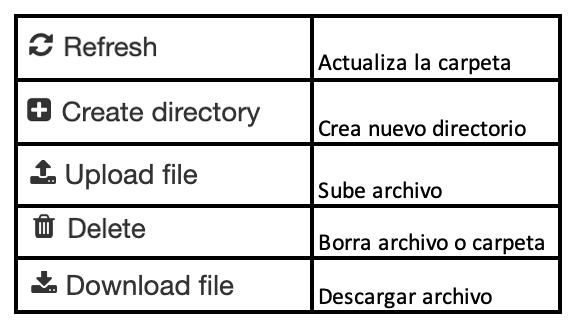
Sounds Module (crear, subir/eliminar)
Esta página se encuentra en el menú de PBX
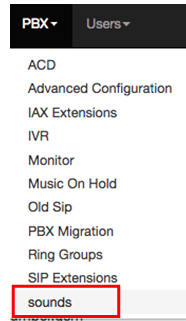
Para poder ejecutar las operaciones de crear, eliminar o subir, se realizará presionando un clic derecho sobre la página de sounds, más específico sobre el elemento deseado.
1. Crear Directorio.
Si desea crear un directorio posicione el cursor en el icono del directorio donde desea crearlo, de clic derecho para observar el menú de acciones, finalmente de clic en crear directorio, coloque el nombre a su directorio y presione el botón aceptar o en caso de rechazar presione la “ X ”.
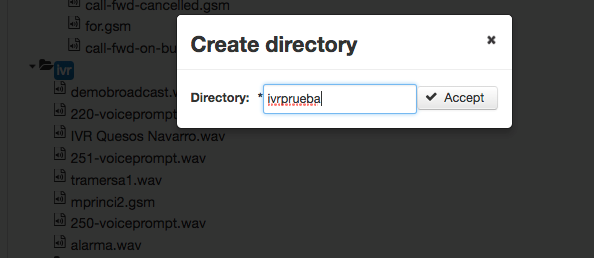
El directorio se mostrará de la siguiente manera:
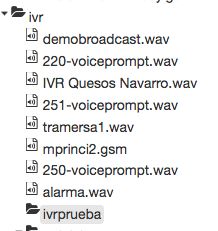
2. Eliminar directorio.
Para eliminar el directorio debe entrar al menú de acciones y presionar la acción Delete, donde pedirá confirmar dicha acción.
3. Subir audio.
Para subir los audios necesita estar en la carpeta deseada, los audios de los IVR por default están en la carpeta IVR, esto no se puede modificar, por lo que debe posicionar el cursor en esta carpeta y dar clic derecho para seleccionar la acción de Upload file, donde nos mostrara una ventana emergente:
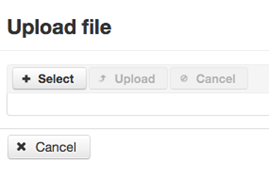
En esta ventana debe presionar el botón Select para poder subir el archivo desde su PC, en caso de que el archivo sea incorrecto mostrará la siguiente leyenda:
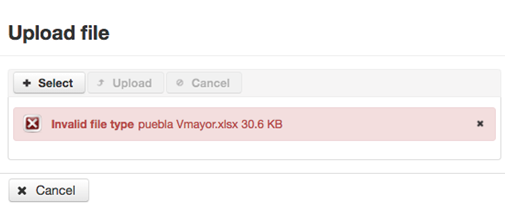
Si ha subido el audio correcto se mostrará en pantalla el nombre del audio, en seguida debe presionar el botón Upload para que este se suba a la carpeta deseada.
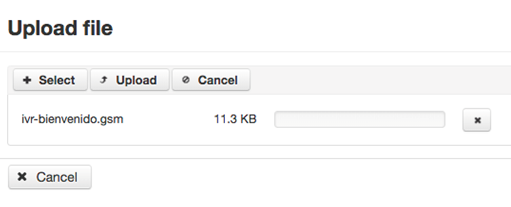
4. Eliminar audio.
Para eliminar audio o carpeta debemos dar un clic derecho sobre el elemento a borrar y seleccionar la acción de Delete, posteriormente confirmar la acción.
5. Descargar archivo.
Para descargar un archivo deberá dar clic derecho al audio que quiere descargar y seleccionar la acción de Download File, en seguida mostrará una ventana emergente donde podrá indicar en que carpeta de su equipo descargará el archivo, esto dependerá de cómo este configurado su navegador, ya que se podría descargar en automático el archivo.
Nota: el archivo se descarga, pero no se elimina del PBX, si requiere eliminarlo debemos usar la acción “Delete”.